A raised garden bed is a great way to grow vegetables, herbs, flowers, and other plants. Raised beds allow you to control the soil quality and drainage, making it easier to grow thriving plants.
Cinder blocks make excellent material for raised bed walls. They’re inexpensive, easy to work with, and durable. Cinder block raised beds can last for many years with minimal upkeep.
In this article, we’ll look at the benefits of cinder block raised beds, provide step-by-step instructions for building one yourself, and share some tips for filling and maintaining your new garden bed. Let’s get started!
Benefits of Cinder Block Raised Beds
Here are some of the top advantages of using cinder blocks for your DIY raised garden bed:
- Inexpensive – Cinder blocks are very affordable, especially compared to materials like brick, stone, or cedar. For a typical 4×8 bed, expect to pay $50-75 for materials.
- Durable – Cinder blocks hold up well to weather, sunlight, and moisture over many seasons. The bed walls should last 5-10 years or more.
- Modifiable design – It’s easy to expand or rearrange your cinder block design later. No mortar is required, so you can move blocks as needed.
- Good height – Standard 8″ cinder blocks offer a nice height for raised beds. Bending over too much can lead to back pain, so 10-12” high is ideal.
- Improve drainage – Raised beds promote drainage away from plant roots and avoid overly wet soil. Cinder blocks elevate your garden above ground.
- Weed prevention – Raising your garden makes it easier to prevent weeds from surrounding areas. Just be sure to line the base of your bed with landscape fabric.
- Warms up faster – The raised height, drainage, and cinder block material all help your garden bed warm up quicker in spring for an earlier start to the growing season.
Shopping List for Materials
Here’s what you’ll need to construct a basic 4ft x 8ft cinder block raised bed:
- 16-20 cinder blocks (8” x 8” x 16”)
- 16 cap blocks (4” x 8” x 16” – optional)
- 1-2 yards of garden soil mix
- Landscape fabric weed barrier
- Shovel and/or spade for digging
- Wheelbarrow for moving soil
- Gloves for working with cinder blocks
For one 4×8 bed, you’ll need around 16-20 cinder blocks. Standard 8″ height blocks are recommended. You can also find 6″ or 12″ blocks for shorter or taller beds. Get a couple extra blocks to allow flexibility in your design.
Cap blocks are thinner (4”) blocks that you place on top of the standard blocks to give a smooth, finished look. They’re optional but do improve appearances.
When shopping, be sure to price check both the solid and hollow core cinder blocks. Hollow core blocks are a bit lighter and often cheaper. The type won’t affect the structural integrity of your raised bed.
Where to Position Your Raised Bed
When selecting the spot for your new raised bed, consider these factors:
Sunlight – Most edible plants need at least 6 hours of direct sun daily. Be sure to situate your raised bed in a sunny spot.
Soil quality – Avoid areas with hard packed or overly wet soil. Raised beds improve drainage, but very poor existing soil can still cause problems.
Convenience – Place your raised bed somewhere easily accessible. You’ll want to reach all areas easily for planting, weeding, and harvesting.
Water access – Consider proximity to a spigot or hose. Hand watering can be tedious, so make watering easy on yourself.
Slope – Don’t position your raised bed on a steep slope. Level ground or a slight incline is best to prevent erosion issues.
Size – Make sure you have adequate space for the full length and width of your planned garden bed. Leave room to work around all sides.
Take time to select the right spot that meets sun, soil, space, and convenience needs. This will set your garden up for success.
How to Build a Cinder Block Raised Garden Bed
Building your own cinder block raised bed is a simple weekend project for the DIYer. Here are step-by-step instructions:
Gather Materials & Tools
First, acquire all the necessary cinder blocks, cap blocks (if using), and soil blend for your bed.
You’ll also need:
- Landscape fabric for weed barrier
- Gloves for working with blocks
- Shovel and/or spade
- Level (optional)
- Wheelbarrow
Plan Your Design
Decide on the exact dimensions and layout for your bed. Standard sizes are 4×4, 4×8, 4×12, or 3×6 feet but you can make any size you like.
Sketch out your design to visualize placement of the cinder blocks and cap blocks if using. Having a plan will make the installation process smooth.
Mark Out Bed Area
Use a tape measure to mark the outer perimeter of your raised bed on the ground where it will be installed.
Use landscaping paint or flour to mark lines for the corners and edges of your planned bed. This is where you’ll place the first cinder blocks.
Weed & Till Soil
Kill existing grass or weeds in the installation area using cardboard, mulch, or herbicide.
Once vegetation is dead, dig down at least 6 inches and loosen the soil using a shovel or tiller. Break up any compacted ground.
Adding some compost to the native soil is optional. Till any amendments in well.
Set Base Layer of Blocks
Place your first cinder blocks down on the ground aligned with the marked outline, using your pre-planned design.
Level and square the blocks as best you can by adding or removing soil underneath to stabilize.
The most important blocks are the corner ones. Make sure they sit solidly in place at the proper 90 degree angles.
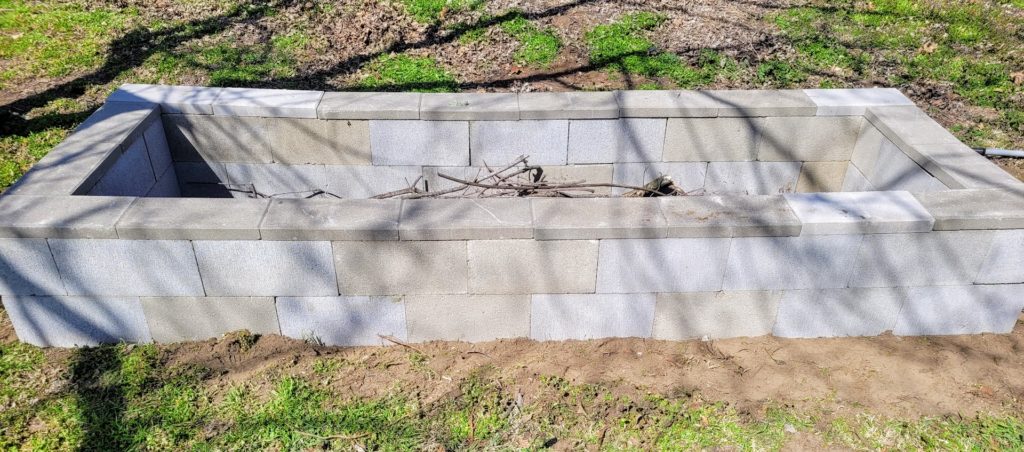
Complete Block Walls
Continue laying blocks end-to-end along the sides of the bed until you reach the desired length.
Check occasionally that blocks are level across the tops as you build up the walls. Add or remove soil as needed to stabilize.
Don’t worry about mortaring blocks together. The weight will hold them in place once filled.
Cap Blocks (Optional)
If using cap blocks, position them along the top edges of the longer cinder blocks with the smooth side facing up.
Cap blocks give a smoother, more finished look compared to the cinder blocks alone.
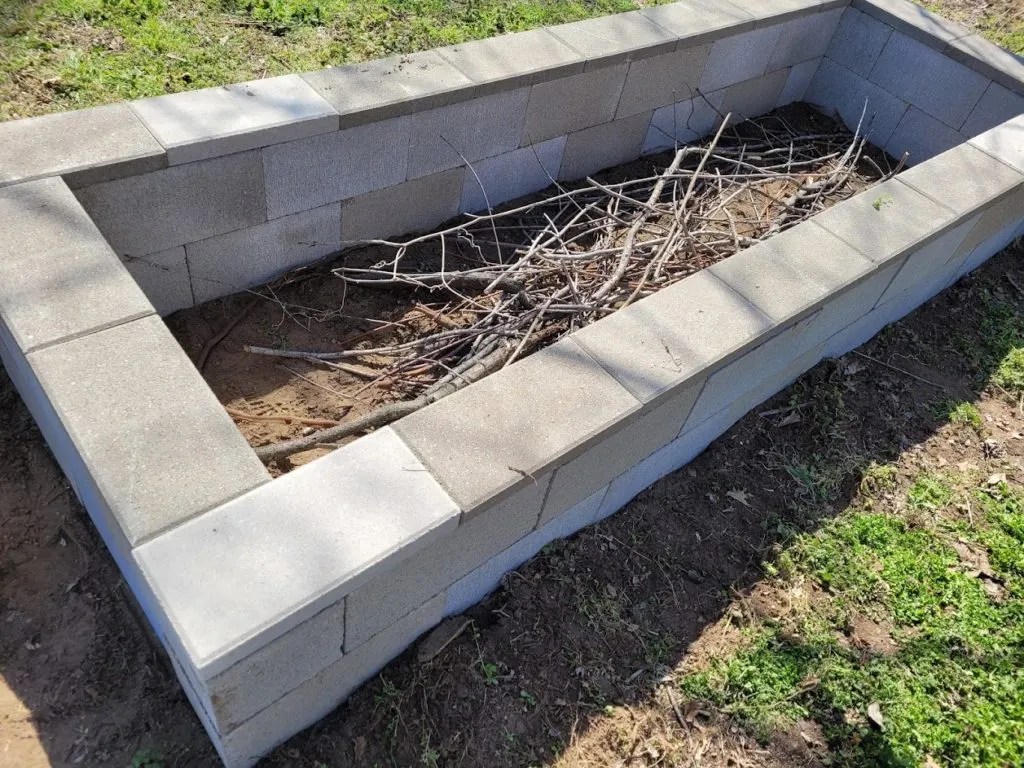
Add Interior Weed Barrier
Before adding soil, lay landscape fabric or cardboard along the bottom of the interior of the bed to block weeds.
Overlap seams by at least 6 inches. The barrier should cover the interior space fully.
Fill Bed with Soil
Add your soil blend into the bed area, filling up to the tops of the blocks. Mound soil in the middle to allow for settling.
A 4×8 bed will need about 1-2 cubic yards of soil blend. Add more later if the level drops.
Mix in any compost or organic fertilizers as you fill.
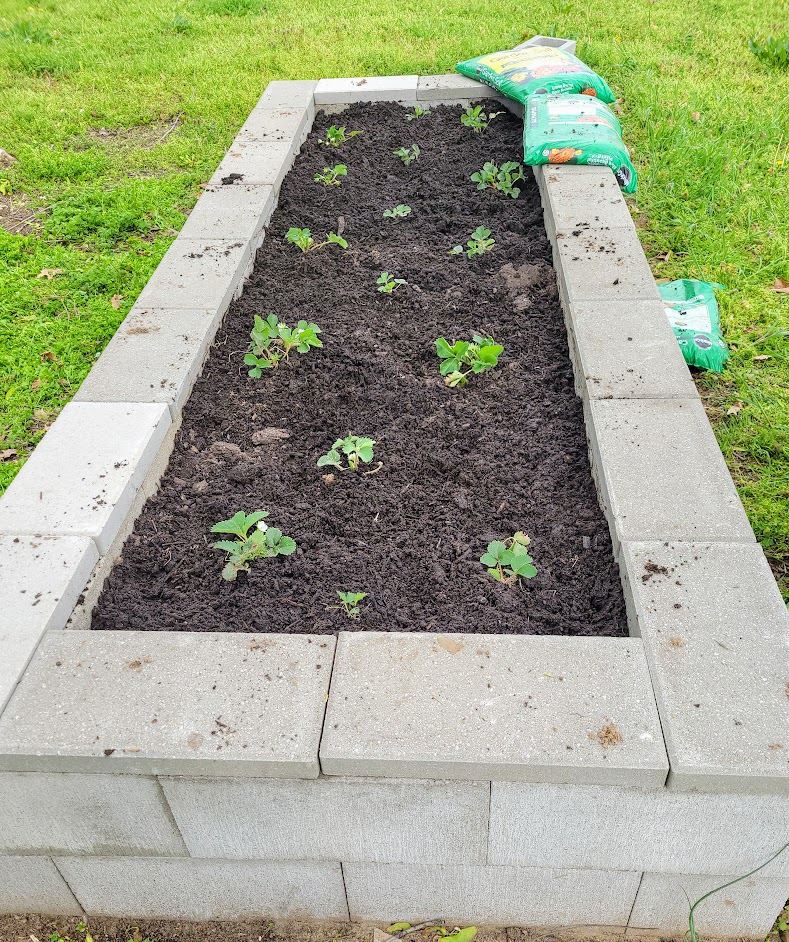
Plant & Enjoy!
Your DIY cinder block raised bed is ready for planting!
Be sure to water and feed plants regularly in the first season as the new soil establishes. Add mulch on top of the soil to retain moisture.
Tips for Filling and Maintaining a Cinder Block Garden Bed
Here are some useful tips to keep in mind after constructing your raised bed:
- Enrich soil blend with compost – Compost boosts nutrients and organic matter. Mix some in when first establishing bed.
- Add mulch layer – Use 2-3 inches of shredded bark, leaves, straw or other mulch on top of the soil to reduce weeds and retain moisture. Replenish as needed.
- Use drip irrigation – Drip lines or soaker hoses save water and reduce disease by not wetting foliage. They’re easy to setup in raised beds.
- Fertilize when needed – Test soil yearly and add organic granular fertilizer as needed to replenish nutrients, especially nitrogen.
- Control pests organically – Practice crop rotation, remove diseased plants promptly, and use OMRI-listed sprays like neem oil to prevent major pest issues.
- Repair blocks as needed – Stack new blocks or rebuild sections that get shifted out of place over time. Cinder blocks are easy to replace.
- Top off soil level – Settlement will occur, reducing depth over time. Top off beds annually with fresh compost and soil to maintain an adequate growing depth.
With proper filling, planting, watering, and care your cinder block raised bed will provide many years of productive gardening. Enjoy the fun and rewards of DIY gardening!
More Tips for Getting Started with Raised Bed Gardening
Raised beds are a great option if you’re new to vegetable gardening or dealing with poor soil. Follow this advice to get the most out of your first raised bed experience:
- Start small – Don’t overbuild right away. Try starting with just one or two smaller raised beds your first year.
- Focus on 1-2 crops – Master tomatoes, peppers or leafy greens before tackling too many different crops until you gain experience.
- Use quality soil – Don’t skimp on pre-made soil blend. Poor soil will doom your efforts. Pay for high quality organic mix with compost.
- Follow a plan – Sketch out a plan for what you want to plant before buying seeds or plants. Stick to it.
- Use transplants – Growing from seed is hard. Buy some transplants at a nursery to get a head start your first year.
- Water consistently – New beds need regular watering. An inch per week is a common target, adjusting for rainfall.
- Protect from pests – Use row covers to protect seedlings. Monitor for potential pest and disease issues early.
- Build up soil – Replenish compost, nutrients, and organic matter in soil yearly to keep beds healthy long term.
- Start a fall garden – Cool weather crops like kale, carrots and onions are easier to grow than summer produce. Experiment with fall planting.
The most important tip is to start small, care for your soil, and master just a few crops before expanding too quickly. Gardening is a fun learning experience, so enjoy the process!
Ready to Get Building?
As you can see, installing your own custom cinder block raised garden bed is an easy DIY weekend project.
The basic construction process involves: clearing, leveling, and tilling the site, laying blocks in your design, adding weed barrier, filling with soil blend, and planting. Maintenance involves topping off soil, fertilizing, and repairing blocks as needed over time.
Cinder block raised beds allow flexibility in size and design to suit your unique space. Plus they’re budget friendly compared to materials like brick, cedar, or stone. The durable blocks will retain their structure for many years to come.
Follow the tips above to create fertile, weed-free, and accessible raised beds that yield bountiful flowers and vegetables. Getting started with raised bed gardening is easy and fun. Just layout your materials, make a plan, and get building. Then enjoy the fruits (and vegetables) of your DIY labor!
FAQ
Are cinder blocks good for raised garden beds?
How long do cinder block garden beds last?
How many cinder blocks do I need for a 4×8 garden bed?
Is it safe to use bricks for a raised garden bed?
- How Fast Does Boston Ivy Grow? A Complete Growth Guide - June 9, 2026
- Gravel for Garden Beds: A Functional and Beautiful Option - June 9, 2026
- The Best Mulch for Raised Garden Beds – Pros, Cons, and Tips - June 9, 2026