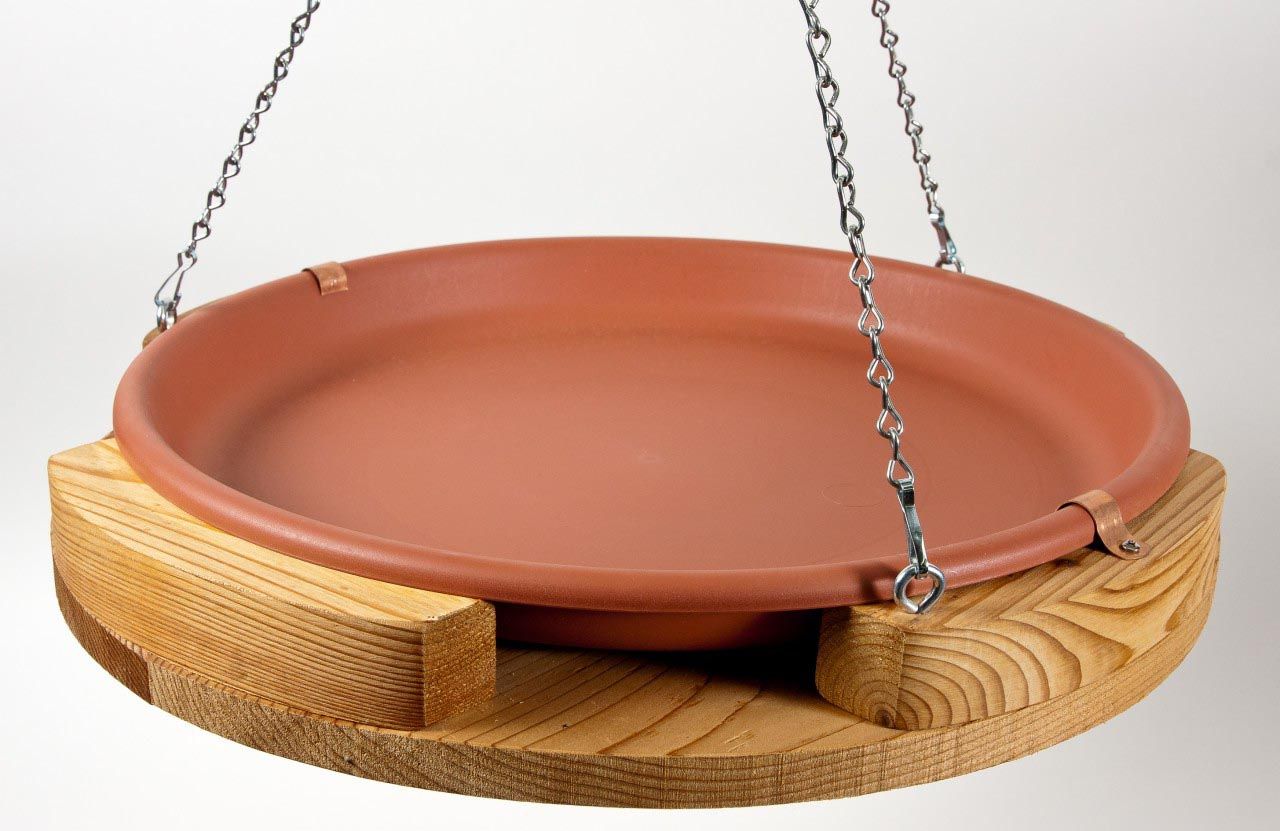
If you like to hang out in your backyard and watch the birds and other animals go about their day, this is the perfect do-it-yourself project for you. With just a few flower pots, paint, and sea glass you can create this gorgeous basin.
This post was transcribed by a member of the Hometalk editorial team from the original HometalkTV episode. { “id”: “8210167”, “alt”: “”, “title”: “”, “video_link”: “https://www. youtube. com/embed/z9rPF7tUjGk”, “youtube_video_id”: “z9rPF7tUjGk” } { “width”: 634, “height”: 357, “showRelated”: true }.
A homemade bird bath is a delightful way to welcome feathered friends into your outdoor space. With a few terracotta pots creativity, and simple DIY skills you can craft a unique birdbath that both you and the birds will cherish. Terracotta pots make ideal materials for constructing an inexpensive yet beautiful bathing spot. Let’s explore how to make a customized birdbath from terracotta pots.
Benefits of Using Terracotta Pots
Terracotta pots offer several advantages when building a DIY bird bath
-
Inexpensive – Terracotta pots are an affordable option available at most gardening stores. Priced as low as $1-5 each, they won’t break the bank.
-
Durable – Terracotta is hardy and weather-resistant, allowing your birdbath to withstand the elements year-round.
-
Customizable – With various sizes and shapes of pots and saucers available, you can get creative with the design.
-
Decorative – Terracotta has a nice rustic, earthy look that enhances gardens. Painting or embellishing adds more flair.
-
Porosity – The porous surface helps water evaporate, preventing mold or stagnant water from accumulating.
Overall, terracotta pots offer versatility, durability, and aesthetic appeal – ideal properties for crafting a unique backyard birdbath.
Step-by-Step Instructions
Follow these steps to make your own beautiful bird bath from terracotta pots:
Supplies Needed
- Terracotta pots in various sizes
- Terracotta saucers
- Spray paint and/or acrylic craft paint in desired colors
- Spray sealant
- E6000 glue or other strong waterproof adhesive
- Decorations like glass beads or marbles (optional)
Directions
-
Plan the design and purchase the supplies. Think about the look you want and find pots/saucers that align with your vision.
-
Wash and dry all pots thoroughly. This removes debris and ensures proper paint adhesion.
-
Paint pots and saucers with spray paint. Apply several thin coats for even coverage, allowing each coat to fully dry before adding the next.
-
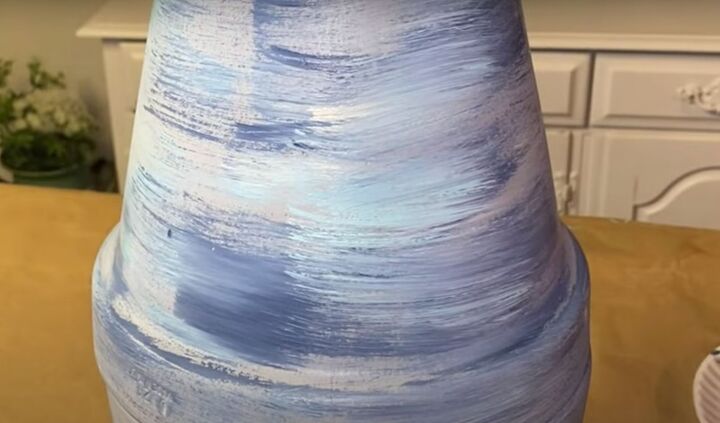
Paint decorative designs if desired. You can leave as is or get creative with patterns using acrylic craft paint. Let the paint cure fully before assembling.
-
Arrange pots in desired order and glue together. Stack the pots from largest on bottom to smallest on top. Adhere saucers with strong glue.
-
Let assembly cure for at least 24 hours before handling. The glue needs proper bonding time to gain full strength.
-
Add decorative embellishments like glass beads or marbles using glue. Work in small sections, letting glue set fully before moving on.
-
Spray with sealant when completely assembled and cured. Multiple thin coats ensure weatherproofing.
-
Add water and enjoy your new birdbath! Maintain clean water to create an appealing space for birds.
Ideas and Inspiration
From colorful mosaics to minimalist looks, get inspired by these creative ways to use terracotta pots for making baths:
-
Stack pots and saucers in alternating sizes for visual interest.
-
Paint the interior blue and add white leaf accents for a natural vibe.
-
Glue pretty glass stones, beads or marbles around the edges.
-
Use a drill to add small holes for hanging plants or decor.
-
Stencil fun shapes on pots or go for an ombre color effect.
-
Incorporate flowers, succulents or moss around the pots in the garden.
-
Use a mix of round and square pots for unique shaping.
There are so many ways to customize and make it your own. Combine colors, textures, shapes and embellishments to design a bath that showcases your personal style.
Helpful Tips for Success
Follow these tips when tackling this project:
-
Check pot and saucer sizes to ensure a stable, secure stack.
-
Use painters tape for crisp paint lines and to protect pot rims from drips.
-
Allow plenty of curing time between steps. Rushing can cause issues.
-
Add sealant to make pots watertight before gluing if stacking multiple empty pots.
-
Arrange pots on their side when adding beads to prevent sliding.
-
Use a drill with a masonry bit for clean holes in terracotta if adding hangers.
-
Consider placing pots on a patio stone or bricks to elevate above ground.
With the right supplies, patience, and techniques, you can create a stunning birdbath from terracotta pots for your backyard. The birds will thank you for providing a new spot to play, splash, and preen!
FAQs
How do I waterproof terracotta for a birdbath?
Seal terracotta pots with a waterproofing spray sealant formulated for terracotta and masonry. Apply multiple thin coats per manufacturer instructions to plug pores and prevent water absorption.
What kind of glue should I use?
Use a strong waterproof adhesive like E6000 that bonds well to terracotta and withstands moisture. Avoid basic school glues which can fail outdoors.
How do I clean and maintain a terracotta birdbath?
Empty and scrub weekly with a soft brush and mild soap to prevent algae. Refill with fresh water to give birds a clean space. In winter, bring pots indoors to prevent cracking from freeze/thaw cycles.
What if my pots don’t stack securely?
If pots are wobbly, use caulk or glue dots inside joints for stability. You can also place pots on bricks or stones first to create a more solid base.
Crafting with terracotta pots allows endless options for personalizing your unique bird bath. With some creativity and effort, you can provide birds with a beautiful handmade oasis they will appreciate.
Make the bath piece
While the glue was drying on the base pots, I worked on the bath part of the project. I used tile glue to line the large, shallow terracotta base with the top that will be the birdbath.
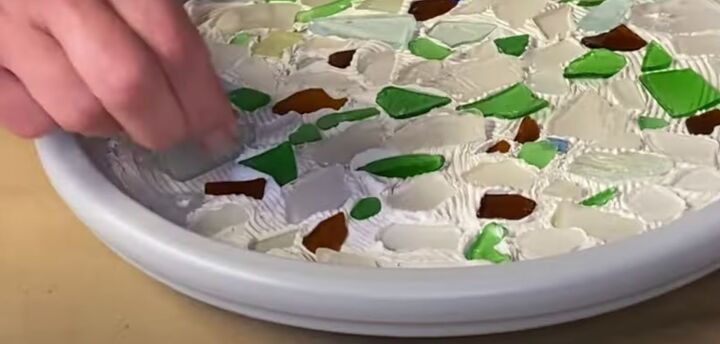
While the glue was still wet, I pushed in different colored and shaped sea glass until the hole was full. Once I had all the glass in place, I let it dry overnight.
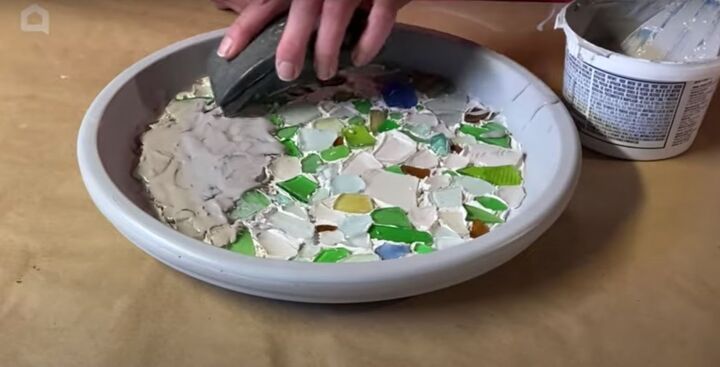
It was time to seal everything. Once the tile glue was dry, I put grout over the sea glass. I made sure to wipe away any excess before it dried.
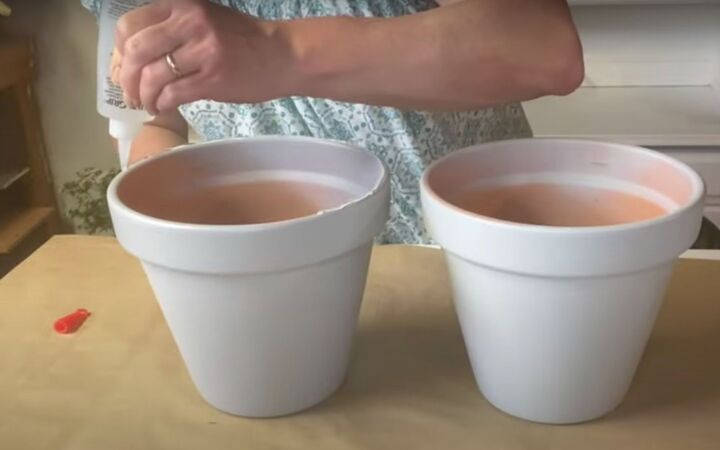
Paint the flowerpots
Next, I sprayed the outside of all three pieces with spray paint in a light gray color. I gave each piece two thin coats.