Hardy hibiscus are quickly becoming a backyard staple thanks to their ability to bring vibrant, tropical-looking blooms to gardens in cool and temperate climates. With flowers up to 8 inches across in shades of red, pink, white and more, it’s easy to see why gardeners are eager to add these striking shrubs to their outdoor spaces. Luckily, container growing makes incorporating hardy hibiscus into small yards or patios a breeze. In this complete guide, we’ll cover everything you need to know to successfully grow hardy hibiscus in pots.
While many hibiscus varieties are tropical plants that require hot, humid conditions, hardy hibiscus types can withstand freezing winter temperatures. The two main species are Hibiscus moscheutos, also known as rose mallow, and Hibiscus syriacus or rose of Sharon. Both are deciduous woody shrubs with large, colorful blooms.
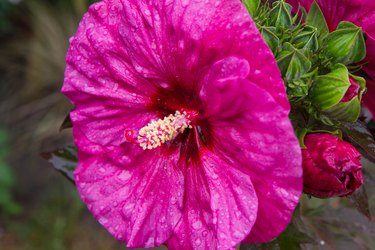
Rose mallow is native to North America and extremely cold tolerant, surviving as far north as USDA zone 4 It grows 3-7 feet tall with 2-4 foot spread. The dinner plate-sized flowers come in shades like pale pink and white with deep red eyes Rose of Sharon reaches up to 12 feet tall with a 6 foot spread. Its slightly smaller 3-6 inch blooms can be single or double in warm colors like red and pink.
Thanks to their hardy nature these hibiscus thrive in pots in zones 4-9. Plus container growing allows you to easily move them around to catch the sun or highlight their fabulous flowers. Read on to learn how to successfully plant and care for hardy hibiscus in containers.
Choosing the Right Pot
When picking a container, opt for a pot that complements your outdoor space while providing proper drainage. Here are some key tips for selecting the best vessel for your hardy hibiscus:
-
Size: Choose a pot that’s 3-7 gallons to give roots room to spread but keep the plant a manageable size. Go larger for added cold protection.
-
Drainage: Ensure the container has sufficient drainage holes to prevent waterlogging. Consider adding pebbles at the bottom too.
-
Material: Use durable pots like plastic, concrete or glazed ceramic that won’t crack in freezing temperatures.
-
Design: Pick a style and color that fits your yard. Choose neutral pots to let the vivid blooms pop or match with other containers.
Getting Started with Container Planting
Hardy hibiscus can be grown from seed, but buying young plants from a nursery makes container growing easy. Follow these simple steps to get your potted hibiscus off to a strong start:
1. Add drainage material (optional): Place pebbles or gravel at the bottom of the pot to improve drainage.
2. Fill with soil: Use a quality potting mix and fill most of the way up the container.
3. Remove from nursery pot: Carefully remove new plant from its original nursery pot.
4. Place in pot: Position the hardy hibiscus in the center of the new container.
5. Backfill soil: Fill remaining space around plant with more potting soil.
6. Water well: Give a thorough watering to settle the soil after planting.
7. Enjoy: Sit back and watch your hardy hibiscus grow and begin blooming through summer!
Caring for Hardy Hibiscus in Containers
While quite low maintenance once established, hardy hibiscus do need some simple care to thrive in pots. Follow these tips for healthy, vibrant container hibiscus:
-
Sun: Provide at least 6 hours of direct sun daily. Morning sun is ideal in hot climates.
-
Water: Keep soil consistently moist but not saturated. Water whenever the top few inches become dry.
-
Fertilizer: Feed monthly during spring and summer with a balanced liquid fertilizer.
-
Pruning: Trim off dead wood in late winter before new growth appears. Also pinch back leggy stems.
-
Repotting: Move hardy hibiscus to a larger pot every 2-3 years to allow roots ample room.
-
Overwinter: Move containers to a protected area once temperatures drop below freezing.
With proper care, your hardy hibiscus will grace your patio or yard with incredible color summer after summer. Keep reading for more tips on helping these tropical beauties thrive.
Getting the Soil Right
Hardy hibiscus prefer fertile, acidic soil with excellent drainage. A quality potting mix amended with compost or peat moss fits the bill perfectly. Or make your own soil blend using:
- 1 part peat moss or coco coir
- 1 part compost, leaf mold or well-rotted manure
- 1 part perlite or vermiculite
When repotting, cover the drainage holes with screening to keep soil from escaping. Top with an organic mulch like bark or cocoa hulls to retain moisture and discourage weeds.
Providing the Proper Sun Exposure
One of the keys to getting those dinner plate-sized blooms is situating your hardy hibiscus where they’ll receive maximum sunlight. Most varieties need a minimum of 6 hours of direct sun per day. More is better, especially in cooler climates.
Make sure to turn the pots regularly so each side gets even sun exposure. Morning sun is ideal in hot climates to avoid afternoon heat stress. Dappled shade in the afternoon can protect the flowers from fading.
If you don’t have a perpetually sunny spot, grow lights can help hardy hibiscus thrive on balconies or patios. Use full spectrum LED grow lights for 14-16 hours daily.
Watering Your Potted Hibiscus
Vigorous drinkers, hardy hibiscus need consistent moisture without keeping their roots constantly wet. Stick your finger in the soil to gauge when watering is needed. The top few inches should remain slightly damp but not soggy.
As a general rule, water container hibiscus:
- Every 2-4 days in hot weather
- 1-2 times per week in temperate weather
- Once every 7-10 days in cool weather
Provide extra water during flowering and if leaves start to wilt. Allow the soil to partially dry between waterings for the healthiest roots.
Self-watering pots are a great option for maintaining optimal soil moisture. Or place containers on saucers filled with pebbles to create a reservoir.
Feeding Your Container-Grown Hibiscus
An early spring application of slow-release fertilizer provides hardy hibiscus with steady nutrients through the growing season. Or use diluted liquid fertilizer every 2-4 weeks from spring until early autumn.
Look for products higher in phosphorus to promote lush blooms. Organic options like compost tea, fish emulsion, worm castings, or manure tea also supply essential nutrients.
Always follow label directions to avoid fertilizer burn. Reduce feeding frequency for mature plants. And take a break in extreme summer heat or if blooms drop.
Staking for Added Support
The wide, dense growth habit of hardy hibiscus makes them top-heavy as pots fill in. Staking prevents flopping stems and broken branches. Drive 1-2 sturdy stakes around the inside of the container to support the shrub.
Use soft, flexible ties to secure larger stems to the stakes. Wrap ties loosely to avoid constricting growth. Check ties during the season to allow for expanding girth.
Cage-style tomato supports are another excellent staking option. Just ensure the cage is large enough to accommodate the shrub’s spread.
Getting Gorgeous Flowers
Hardy hibiscus produce their fabulous blooms on new wood. Pruning at the right times encourages vigorous new growth and maximizes flowers.
In late winter, trim off any dead or frost-damaged branches. Cut each remaining stem back to 2-3 healthy buds to stimulate bushy regrowth.
Remove spent blooms throughout summer to promote continuous reblooming. Always prune just above a leaf node using sterile shears to avoid disease.
Deadheading also neatens up plants. Snipping off faded flowers before seed heads form puts the energy into making more flowers instead of seeds.
Overwintering Container Hibiscus
While quite cold tolerant, container grown hardy hibiscus need some protection to survive freezing winter temps. Follow these tips to help them make it through:
-
Move containers to shelter: Place pots in an unheated garage, shed or under a patio cover.
-
Stop fertilizing: Fertilizer encourages tender new growth that’s vulnerable to frost damage.
-
Trim away dead leaves: Cut back foliage once it turns brown after a hard freeze.
-
Add insulation: Wrap container with bubble wrap or burlap. Add styrofoam insulation outside larger pots.
-
Wait until spring: Don’t prune live stems until new growth emerges in spring.
-
Water sparingly: Check soil moisture monthly and water only if extremely dry.
With proper overwintering care, your hardy hibiscus will return to their glorious blooming selves once warm weather arrives again.
Troubleshooting Common Hibiscus Problems
Even when grown under ideal conditions, hardy hibiscus may encounter a few issues. Here are some common problems and how to fix them:
-
Few or no blooms: This is usually caused by insufficient sun exposure. Move containers to a sunnier location.
-
Leaves yellow & drop: Overwatering can cause root rot. Allow soil to partially dry out between waterings.
-
Wilting: Plants wilt when underwatered. Check soil and water containers if the top few inches are dry.
-
Leaf spots: Fungal diseases like leaf spot cause round brown spots. Improve airflow and use fungicides if severe.
-
Insect pests: Aphids, spider mites and Japanese beetles can be controlled with insecticidal soap sprays.
-
Leggy growth: Prune back overgrown shoots and move container to a sunnier area to encourage compact growth habit.
-
Frost damage: Protect containers from harsh winter weather. Cut back any dead stems in spring. Healthy new growth will quickly fill in.
Great Hardy Hibiscus Varieties for Pots
With so many gorgeous options, it can be tough to decide which hardy hibiscus is right for your container garden! Here are some top varieties that are sure to impress:
Midnight Marvel: Deep reddish-black satin blooms on compact 3-4 foot plants.
Kopper King: Pale pink, white-eyed flowers on bushy 8 foot shrubs.
Lord Baltimore: Vibrant red semi-double blooms up to 8 inches wide on tall plants.
Moy Grande: Huge 8-10 inch single white flowers with brilliant red centers on 5 foot shrubs.
Plum Crazy: Unique plum purple flowers with lightly ruffled petals on 4-6 foot plants.
Patio Pink: Abundant bright pink blooms on 3 foot dwarf shrubs perfect for containers.
Bluebird: Sky blue flowers with yellow stamens bloom late on 4 foot mounds.
Now that you know how to successfully grow hardy hibiscus in containers, you can enjoy these gorgeous blooms anywhere from a country cottage patio to an urban rooftop. With the right care, these tropical beauties will reward you with vivid color and effortless allure through summer and beyond.
Hardy Perennial Hibiscus Basics
There are two species of hardy hibiscus you can choose for your garden. One is Hibiscus moscheutos, which is native to much of the U. S. and is known as a swamp mallow or rose mallow. Its slightly hardier than its cousins and can sometimes be grown successfully in USDA zone 4. It’s a tall, gangly plant in the wild, but commercial growers have made new hybrids that are shorter and easier to handle. How tall they are and how wide they are will depend on the cultivar you choose. People often use the phrase “dinner plate” to describe how big the flowers are. The flowers come in many colors. Many take the form of pale or white flowers with a darker eye, which is especially striking.
Hibiscus syriacus, also known as rose of Sharon, is another type of hardy hibiscus that can grow in colder places. It can be even taller than H. moscheutos, with some cultivars growing to 12 feet in height, though 6 footers are more common. The flowers aren’t quite as big as swamp mallow flowers, but they’re still big and pretty. The blossoms are 3 to 6 inches across, and there are both single and double types.
Both of these plants are deciduous perennial shrubs with woody stems instead of more delicate herbaceous stems. This is a big part of why they are so durable and winter-hardy. Hardy hibiscus plants need two to three years to become established, or maybe even longer if you live in a colder area. Once they are established, they don’t need much care and just a little protection from the winter weather.
Enjoying Your Hardy Hibiscus
The payoff for all of this work is a beautiful, long-lasting addition to your garden. The deep green leaves on your hibiscus won’t usually show up until late spring, so it will look pretty sparse in the spring. Blooms start to show up in early summer in warmer places, in midsummer in cooler places, and in late summer in colder places. Once your hibiscus blooms, it will keep blooming through late summer into early fall. This means that they will keep going until the cold weather makes the flowers and then the leaves fall off.
These hibiscus species bloom for longer than many of your other ornamentals, so hummingbirds and many insect pollinators use them as a late-season food source. People can also eat the tender young leaves or the petals, which can be added to a salad. Dried hibiscus flowers make a nice herbal tea.
Hibiscus is a hardy plant that can survive in both warm and cold places. It makes a great garden plant whether you grow it in the ground or in a pot, and it’s also one of the biggest and most beautiful houseplants. Wherever and however you choose to grow it, its well worth the minimal effort required.
Planting Hardy Hibiscus Big Containers
Can hibiscus grow in pots?
Tropical hibiscus ( Hibiscus rosa-sinensis) is hardy in USDA zones 9-12, depending on the variety, and is sensitive to temperatures below 50 degrees F. This popular landscape shrub can also be grown in pots and is easy to care for when given the right type of container, rich soil, plenty of water and light.
Can hibiscus grow outside?
Hardy hibiscus is a cold-hardy plant that thrives in freezing conditions in USDA zones 5 to 9. In some areas, hardy hibiscus shrubs survive outdoors in zone 4 with protection by mulching the root zone. Perennial hibiscus plants are generally large shrubs or small flowering trees.
Can Hibiscus be grown in containers?
These shrubs like to have crowded roots, so they make an ideal choice as a container plant in this sort of setting. These Hibiscus are known for their glossy evergreen foliage and large bold flowers. Plants can be grown in containers and give a tropical feeling on a deck or patio or around a pool.
How do you plant Hibiscus in pots?
Create Large Containers for A Large Area! Spring is the best time for planting hibiscus. Wait until all danger of frost is past in your area. Follow these steps to plant hibiscus in pots. Place 1 to 2 inches of potting soil in the bottom of the container.
- The Ultimate Guide to Growing Strawberries in Raised Beds - August 8, 2025
- No-Dig Garden Beds: The Easiest Way to Grow a Beautiful Garden - August 6, 2025
- How to Protect and Preserve Wood for Raised Garden Beds - August 6, 2025

