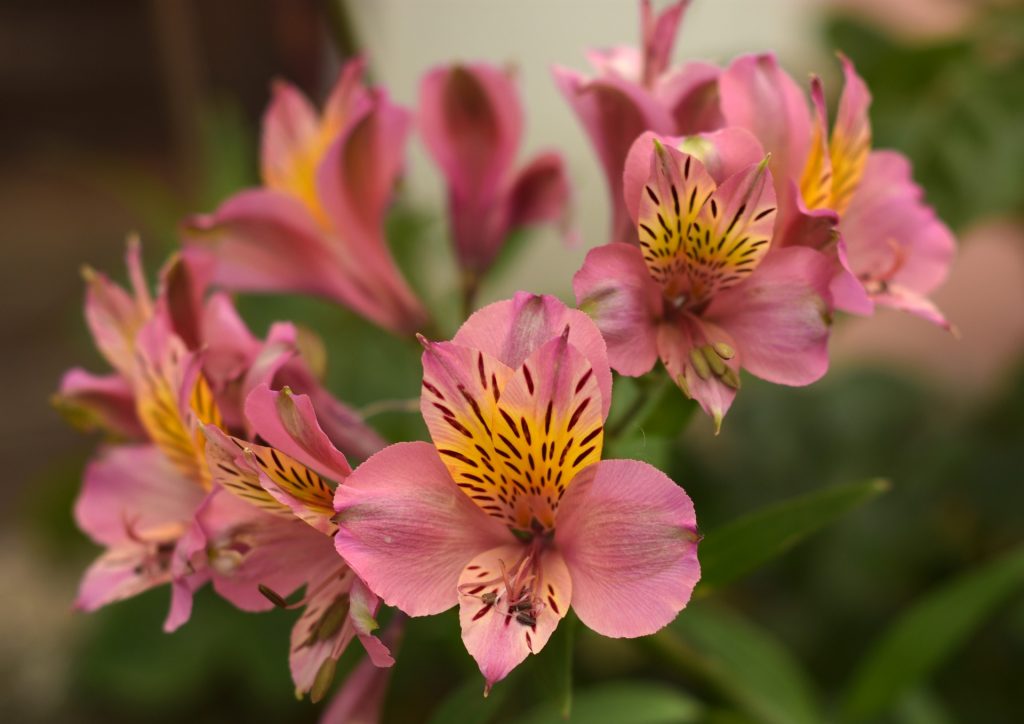
With its brilliant crimson blooms resembling parrot beaks, Alstroemeria psittacina, also known as parrot lily, makes a stunning addition to cottage gardens. However, this South American native requires some specific care and growing conditions to thrive. Here is a comprehensive guide to successfully caring for Alstroemeria psittacina.
Sun and Soil Requirements
-
Parrot lily thrives in full sun to partial shade Provide at least 6 hours of direct sun daily
-
Well-drained soil is essential Amend clay soils with compost, Raised beds improve drainage
-
Prefers slightly acidic to neutral pH between 6.0-7.0. Add sulfur to lower pH if needed.
-
Loamy, organic soils with good fertility are ideal. Regularly mix in compost.
-
Mulch around plants to retain soil moisture and suppress weeds.
Proper sun exposure and well-draining soil help parrot lily establish deep roots and maximize blooms.
Watering Needs
-
Water parrot lily regularly to keep soil consistently moist but not saturated.
-
Requires about 1-2 inches of water per week from rain or irrigation.
-
Check soil moisture before watering. Water when top few inches become dry.
-
Deep watering encourages deep roots. Avoid frequent shallow watering.
-
Reduce watering in cooler weather. Increase in heat and drought.
-
Container plants need more frequent watering as they dry out faster.
Adequate moisture is key but take care not to overwater parrot lily. Allow soil to partially dry out between waterings.
Temperature and Humidity Preferences
-
Parrot lily prefers daytime temperatures between 60-80°F (15-27°C).
-
Can tolerate highs up to 90°F (32°C) but flower production declines.
-
Provides best growth and flowering in 50-60% relative humidity.
-
Requires excellent drainage and air circulation to prevent diseases.
-
Move containers to shade if temperatures exceed optimum range.
-
Humid climates may require wider spacing between plants for air flow.
Parrot lily thrives in warm temperatures and moderately humid conditions with good air movement.
Fertilizer Needs
-
Fertilize every 2-3 weeks during the growing season.
-
Use a balanced liquid fertilizer diluted to half strength.
-
Alternate with a low-dose organic granular fertilizer.
-
Discontinue fertilizing after September to prepare for dormancy.
-
Container plants need more frequent feeding than in-ground plants.
-
Excess nitrogen can cause floppy growth. Reduce if this occurs.
Regular feeding when actively growing keeps parrot lily vigorous and floriferous. But don’t over-fertilize.
Pruning and Maintenance
-
Remove spent flower stems to neaten appearance and promote new blooms.
-
Cut back any damaged foliage or diseased parts promptly.
-
Divide congested rhizomes every 2-3 years in early spring as new growth begins.
-
Pick off any insects by hand to avoid pesticide use.
-
Clear fallen leaves and other debris away from the base of plants.
-
Provide winter mulch in cold climates for protection.
Pruning, division and cleanliness are the main maintenance tasks for a healthy parrot lily planting.
Propagation
-
Propagate parrot lily by dividing rhizomes or root cuttings in spring.
-
Take 3-4 inch sections containing a growth bud and root well before planting.
-
Start new plants indoors 6-8 weeks before the last frost. Harden off before planting outside.
-
Seeds can be sown in flats but take 2-3 years to bloom. Division is faster.
-
Maintain same growing conditions when propagating. Keep new plants consistently moist.
Dividing mature plants is the most effective way to propagate parrot lily. Take care when handling as skin irritation may occur.
Problems and Solutions
-
Ensure excellent drainage and avoid overwatering to prevent root rot.
-
Pick off insect pests instead of using pesticides which stresses plants.
-
Apply organic fungicides to inhibit foliar diseases in humid conditions. Improve air flow.
-
Lack of blooms can indicate insufficient sun, over-feeding, overcrowding or drought stress.
-
Shelter plants from heavy rain and provide winter protection in cold climates.
With proper site selection, care and maintenance, parrot lily is relatively pest and disease free. Promptly address any issues that arise.
Winterizing Parrot Lily
-
Cut back foliage after several hard frosts in fall as it dies back.
-
Add a 2-4 inch layer of shredded bark, leaves or straw for winter insulation.
-
Reduce watering frequency for dormant plants but don’t allow roots to completely dry out.
-
Apply a final slow release fertilizer application to support spring growth.
-
Remove mulch when new growth emerges in spring. Do not cut back until risk of frost has passed.
A little extra care prepares parrot lily for winter dormancy and ensures healthy growth next season.
Alstroemeria psittacina is easy to grow when provided with suitable conditions. Well-draining soil, adequate moisture, fertilization when actively growing, and pruning are the keys to success. With excellent winter hardiness, parrot lily will flourish for many years in the garden. Follow these guidelines for optimal performance from this uncommon beauty.
Finding light for Peruvian-Lily in your home
Peruvian-Lily love being close to bright, sunny windows .
Place it less than 1ft from a south-facing window to maximize the potential for growth.
Peruvian-Lily does not tolerate low-light .
Click on your region to see how the current weather in your area affects where you should put your Peruvian Lily
Taxonomy Scientific name
Peruvian-Lily needs 0. 5 cups of water every 9 days if it’s in a 5″ pot and doesn’t get direct sunlight.
You can use our water calculator to get personalized watering advice based on your area, or you can download Greg to get more detailed advice for all of your plants.

Water 0.5 cups every 9
Does your plant get direct sunlight? No Yes
Select the pot size
Greg is a plant care intelligence that has learned how plants work so you can grow with confidence!
Growing alstroemerias – everything you need to know, esp how to pick them!
How do you care for Alstroemeria?
Here are some plant care tips and tricks to help keep your Alstroemeria at its healthiest. Sunlight: Alstroemeria flowers should be planted in an area of your garden that is mostly sunny. They thrive when receiving full morning sun and some partial shade in the afternoons. Water: These plants do best when they’re watered regularly.
What is the treatment for teratozoospermia?
Teratozoospermia is defined as the abnormality of sperm morphology. It means, it is a condition of irregular shape and size of the sperm that affects the fertility of a man. According to the criteria released by the World Health Organisation (WHO) in 2010, if the normal spermatozoa percentage in the ejaculate is less 4%, then a man is said to be having teratozoospermia condition. Mild to moderate teratozoospermia caused due to other reason might be reversible with timely intervention and some lifestyle changes such as quitting smoking and drinking alcohol, a well-balanced diet can improve sperm quality. If the abnormal sperm is a result of varicocele condition, immediate surgical correction can reverse the production of abnormal sperms with altered morphology. In the case of genetically inherited teratozoospermia, there is no cure. Defects in sperm morphology due to Cancer chemotherapy and radiotherapy are also difficult to cure. So, better to freeze your sperm before treatment is a good choice if future fertility is desired.
Does Alstroemeria psittacina grow in shade?
Ideal for the garden, Alstroemeria psittacina thrives best in full sun or partial shade. With its vibrant blooms, it adds a touch of exoticism to borders, beds, and containers. Alstroemeria aurantiaca (Peruvian Lily) is a robust, clump-forming perennial. This plant can grow up to 48 inches (1.2 m) in height.
How do you repot Alstroemeria?
Repotting: When repotting your Alstroemeria, water the soil a few hours before you intend to remove it from the pot. Apply enough water so that you can see it come out of the drainage hole. This will allow the soil to stay intact when you remove the plant.
- How to Grow Gorgeous Climbing Roses on a Wooden Fence - March 24, 2026
- Avoid These Plants When Companion Planting with Oregano - March 24, 2026
- 15 Great Trees to Plant Near Your House - March 24, 2026