You’ve chosen to learn how to fill in a pond, but you don’t know where to begin. Filling it in takes careful planning and steps that ensure a smooth transition.
The steps in our blog post will help you safely move animals and pick the right fill material for a new start.
Having a pond on your property can be a beautiful addition, providing aesthetic appeal and recreational enjoyment. However, before you can reap the rewards of a pond, you first have to fill it properly. Filling a pond requires careful planning and execution to ensure it holds water, maintains proper ecosystem balance, and integrates seamlessly into your landscape.
In this comprehensive guide, we will walk through the key steps and best practices for filling a new or existing pond. Follow along to learn about critical factors like site selection, materials, adding water, establishing wildlife, and maintaining safe water quality. With the right approach, you can fill your pond correctly so it thrives for years to come.
Step 1: Choose an Ideal Location
-
Pick a low-lying area of your property where water naturally collects and drains. This prevents flooding issues.
-
Ensure the soil composition can properly hold water Clay soils are best, Sandy soils will require lining
-
Consider proximity to a water source for filling and maintaining pond water levels
-
Allow enough space for the pond’s size and shape you desire.
-
Consult local regulations regarding minimum setbacks from property lines and any permitting requirements.
Choosing the right location sets your pond up for success from the start. Make sure to thoroughly assess the site ahead of time.
Step 2: Plan Size, Shape and Depth
-
Generally, larger ponds hold ecological balance better. Aim for at least 1,000 sq. ft. surface area if possible.
-
Irregular shapes create more diverse aquatic habitats. Include varying edges and depths.
-
Maximize depth near the center (at least 8 ft.) so the majority of the pond doesn’t freeze solid.
-
Incorporate shelves, ramps, or beach areas for easy wildlife access and habitat.
-
Design and orient the pond to blend and complement your landscape aesthetics.
Take time to carefully plan out pond dimensions to meet your needs and preferences. This will also help estimate how much fill material you’ll require.
Step 3: Outline the Pond and Remove Sod
-
Mark pond perimeter with stakes and strings. Or, spray paint outline on grass for visible guide.
-
Remove all sod within pond area to expose bare earth.
-
Scrape off and discard any topsoil to reach solid subsoil base.
-
Stockpile any excavated subsoil nearby to reuse later as fill material.
Prepping the bare pond foundation is vital for proper water retention and sealing ability.
Step 4: Install Soil Liner and Fill Material
-
For permeable soils, install commercial clay liner or bentonite. Compact in 6 inch layers.
-
For rocky/sandy soils, use a flexible EPDM rubber liner, PVC, or reinforced polyethylene.
-
Backfill liner edges with soil to anchor securely. Remove rocks or debris that could puncture liner.
-
Fill bottom with 4″-6” of sand or gravel substrate to protect liner and anchor plants.
Lining and proper fill material prevents water loss while also providing habitat and planting benefits.
Step 5: Install Pond Components
-
Position skimmers, filters, waterfalls, fountains, plumbing, electrical according to plans.
-
Make sure underwater slopes, shelves, etc. are created before full filling.
-
Surround components with gravel and anchors to prevent shifting or floating.
Any equipment should be installed early before the pond is completely full. This allows for easier access and positioning.
Step 6: Partially Fill the Pond
-
Fill pond halfway initially. Use water truck or pump from a hydrant or other source.
-
Allow water to settle overnight to check for leaks. Make any repairs needed to liner.
-
Refill to normal level, less 6″-12″ from top to allow for plant shelves and soil backfill.
Go slow when first adding water to check for any liner issues before completely filling. Leaks are easier to fix at lower volumes.
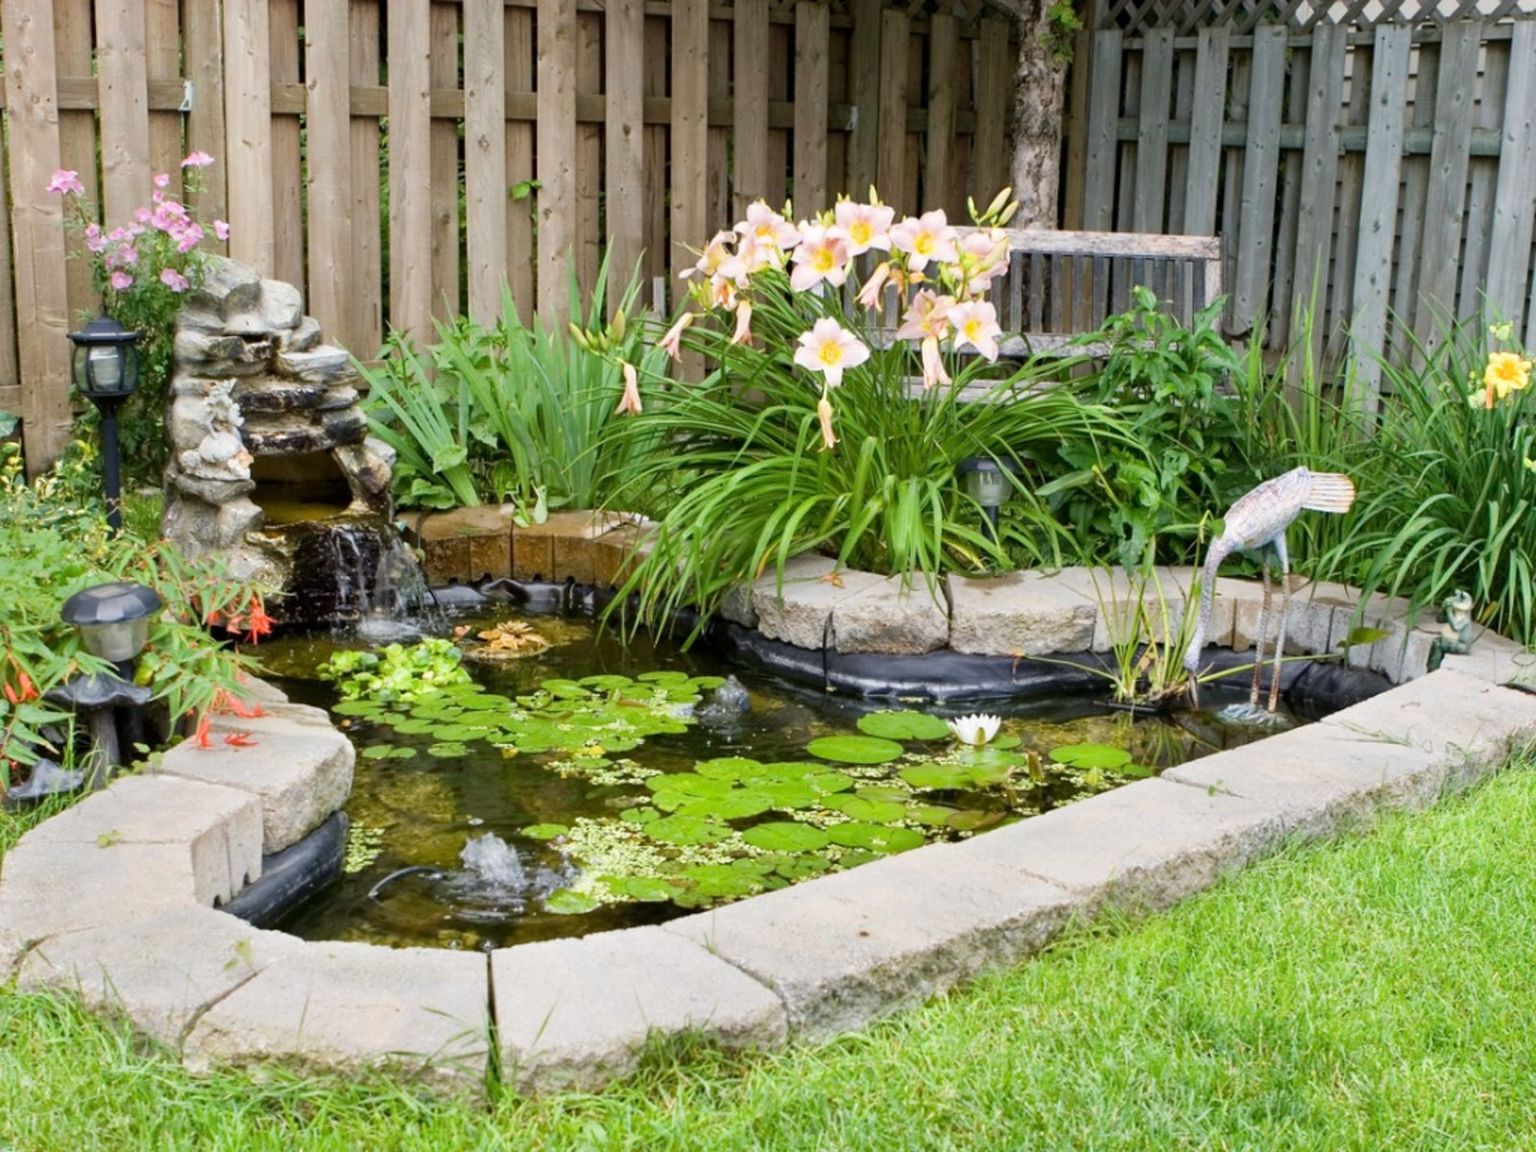
Step 7: Install Aquatic Plants
-
Plant native vegetation from local wetlands and waterways first to establish ecosystem.
-
Group oxygenating plants together in deep sections to maintain water quality.
-
Place floating plants like lilies or lotus in pots buried near pond edges.
Aquatic plants help balance water chemistry, oxygenate pond, and provide wildlife food/habitat.
Step 8: Allow Natural Filling by Rainfall
-
Let nature do some of the work by allowing rainfall to continue filling pond the rest of the way.
-
This more gradual filling allows plants, soil, microorganisms to adjust and settle in.
-
Stop at water level you desire, leaving a few inches below top so rain can continue maintaining levels.
Slow final filling via rain creates ideal conditions for establishing plants, fish, and insects as the ecosystem stabilizes.
Step 9: Introduce Fish and Wildlife
-
Research and select fish species suitable for your climate and pond environment.
-
Acclimatize fish slowly to pond’s temperature and chemistry before release.
-
Introduce native insects and larvae to establish food chain. Wood debris also invites insects.
-
Attract and assist settlement of frogs, turtles, and birds as predators and prey.
A balanced mix of plant and animal life results in a self-sustaining pond ecosystem.
Step 10: Maintain Proper Water Quality
-
Monitor water chemistry like pH, oxygen, and temperature levels. Perform partial water changes as needed.
-
Control algae growth through plant coverage, water circulation, or UV clarifiers if excessive.
-
Watch for signs of pollution like odors, sheens, or murkiness and treat accordingly.
-
Remove fallen leaves and debris regularly to prevent excess organic matter buildup.
Ongoing maintenance ensures your pond’s water remains clear, clean, and hospitable for all organisms that call it home.
Key Tips and Warnings
-
Always follow local regulations for pond construction, drainage, and acquiring fish/wildlife.
-
Avoid using metal equipment in pond which can leach harmful chemicals.
-
Prevent erosion and muddy runoff from worksite entering nearby waterways.
-
Never introduce non-native or invasive plants/animals which can disrupt ecosystems.
-
Use quality liners and sealants made specifically for pond use.
-
Eliminate steep drop-offs or sheer edges for safer swimming and wildlife access.
With proper siting, filling, planting, stocking, and care, your new pond will soon become a vibrant aquatic habitat, unique water feature, and cherished spot to enjoy the peace of nature. What are you waiting for? Get started designing your ideal pond oasis!
Understanding the Basics of a Pond
Moving from an overview to specifics, its important to grasp what makes up a pond.
A garden pond is often a small body of water created for decorative or habitat reasons.
It can be home to plants and fish like pterophyllum and shining pondweed, greater pond-sedge, and water mint.
A lot of garden ponds have liners that keep water from seeping into the soil around the pond. This keeps the water inside the pond.
Ponds also have their own watershed or drainage area where surface runoff collects. This means they can affect nearby ground water and creeks.
Understanding these parts helps when its time to dismantle your garden oasis safely and responsibly.
Building an In-ground Trampoline
Dig a hole where the pond was to fit your trampoline frame.
It needs to be deep enough so that the trampoline’s top is level with the ground. In-ground trampolines are safer for kids because theres less risk of falling off.
They blend in with your yard and dont block any views.
Pack down a layer of soil around the frame once its in place. This provides solid support and prevents movement during use.
You can jump for hours without having to worry about taking up space in your backyard like above-ground trampolines do.
Now picture adding new plants or even a sandbox to this spot to make it an oasis where you can enjoy more outdoor activities.
Planting trees turns an old pond area into a green paradise. Its easy to do and keeps the space looking great.
Trees like maples or oaks bring amazing colors, especially in the fall.
Their roots help fill up the ground where water once was.
Choose trees that fit well with your local climate and soil. They will grow strong and need less care over time.
This way you save on soil because tree roots take up more room as they spread out.
Now, imagine turning this spot into a fun play zone.
Before You Fill-in Your Pond, Watch This Video
FAQ
What is the best way to fill in a pond?
What is the cheapest way to fill in an old pond?
How do you keep a pond full of water?
Is it expensive to fill in a pond?