Mushroom grow bags are an essential tool for cultivation, both for the professional cultivator and the enthusiastic hobbyist.
Alternatively, they can be used as spawn bags, which are used to germinate grain and spread mushroom cultures, or they can be used to make mushroom growing blocks with added sawdust.
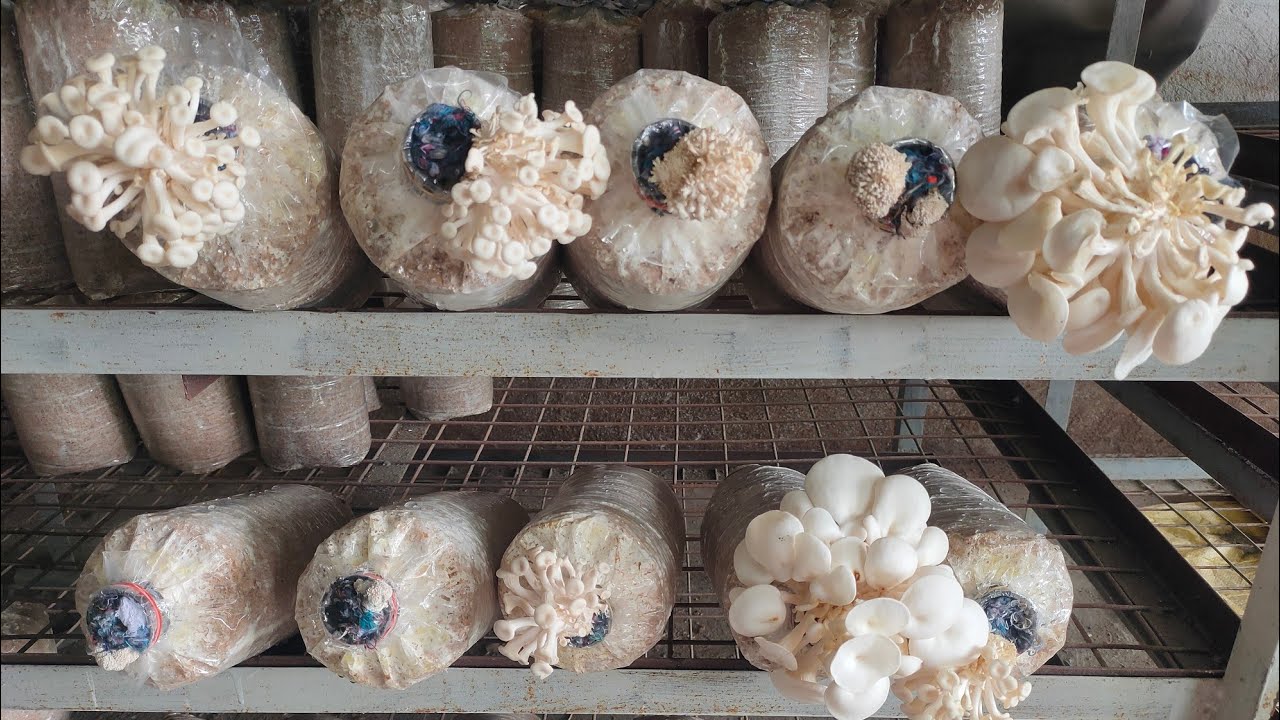
Mushroom fruiting bags have become an extremely popular way for home growers to cultivate gourmet mushrooms. These pre-inoculated blocks contain mushroom spawn embedded in a substrate like sawdust straw or wood chips. With some basic care and optimal conditions the mycelium will colonize the substrate and produce flushes of mushrooms. While fruiting bags make mushroom growing easy, there are still some key things you need to know to get the best results. In this complete guide, we’ll cover everything you need to successfully care for mushroom fruiting bags from start to harvest.
Choosing the Right Location
Choosing the optimal location is the first step in caring for your mushroom fruiting bags Most gourmet mushroom varieties perform best at temperatures between 55-75°F King oyster and pearl oyster mushrooms can tolerate slightly warmer conditions while shiitake prefer it a bit cooler. Avoid areas that get over 80°F or under 50°F. High humidity is also essential, between 80-100%. Find an indoor spot away from direct airflow but with good air circulation. A garage, basement, or insulated shed are good options. You can also grow outside in a shady spot during cooler months. Just bring the bags indoors if temperatures drop below 50°F at night.
Maintaining Proper Moisture Levels
Keeping your mushroom fruiting bags properly hydrated is crucial. The mycelium and developing mushrooms need constant moisture. Check the bags daily by lifting them and feeling the weight. Adequately hydrated bags should feel heavy. If light, it’s time to mist them or soak the blocks. Bags may need misting 1-3 times per day depending on humidity levels. Spray them with clean water in a fine mist to avoid over-saturating. If the substrate dries out completely, you’ll need to soak the bags in cool water for 4-8 hours to rehydrate thoroughly. Don’t let them sit in water logged. Proper moisture encourages mushroom growth and prevents contamination.
Providing Good Air Exchange
Mushrooms require fresh air to grow well so adequate air exchange is essential. Avoid tightly enclosing the fruiting bags. Leave space between them if cultivating multiple bags together. You can elevate the bags on wire racks or wooden blocks to allow airflow underneath. Gentle breezes and small fans also help circulate air but avoid directing fans right at the bags. Rotate the bags daily so all sides get exposure. Opening a window briefly to refresh the growing area can provide a boost of fresh air too. Just don’t let temperatures drop too low. Remember, gourmet mushrooms prefer still air but need occasional exchanges of oxygen.
Introducing Light to Initiate Fruiting
Exposing your mushroom bags to light is what triggers the formation of mushrooms. Keep the bags in complete darkness during the mycelium colonization period which takes 2-4 weeks. Once fully colonized, move the bags to a lightly lit area to initiate fruiting. Bright, indirect sunlight or fluorescent light about 12 hours daily is ideal. You should see primordia (baby mushrooms) develop within a week. If growing indoors, set up a simple grow light on a timer to control exposure. Avoid direct hot sunlight which can dry out the bags. Gentle natural light is best for mushroom development.
Harvesting Mushrooms at Peak Maturity
Now for the rewarding part—harvesting your homegrown mushrooms! Check your fruiting bags often as mushrooms mature rapidly, sometimes overnight. Harvest each mushroom by twisting gently until removed from the substrate. Use a knife to cut away any stubborn stems. Pick mushrooms before the caps flatten out for best flavor and texture. They’re optimally mature when the caps just start to curl under. You can harvest mushrooms of any size based on your preference. Try to handle the mushrooms gently to avoid bruising. After the first flush, repeat steps to maintain ideal conditions for additional flushes. Rehydrate and rest bags between flushes.
Caring for mushroom fruiting bags requires attention but very little effort. Following this guide will help you create the right environment for your bags and maximize your mushroom yields. With a bit of practice, you’ll discover how to produce flush after flush of delicious, nutritious gourmet mushrooms!
How To Seal a Mushroom Grow Bag
After adding the seeds to the grow bag, you should close the top and put it on a shelf so that the seeds can start to grow. There are a couple easy ways to do this. The simplest method is to use small pieces of wire.
After inoculating the bag with your spawn, quickly twist the top of the bag and tightly wrap the the wire around the twist. You can use something like this, or any steel wire found at your local hardware store. You could also use zip ties, which are quick and easy but much less cost effective.
Of course, you could always step up your game and use an impulse sealer. If you are pumping through a high volume of bags, an impulse sealer will save you some time and effort, but for small scale grows, it is likely not worth the cost.
One concern about using mushroom bags, especially for large scale commercial operations is the environmental cost. Polypropylene bags aren’t very good for the environment, and they create a lot of trash after a while.
Some growers are looking into using biodegradable mushroom bags, but right now there isn’t anything on the market that can compare to the usefulness and effectiveness of an autoclavable polypropylene filter patch grow bag.
Uses for a Mushroom Grow Bag
There are many awesome ways that you can use mushroom grow bags for mushroom cultivation. The most common uses are spawn bags and sawdust fruiting blocks.
However, if you are making a lot of grain spawn, a grow bag is much better. Mason jars are good for making the first generation of grain spawn or for test batches. Having your spawn in a grow bag makes it easy to break it up so that it can be mixed and colonized more quickly.
It also makes it easier for spreading your spawn to a bulk substrate.
People who have tried to get well-colonized spawn out of a grain jar know that it doesn’t always want to come out. You end up digging it out with a spoon, and risking contamination in the process. Picture trying to get that stubborn ketchup out of a glass bottle. Spawn bags solve this problem.
Most of the time, a large spawn bag has 5 pounds of spawn, which is the right amount in my opinion. It is enough to spawn a small straw log, or several fruiting blocks. You could even use it to inoculate ten more spawn bags!.
Filter patch grow bags are an indispensible tool for making sawdust fruiting blocks. A large bag will typically make a 5 lb fruiting block, including the weight of your spawn. The bag makes it easy to mix your spawn after you’ve planted it, and the filter patch lets your mushroom culture breathe as it grows in the sawdust.
Once the mushrooms have taken over the bag, you can either cut the “x”s or holes in the side of the bag or open it up all the way to let the mushrooms fruit. Cutting the bag so that the edges are at different heights will let you fine-tune the grow block’s humidity.
You can also use a mushroom grow bag as a small fruiting chamber. The top of the bag makes a humid dome for the mushrooms to fruit in. Also, keep in mind that there won’t be a lot of fresh air inside the bag. If you are using it to fruit your mushrooms, make sure you open the top of the bag a lot to let enough fresh air in. You should wait to open the bag until the block is fully colonized. If you do, your bag could get infected.
Some mushrooms will grow inside the bag in interesting ways, notably the Reishi mushroom. Because there is a lot of CO2 inside a bag, the Reishi will grow long, twisted “antlers” instead of the more common “conks.” If you let Reishi grow long enough, it will eventually fruit right through the filter!.
You should probably start with new bags when making fruiting blocks or propagating spawn bags, but you can always use old bags for something else as long as you haven’t cut them open for fruiting.
As an example, used spawn bags are great for cooking small amounts of casing layer on the stove. Just put your casing layer in the bag and put it in a pot of hot water on the stove. To keep most of the bag under the water, you might need to put something heavy on top of it.
You can also reuse the bag to make mini straw logs instead of using poly tubing. The bag should be filled with pasteurized straw and grain spawn, just like when you grow mushrooms on straw.
You could use the bags again for spawn or fruiting blocks, but after several sterilizations, the bag and filter patch become less reliable, so it’s better to use new bags to lower the risk of contamination.
When you purchase spawn bags you need to pay attention to what is specified for the filter. Typically, the filter will be given a micron rating. This simply describes the pore size of the filter. The sizes typically range from 0. 2 micron to 5 micron.
If you want to use your bags for spawn bags or fruiting blocks, you should aim for a micron rating of no more than 0. 5 micron. This will be required to adequately protect your substrate from contamination.
Mushroom bags with a 5 micron filter will let more gas exchange happen, but they are more likely to become contaminated, so they shouldn’t be used for sterile cultivation.
These bags are generally available in a variety of sizes. How big of a bag you need depends on how much substrate (grain) you want to put in it, as well as other things like the size of your sterilizer.
In my experience, the large sized bags are by far the most useful. To give you an idea, a bag of size 8 inches wide by 5 inches deep by 18 inches tall will comfortably hold 5 lbs of supplemented sawdust and grain spawn. You can just fit 6 of these bags in a Presto Pressure Canner.
The bags come in a variety of different thicknesses, with the typical range being 2. 2 mil to 4. 0 mil. Bags of thickness 2. 2 mil bags work fine, but some of them will likely tear when you handle them normally.
If your bag rips post-sterilization, there is good chance that your bag will get contaminated. Thicker bags are less likely to tear, but come at a higher price.
My recommendation would be to go with thinner 2. 2 mil bags, and take reasonable care when handling your bags.
How to care the mushroom fruiting bags after harvesting
How do fruiting bags grow mushrooms?
Inoculation is the first and perhaps most crucial stage when using fruiting bags to grow mushrooms. During inoculation, spawn, spores, or liquid culture of the desired mushroom species are introduced to a sterilized fruiting bag filled with a nutrient-rich substrate.
How do you care for a mushroom grow bag?
To care for a mushroom grow bag, maintain the right temperature, humidity, and fresh air exchange in and around the bag. Keep the substrate moist and provide light if necessary for the type of mushroom you are growing. Here are some additional steps: 5. Harvest mushrooms from your Mushroom Grow Bag when
What is a mushroom grow bag used for?
Mushroom grow bags can be used for sterilizing grain and propagating mushroom cultures (as spawn bags) or creating supplemented sawdust fruiting blocks for growing gourmet mushrooms. If you’re growing mushrooms, you’ll want to be familiar with grow bags. What are mushroom grow bags used for?
Is a bag necessary for mushrooms to fruit?
Mushrooms need specific conditions to fruit, including the right temperature, humidity, and light. Place the bag in a location that meets these requirements. Sometimes, keeping the bag in a dark corner during the colonization phase and then introducing it to indirect light during fruiting can be beneficial.
- The Moderate Growth Rate of the Stunning Edith Bogue Magnolia - April 10, 2026
- Cultivating Vibrant Dahlias in Garden Beds – A Complete Growing Guide - April 10, 2026
- Mediterranean Pink Heath in Summer – Tips for Care and Maximizing Bloom - April 9, 2026