Good, mature roots from healthy plants usually keep well, and any of several ways to store tubers should work 90 to 95 percent of the time. But tubers from some dahlia types don’t keep well, and tubers from some cultivars are very few and far between. For these varieties, one should consider planting extras and growing pot roots.
Care of tubers starts with proper treatment during the growing season. Most dahlias start making tubers in the spring, but the roots don’t become fully grown until the end of the growing season.
Before digging, go through the garden and throw away any weak stock. Pull up and throw away any plants that were weak during the growing season or that didn’t get good blooms. Send any plants that showed signs of a virus that could hurt the plant or bloom to the nearby landfill or incinerator. It is important to make sure that each stake has the correct cultivar name and that the labels are easy to read before the frost.
The longer the tubers are in the ground to cure, the more fully developed they are and the more likely it is that they will last through the winter. Along the Pacific Coast, you can start digging before frost or the rainy season, and you may need to if you have a garden with thousands of plants. However, small growers should really think about letting their dahlia roots keep growing and maturing for as long as possible. In most places, there is a light frost that kills partially opened flowers and top leaves, followed by a hard freeze that may happen a few weeks later. After light frosts, dahlias keep growing and their roots keep getting stronger. They may even keep growing after the first killing freeze, depending on how deep the freeze affects the soil. ).
They tend to come out of the clumps more easily if you cut them a few days before you dig. However, if water gets into the stem, it can promote crown rot and ruin the tubers. Also, if you cut all the stalks with the same tool and then leave the plants in the ground, the tool could spread the virus to other plants. One part bleach to ten parts water should be added to cutting tools before moving from one plant to the next to stop the virus from spreading. (Check out the ADS virus research reports for other ways to get rid of viruses on tools and people’s hands, or use sprays.) Those who cut the stalks a few days early should put aluminum foil over the open stalk to keep water from going down to the crown. (After the first frost, the stems always seem to have a lot of water in them, so there will be some water there.) ) Leave enough stem (at least a few inches) to facilitate handling the clumps easily.
When the tops are cut off, the variety name can be separated from the bunch. Carefully keep the tag with the proper clump at all times until finishing marking the individual tubers. Unmarked tubers (variety unknown) are worth a lot less than marked ones. Along with the variety name, carefully list the best plants—grow plants from the best stock, not the worst.
Dig and handle the clumps with care. A dahlia tuber’s neck is fragile, especially right after digging. To get rid of the clumps, dig around the plant on all four sides, about a foot from the main stalk. Once all four sides are free of longer feeder roots, carefully lift the clump with the shovel or tined fork. Remove any big clumps of dirt with care, and then turn the clump over to drain any water in the stem. If you dig early in the morning and leave the clumps out for a few hours, the tubers will be much less likely to break. After a couple of hours, one can remove the dirt with less opportunity of breaking fragile tubers.
When ready to clean the clump, use a garden hose to wash away as much dirt as possible. (Dirt contains microorganisms, so one wants to remove the dirt before storing the divisions. ) At this time, the clump is ready for cutting.
Cutting clumps presents another tradeoff. It is easier to separate roots in the fall than in the spring, when some types get so hard that you would need a power saw. On the other hand, it is harder to find the eyes before they start to sprout. Many growers divide their roots in the fall. Most gardeners have more time in the fall than in the spring, and it is easier to clean and fungicide divisions than clumps. Growers who aren’t sure where to look for the eyes can cut off the tops a few days before they plan to dig. This gives the eyes time to become more visible. Alternatively, just cut — some divisions will have eyes.
If a type of tubers is hard to keep or makes tubers with very thin necks and crowns, or if the tubers are very small and thin, people who aren’t very experienced may want to split the clump into sections and leave some tubers together. One can keep the tubers from each division together with 3/4 inch masking tape.
Another suggestion for varieties whose roots are difficult to keep is to grow the plants in pots. Keep a tuber or cutting with roots in a 4-inch pot. Plant the pot so that the top is about an inch below the ground. After that, care for the plant like you would any other dahlia in the garden. Because of the inch of soil above the pot, the feeder roots will come above the pot. Even if you treat the plant like a show dahlia instead of a pot root, this is how the roots form and stay healthy.
Roots grown in pots are usually not as big as roots grown outside. This is because most of the time, growers choose varieties that don’t make a lot of roots to put in pots. Cut off the stalks below the top inch or two to get tubers from pots. Then, dig up the pot. Cut away any hair-like roots that extend from the pots. One may shorten thick tubers that extend from the pot. One method to treat potroots is to remove them from the pot. (If the clump is pot bound, break the pot to get the clump out. Wash the clump, pull out the hair roots, let it dry for a day or two, and then put it in a bag with vermiculite. You could also leave the potroots in the pots, put the name tag in the pot, and wrap the whole pot in six sheets of newspaper. Place the wrapped pots in brown grocery bags and store them with other tubers. In the spring, remove the pot and start watering. After a few weeks, you can either take cuttings or, once the eyes have shoots, take the roots out of the pot, separate them, put them back in the pot, and start each section as its own plant.
In dividing clumps, each division must have a piece of the crown with an eye. Remove all of the stem, because any remaining tends to promote crown rot and ruin the tuber. ALWAYS STERILIZE CUTTING TOOLS AFTER DIVIDING EACH CLUMP. The ADS virus research project found that cutting tools can spread the virus from one plant or clump to other tubers, which will damage more of the stock. One part bleach to ten parts water is the cheapest and most effective way to kill the dahlia virus on hands and cutting tools. Some years ago, experienced growers said that the best way to clean cutting tools was to heat the blades over a flame until they were red hot and then let them cool before using them again. Hook-shaped carpet knives are cheap and can be bought at a hardware store. By rotating several knives, you can save time waiting for each one to cool down after sterilizing it.
While cutting the clumps, carefully inspect the divisions. Almost everyone throws away the “mother root. ” Sprouts from the mother root tend to rely on it for nutrients and develop fewer feeder roots. With poor feeder roots, the result is poorquality plants and tubers. One prominent grower would save the mother root, use it for cuttings, and then throw it away.
Tubers need only be large enough to keep well through the winter without shriveling. In fact, some experienced growers like small roots better than big ones unless they only want to use the roots to make cuttings and then throw them away. Some varieties seem not to push to develop feeder roots if their tubers are large. When it comes to these types, smaller tubers (or big tubers with the top inch or two cut off and thrown away) will grow stronger plants and better flowers than bigger tubers. However, smaller tubers are preferable only if they are fully mature. Immature roots from late, partially formed laterals seem more likely to rot than larger, more mature roots. To find a middle ground, use bigger, older roots but cut off all but the top few inches and throw away the rest. Keep enough of the tuber to mark its variety name clearly (see below). For the best results, start a few tubers per clump in a 4-inch pot in the spring. Let them all grow for a few weeks, and then plant the strongest plants in the garden.
Back to the clumps, remove all feeder roots and any stalk (both promote rot). If the inside of the crown has any brown or rusty colored areas, cut them away. The discoloration probably indicates crown rot, and the tuber is unlikely to keep. Use a hose or an indoor laundry tub (if it’s cold) to wash the tubers again after cutting them into pieces. This will get rid of any dirt that was missed when the clump was washed the first time.
After rewashing, cut the end of the tuber. Any brown or rusty colored area in the middle or part of the way out indicates rot. If any of these things happen, cut away toward the crown to see if there is a clear section of the tuber that includes the crown. If so, the tuber should be viable. If not, throw it away.
Some tubers have insect holes part way down from the crown. Insect holes are only a problem if they make room for an organism that will promote rot. Cut above the holes made by the bugs and look for a part of the tuber that doesn’t have any brown or rusty spots (like in the last sentence).
Dahlia tubers are the swollen stems that dahlia plants produce underground to store energy over winter, Properly cleaning freshly dug tubers is an important step before storing them for the winter Removing all soil and debris prevents rotting or disease issues from arising during storage
Follow this complete guide to learn how to thoroughly clean dahlia tubers after digging them up in fall.
When to Dig and Clean Dahlia Tubers
Dahlias should be dug up in fall after the first light frost blackens the foliage Avoid digging too early or the tubers may not be fully mature
Ideally dig when:
- Plant growth slows down
- Stems begin dying back
- Days become shorter and cooler
This is generally 4-6 weeks before the ground freezes in your area.
Digging Up Dahlia Tubers
Use a garden fork to dig tubers, taking care not to stab or slice them. Dig about 12 inches away from the plant’s center and lift out the entire clump.
Shake or rinse off excess soil still attached to the clump. Cut stems back to about 2 inches above the top of the tubers.
Why Cleaning is Important
Thoroughly cleaning dahlia tubers right after digging serves several purposes:
- Removes soil that harbors disease organisms
- Allows inspection for damage or rot
- Prevents tubers drying out before storing
- Removes nesting spots for insects or rodents
- Improves storage by eliminating excess weight and bulk
Proper cleaning is a vital step in maintaining healthy tubers.
How to Clean Dahlia Tubers
Follow these steps to thoroughly clean dahlia tubers after digging them up:
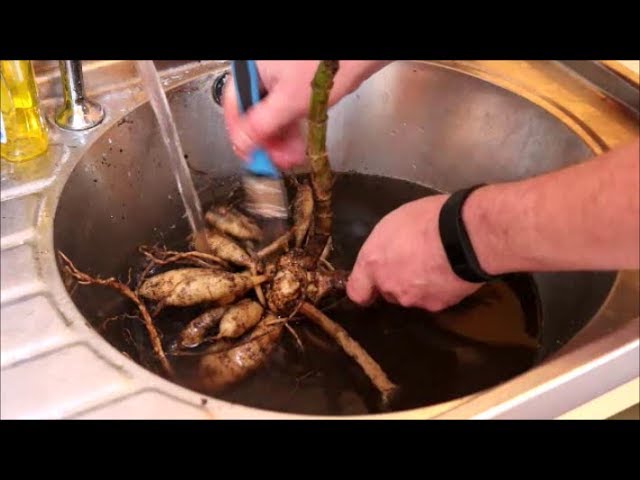
1. Wash the Clumps
Use a garden hose or bucket of water to thoroughly rinse the soil off the dahlia tubers. Spray or soak the clumps to remove all soil.
2. Dry Upside Down
Stand the washed clumps upside down to allow water to drain out of the tuber crowns. Leaving them upside down prevents water pooling and possible rotting.
3. Separate the Tubers
Once drained, carefully separate the individual tubers from the clump. Use a clean, sharp knife to divide them, sterilizing between each cut.
4. Inspect for Damage
Check each tuber, discarding any with rot, significant insect damage, or other defects. Look for discoloration or soft spots that indicate rot.
5. Wash Again
Give the separated tubers another wash to remove any remaining soil or debris. Use a soft brush to gently scrub if needed.
6. Dry Thoroughly
Allow the clean, separated tubers to dry completely before storage. Lay them out in a single layer in a well-ventilated area out of direct sun.
7. Label Varieties
Mark each dry tuber with its dahlia variety using a permanent marker. Proper labeling prevents mixing up types later.
Storing Cleaned Tubers
Once thoroughly dried, the cleaned tubers can be packed for winter storage:
- Place in breathable bags like mesh onion sacks
- Use slightly dampened vermiculite, peat, or wood shavings as packing material
- Store in a dark, cool (40-50°F) spot like a basement or unheated garage
Regularly check stored tubers, removing any that show signs of rotting. Proper cleaning and careful handling prevents issues from arising over the winter.
In spring, the tubers can be retrieved and replanted for another season of gorgeous dahlia blooms!
FAQs About Cleaning Dahlias
Should I use any disinfectants when cleaning tubers?
Most experts advise against using chemical disinfectants when cleaning tubers. The main purpose is to remove soil and debris rather than kill bacteria. Good airflow while drying provides enough disease prevention.
How can I avoid damaging tubers when digging?
Use a garden fork rather than spade when digging. Take care not to stab or slice into tubers. Dig at least 12 inches away from the plant’s center to avoid severing main tuber crowns.
Is it okay if some soil remains stuck to tubers?
It’s best to remove all soil through washing. Any remaining clumps provide places for insects or disease to establish. Be sure to thoroughly scrub off all soil.
Should I cut off sprouts or stems before storing?
Yes, trim stems down to about 2 inches above the topmost tubers. Remove any small sprouts as well. This prevents the tubers losing moisture through the stems and foliage.
What if some tubers are quite small?
Even tiny peanut-sized tubers can be saved. They may not sprout the first season after planting but can still grow into productive plants later on. Mark them separately so you don’t confuse them with sets.
Why shouldn’t tubers dry in direct sun?
The heat can actually cook tubers if left drying too long, causing tissue damage. Gentle shade drying prevents harming the tubers. Turn them periodically for even air exposure.
Thoroughly cleaning dahlia tubers is a simple process that pays off through healthy tubers and bountiful blooms for years to come. Follow these tips to properly prep your tubers for winter hibernation.
Treating for Fungus and Marking the Tubers
Once the divisions are cut, apply a fungicide to the cut ends. Cleary’s 3336 is systemic and low in human toxicity. Captan or sulfur can also be used. You can use Captan or Sulfur on their own, or you can mix them with water and dip the roots in it. I have not heard any concern about spreading virus by using the dip for successive clumps. When using a liquid dip, place the tubers from one clump in the solution for about 15 minutes. If you want to dry the tubers, take each clump and put it in an empty shoe box or other open container. Never dry tubers on concrete, because it tends to draw the moisture from tubers and make them shrivel. Keep the tag with the cultivar name with the clump at all times. If you have a few containers, you can put each clump in its own dip and let it soak for about 15 minutes. Discard any tubers that float in a dip, because they will not keep. I have been storing potatoes for more than 30 years and have never seen a difference in how well they keep with or without a fungicide dip. That’s why I no longer dip my potatoes. Before putting the crown or tuber away, it’s most important to cut out any fungus that you see.
After cutting, put enough information on each division to tell what variety it is and, if there are more than one of each type, which plant made the tuber. An indelible pencil works well if the tuber is a little wet. Have a small container of water nearby to wet the pencil. One indelible pencil should mark tubers from more than 100 clumps. Since indelible pencils are toxic, never put the tip into the mouth.
The easiest method to mark tubers is to write the name of the variety. Codes can be used instead of long names, but DO NOT LOSE THE CODE! Some commercial growers write or stamp a number for each type of plant. Also, mark any really good tubers in some way, like with an asterisk (*), so you can use them to make cuttings for next year.
After cutting, dipping, and marking the tubers, let them dry. For small roots, this will take about 24 hours. For medium to large roots, it will take between 24 and 36 hours. Drying time varies depending on temperature and humidity. Do not dry the divisions on cement, because cement tends to draw out water and promote shriveling.
If you can’t use an indelible pencil, you can still name the tubers after they’ve dried with a thin indelible marker. The problem is that these markers do not always write well on tubers. Be certain to have several fresh markers and rotate them. Nursery markers can be bought in some nursery catalogs. Cheaper markers can be bought at office supply or drug stores. Indelible pens work only on completely dry tubers. When a tuber is wet, the ink spreads and whatever one writes becomes unreadable.
Some growers attach labels with wires to mark each tuber. One grower cuts strips from empty plastic detergent bottles, tags them with plastic wire and an indelible marker to show the name of the cultivar.
Storing Tubers over Winter
There are numerous methods to store tubers over the winter. As long as the process keeps the tubers cool (above freezing but ideally below 50 degrees) and lets the tubers and storage medium exchange moisture, all of them seem to work about the same. The containers, however, must retain the moisture in the storage medium. If the moisture escapes, the tubers tend to shrivel.
Vermiculite in plastic bags seems to be what most growers use to store tubers that have been dry for one to two days. Coarse vermiculite works better than the fine horticultural vermiculite. One view is that fine vermiculite keeps too much water on the tubers, which speeds up their growth and sprouting. Also, vermiculite dust is hard on the lungs. The finer the vermiculite, the worse that problem.
A prominent grower in the Northwest would use slightly moistened sand in five gallon containers. The tubers kept very well but developed sprouts and feeder roots earlier than those in coarse vermiculite. Also, sand is much, much heavier. Perlite isn’t a good medium because it doesn’t soak up water, and the dust it makes is bad for your health.
Experienced growers warn against peat moss. Dry peat moss tends to make tubers shrivel while moist peat moss tends to promote rot. Numerous growers use wood chips to store tubers, but some warn that wood chips leach moisture from roots. An inexpensive source of wood chips is pet bedding (available from pet supply outlets). Specify the higher quality wood chips that are supposed to be dust free.
Dipping tubers in paraffin wax was fairly popular in the Northwest several years ago. Tubers dipped in wax tend to be very slow to develop eyes. For cultivars that develop eyes very late, storing the tubers in wax would seem unwise. For varieties that develop sprouts and feeder roots in December, the wax method would seem more sensible. However, the wax treatment has not become popular despite several articles promoting it. This method hasn’t caught on with many people, which suggests that the extra work isn’t worth it.
Numerous containers work well for storing tubers. While the discussion assumes coarse vermiculite, one can substitute wood chips without any additional changes. Add some vermiculite, put in some tubers, then add more vermiculite. Some growers use a separate bag for each clump. If a clump generates many divisions, one may need two bags. Each bag, however, must contain at least as much vermiculite (in volume) as tubers.
Fill the vegetable bags with food, then stack them in brown grocery bags that have been folded in half. Store them in the coolest part of the basement or somewhere else that stays between 40 and 45 degrees. An insulated garage with a space heater for the coldest part of winter works well for some growers. Different growers say the bags need to be airtight, while others say they only need to be twisted so a little air can get out. Some growers in areas with very humid winters pierce holes in their plastic bags. It is generally better to have bags that keep air out if the roots are small and thin and the humidity is low in the winter.
One can also place the tubers in Styrofoam, wood, or cardboard containers with vermiculite separating layers. If one uses a wood or cardboard box, moisture could escape from the vermiculite. Line all sides of the container with newspaper that is at least eight sheets thick to keep the water in. Make sure the lid stays closed.
One should store the tubers at a nearly constant, cool temperature. Most growers seem to recommend a range of 40 to 45 degrees. Freezing temperatures ruin tubers, and higher temperatures encourage microorganisms and fungus to destroy them. Also, warm temperatures prompt tubers to develop sprouts and feeder roots too soon. One well-known grower cools and humidifies their plants by using an old, unused refrigerator that is not plugged in and filled with ice in a plastic gallon container that is changed every two weeks.
One should inspect tubers monthly during the winter. Throw away any tubers that show signs of rotting. By checking frequently, one can throw away rotting tubers before the rot spreads to otherwise healthy tubers. Some growers say that rot won’t spread if you store tubers so that they don’t touch (like in a wooden box but not a plastic bag). A rotting tuber releases a gas that hastens the developing of eyes and sprouts. A rotted tuber can therefore be useful for tubers that are very late to develop. If someone uses a rotten potato for this purpose, they should keep an eye on the bag often to make sure the rot doesn’t spread to the healthy late potatoes.
To help the eyes grow, move the tubers to a warm place (dark but room temperature) in early spring. Every week to ten days before taking the tubers out, add a teaspoon of water per quart of bag space. After adding the water, retie the bag and put it into a warm location.
How To Clean & Wash Your Dahlia Tubers For Winter Storage
- How to Grow Gorgeous Climbing Roses on a Wooden Fence - March 24, 2026
- Avoid These Plants When Companion Planting with Oregano - March 24, 2026
- 15 Great Trees to Plant Near Your House - March 24, 2026