It’s hard to keep track of cultures, clean grains, make spawn, mix substrates, and do all of that without contaminating anything that could ruin the whole project.
Of course, if you love growing mushrooms as much as I do, all those fancy words will sound great to you! But if you are new to the process, you may be wondering:
You could always use a mushroom kit, but if you wanted a much more satisfying experience, you might want to grow mushrooms outside in a straw bed.
In fact, all you need to grow mushrooms outside is water, pre-made grain spawn, a bundle of wheat or oat straw, and a poly or tarp sheet. This is my favorite way to grow mushrooms, and I try to have at least one or two garden beds with fruiting mushrooms in the spring, summer, and fall.
You will get mushrooms, but the results won’t be as consistent as they would be if you grew them from properly colonized substrate in a very controlled setting.
Although it might not be easy, you should be able to grow so many mushrooms that you won’t know what to do with them all.
1. Grain Spawn You can either make the grain spawn yourself, of buy pre-made grain spawn. It’s really cool to make your own grain spawn (you should definitely try it!), but it’s not very easy for beginners. There are many great places that you can buy pre-made grain spawn online. If you live in the USA or Canada, you can even get it from FreshCap.
2. Straw You can use either wheat straw or oat straw. The best bet is to find a local source of straw. If you live anywhere near a farm you’ll find that many farmers are almost giving it away. In my area, I can get a 40lb bale of straw for $3. If you can’t find a local source, you can always but some on Amazon.
3. A Poly sheet: After you plant the mushrooms, you’ll need to cover them with something to keep them moist and safe while they grow. You could also use a tarp. 4. Some Space in the Garden Of course, you’ll also need some room in the garden. Try to find a spot that gets the least amount of direct sunlight. A great spot is in the shade all day and has tall grass or bushes around it to help keep the humidity high.
The kind of mushroom you choose to grow will have a huge impact on your results.
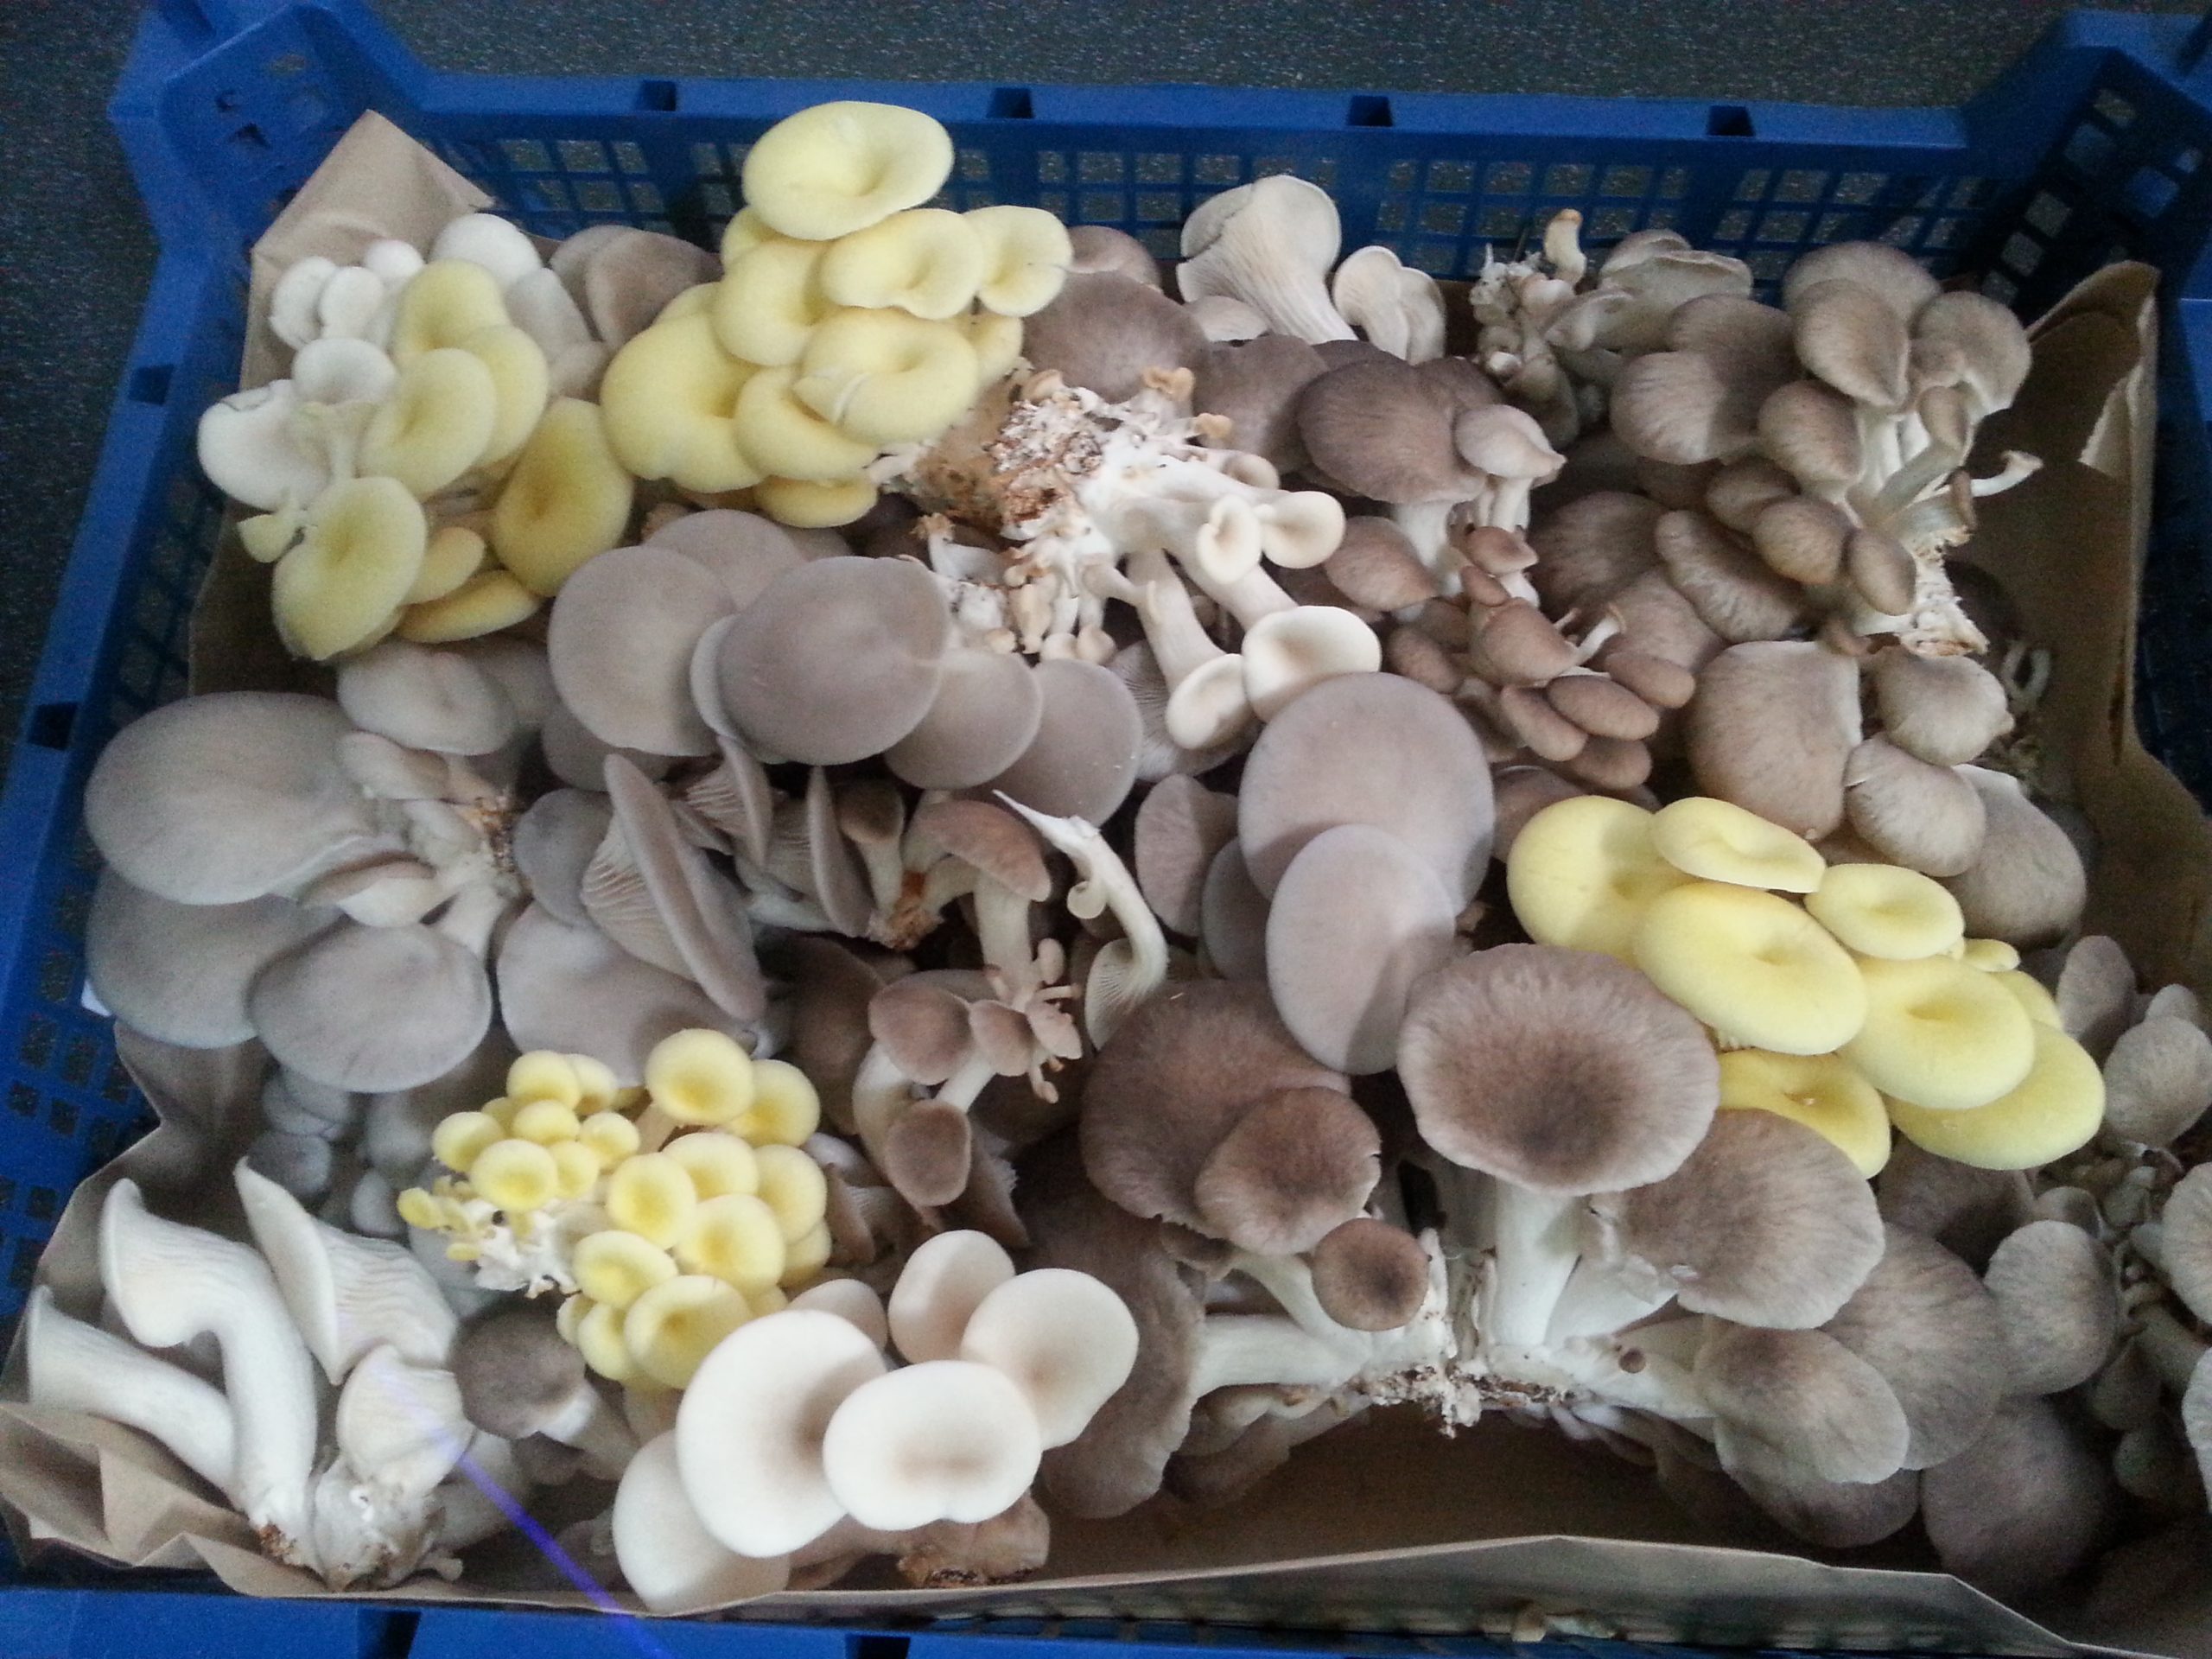
Ideally, you want a species that grows fast on straw, and is resilient enough to withstand fluctuating conditions. Blue Oyster is a great choice if you live in a mild climate because it grows quickly and bears a lot of fruit on straw. It also does a good job of keeping other plants away.
If you live in a warmer area, you should stick to tropical species like the Pink or Yellow Oyster. It’s not likely that this method will work with Shiitake or species that like wood, like Lion’s Mane or Reishi.
You are ready to grow as soon as you have mushroom grain spawn and a nice, shady spot chosen.
Growing vibrant, fresh mushrooms may seem intimidating, but it can actually be quite simple with the right approach. Outdoor mushroom cultivation lets you work directly with nature to produce a bountiful harvest.
Instead of complex indoor growing setups, all you need is logs, a shady spot and mushroom spawn to grow your own gourmet mushrooms outside. This article will walk you through the straightforward process step-by-step.
An Overview of Outdoor Mushroom Growing
Outdoor mushroom growing centers around inoculating logs or wood substrates with spawn, then letting nature take its course. The basic steps are:
-
Obtain mushroom spawn and tools
-
Source and prepare substrate logs
-
Inoculate logs with spawn
-
Set logs in suitable growing area
-
Maintain proper moisture as logs colonize
-
Harvest mushrooms as they form
It’s a natural, hands-off approach compared to meticulous indoor cultivation. However, a few key factors impact success
-
Mushroom species/strain – Choose an outdoor variety suited for logs
-
Log condition – Use freshly cut, unseasoned logs
-
Growing location – Select a shady spot with consistent moisture
-
Spawn coverage – Fully inoculate logs to prevent contamination
Follow the guidelines below, and you’ll gain a bountiful outdoor mushroom crop as the spawn colonizes the logs and fruits.
Step 1 – Obtain Spawn and Supplies
The mushroom type you select will influence results. Look for outdoor varieties of Oyster, Shiitake, or Lion’s Mane. Purchase dowel spawn designed for inoculating logs. You’ll also need:
-
Drill and bits
-
Cheese wax or beeswax
-
Inoculation tool
-
Paper towels
-
Pruning shears
Step 2 – Source and Prepare Logs
Mushrooms grow best on fresh cut logs between 3-6 inches diameter. Ideal wood types include oak, maple, poplar, beech, alder, and birch. Avoid pine.
Logs should be cut during dormancy, between late fall and early spring. Cut logs into lengths around 32-48 inches. If possible, submerge whole logs in water for 24 hours before inoculating to prevent contamination. Otherwise, simply hose them down.
Step 3 – Inoculate the Logs
Use a drill to make evenly spaced rows of holes 3/4 inch wide by 1 inch deep. Stagger holes a few inches apart. Wipe dust away and load holes with spawn. Aim for around 100-150 dowels per log.
Plug cavities with beeswax to retain moisture. Label logs with mushroom type and date. Inoculation is complete!
Step 4 – Select an Outdoor Growing Area
Mushrooms need shade and steady gentle moisture to thrive. Position logs in a shady spot under trees or hedges. Lean them diagonally against supports to provide adequate drainage.
Bury logs partially underground or surround with mulch to maintain humidity. Aim for 50% to 80% shade in a place with indirect sun.
Step 5 – Maintain Moisture as Logs Colonize
Fungal mycelium will spread through logs over several weeks or months. Monitor moisture weekly. If logs feel dry, lightly mist or place a sprinkler nearby to hydrate.
Avoid oversaturation. Mycelium grows best at consistent levels, not overly wet or dry. Resist the urge to disturb logs while colonizing.
Step 6 – Harvest Mushrooms
Pinheads will eventually form, growing into full mushrooms. Pick mushrooms when caps enlarge but before edges curl under. Twist gently to remove. Use pruners for clusters.
Harvest all mature mushrooms, as more will continue forming. Under ideal conditions, logs can produce edible mushrooms for years. Enjoy your homegrown bounty!
Tips for Troubleshooting Common Outdoor Growing Issues
Despite the ease of outdoor mushroom cultivation, you may encounter some problems:
-
Contamination – Discard logs if you see brightly colored mold.
-
Pests – Use natural repellents to deter slugs/snails.
-
Dry logs – Increase watering frequency if logs dry out.
-
Slow colonization – Be patient as mycelium slowly spreads through logs.
-
Malformed fruits – Improve moisture consistency for better development.
Don’t let setbacks discourage you. Proper preparation and diligent care will lead to success and let you enjoy the fruits of your labor.
Alternative Substrates for Outdoor Mushroom Growing
While logs are ideal, you can also use:
-
Wood chips – Good for Oyster mushrooms. Pasteurize to kill competitors.
-
Straw/hay – Best for fast-colonizing Oyster varieties. Keep lightly moist.
-
Sawdust – Supplemented sawdust can grow many types. Maintain proper moisture.
-
Wood pellets – Soak hardwood pellets in water to expand, then inoculate.
Experiment with different pasteurized mediums in a shaded garden to expand your outdoor growing possibilities. The same general inoculation and care principles apply.
Growing Mushrooms Outdoors is Simple and Rewarding
With a basic grasp of outdoor cultivation techniques, you can successfully produce multiple flushes of mushrooms on logs, year after year.
It’s an eco-friendly way to turn a shady corner of your property into a vibrant mushroom farm. The steps are straightforward, but the rewards are immense.
Homegrown mushrooms are virtually guaranteed if you select responsive strains, prepare logs properly, and provide adequate moisture during colonization and fruiting. Be diligent, and you’ll reap bountiful, delicious mushrooms.
The satisfaction of nourishing your family with mushrooms cultivated through your own effort makes the journey well worthwhile. Set up an outdoor mushroom patch this season – it’s easier than you think!
Frequently Asked Questions About Growing Mushrooms Outside
If you’re new to outdoor mushroom cultivation, you likely have lots of questions. Here are answers to some of the most common inquiries:
What’s the best type of wood to use?
Hardwoods like oak, poplar, maple, and alder work well. Avoid pine, which contains resins that inhibit mushrooms.
Should I use logs or wood chips?
Logs are simpler for beginners to start, while wood chips offer faster fruiting. Both work!
How long does it take mushrooms to grow outside?
Pinheads and fruits will form within 2-12 months after inoculating logs or wood chips. Good things come to those who wait!
Do mushrooms need sunlight to grow outside?
Not directly. Pick shady spots that get bright indirect light. Some sun helps trigger fruiting.
What causes mushrooms to stop fruiting outdoors?
Declining moisture, depletion of nutrients, competition from other fungi, or temperatures extremes can cause a drop in yields.
Can I reuse mushroom logs?
Logs usually produce for 3-5 years before becoming depleted. Stagger your log harvesting to ensure a continual supply.
Is outdoor mushroom growing difficult?
It’s quite simple compared to meticulous indoor cultivation methods. Just follow the basic steps outlined in this article.
Ready to Grow Your Own Mushrooms?
With a shady spot, quality spawn, freshly cut logs, and proper care, you’ll fill your landscape with an edible bounty. Mushroom growing is hugely rewarding.
The satisfaction of tending fungi from spawn through harvest is a joy. And there’s nothing better than cooking up mushrooms you’ve fostered using natural principles handed down through generations.
If you have any other questions about outdoor cultivation, don’t hesitate to ask! I’d love to help you get started and watch your mushroom logs flourish.
Step 2: Layer the Straw and Spawn
Place a thin layer of straw down (about 1-2” thick), covering the whole area of the garden bed. Then, take your grain spawn and sprinkle down a thin layer evenly throughout the whole bed. As much as possible, spread the spawn out so that it doesn’t stick together.
You should do this three or four times, adding more straw and spawn each time until you run out of spawn.
As we already said, you should use 5 pounds of spawn for every 18 to 20 square feet of garden space. You can certainly use more if you wanted to, although you will see diminishing return pretty quick.
Don’t spread the spawn out too thin either, because it needs a certain amount to fully colonize the straw and start working.
When you’re done with spawn, cover the whole bed with a thin layer of straw for the last layer. Make sure there is no large area of exposed spawn.
Step 1: Clear out an area for your garden.
5 lbs of grain spawn will cover about 18-20 sqft of garden space.
Make sure that the area is reasonably clean and level. If the bed is going to be built right on grass, you might want to dig it up or put some landscaping fabric over it so the grass doesn’t just grow in.
I decided to just use a few large pieces of cardboard to lay down under the bed.
I chose a 3 ft x 6 ft (18 sq ft) area with tall grass and trees around it for my oyster garden bed. I dug out the grass and weeds and flattened everything. I also laid down some 4 x 4’s and cinder blocks to define the edges of the garden. Nothing fancy that’s for sure, but it does the trick!.
Outdoor Mushroom Beds | The Easiest Way to Grow Edible Mushrooms in Your Garden or Back Yard!
- The Moderate Growth Rate of the Stunning Edith Bogue Magnolia - April 10, 2026
- Cultivating Vibrant Dahlias in Garden Beds – A Complete Growing Guide - April 10, 2026
- Mediterranean Pink Heath in Summer – Tips for Care and Maximizing Bloom - April 9, 2026