How do you make moss balls for home decor that look nice? A quick and easy project. Perfect DIY spring craft idea for any spring home decor.
These cute little DIY moss balls make me so happy. And yes, it’s possible that I have a moss problem.
Let me explain. I can’t get enough of the spring-like green plant that grows in the worst places.
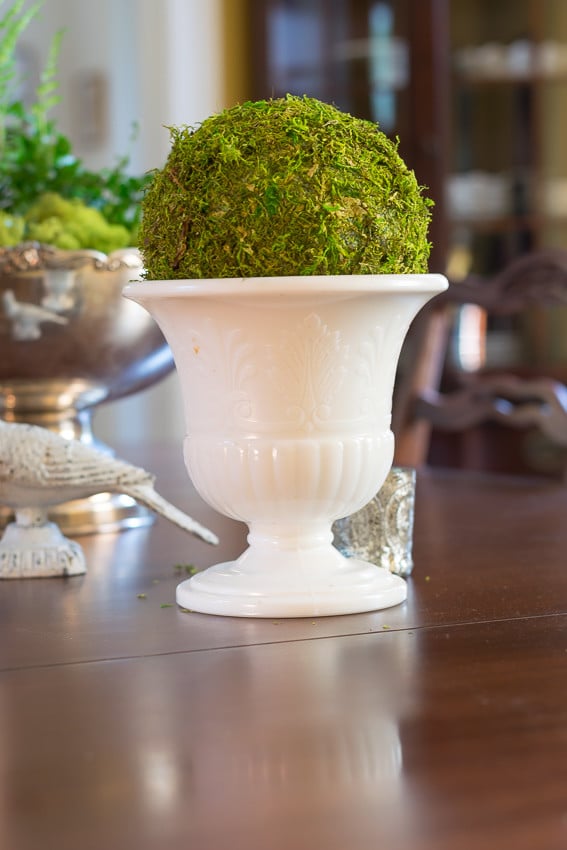
I really liked Scotch Moss earlier this spring, but it didn’t do well on my dining room table as part of my indoor spring decor. Oh well, it can grow almost anywhere. Having a new family member, Quinn the kitten (whose only name is “Peep”), who also has a moss problem might have had something to do with it.
Being far away, I was happy to admire the moss, but Peep had to dig it up and spread it out on my dining room table. Surprisingly, it eventually just kicked the bucket.
I felt bad for the moss, but what to put in my grandmother’s milk glass urns was more important to me. Moss still makes me feel all the feels, but I knew I had to do something other than buy another live moss plant because of “Peep the Kitten.” I was really looking forward to creating some spring crafts for my DIY spring decor.
I liked the idea of moss balls, but I didn’t see any when I went on a “fill the milk glass urns” adventure. So, I decided to make my own. I know,’ shock face’? Yep, DIY moss balls it is!.
Moss balls are a fun craft project and beautiful addition to home decor. Also called kokedama in Japanese these mini gardens wrapped in moss are living art. With just a few simple materials you can easily make your own moss balls.
Read on for a complete step-by-step tutorial on crafting moss balls from start to finish. We’ll cover everything from choosing plants and moss to shaping, securing, and displaying your creation Let’s get started!
What is a Moss Ball?
A moss ball consists of a plant’s roots encased in a ball of soil or other growing medium, all wrapped up in a covering of live moss. The moss thrives in the humid microclimate next to the soil and helps retain moisture. Mosses naturally grow in clumps or mats, so forming it into a ball shape takes some doing.
This charming living art form originated centuries ago in Japan. Moss balls are also known as kokedama which translates to “moss” (koke) and “ball” (dama).
Materials Needed
To make your own moss ball, you will need:
- Small indoor plant like African violet, orchid, or fern
- Sheet moss or Spanish moss
- Sphagnum peat moss
- Bonsai soil or potting mix
- Floral stem wire and cutters
- Long wooden floral pick
- Scissors
- Bowl of water
- Mist spray bottle (optional)
Step 1 – Choose a Plant
Select a small houseplant that will thrive in the humid environment inside a moss ball. Consider compact houseplants like:
- Air plants
- African violets
- Mini orchids
- Small ferns
- Peperomia
- Nerve plants
- Creeping fig
- Prayer plants
Succulents and cacti don’t do well as they require excellent drainage. Avoid plants prone to rotting like African violets.
Step 2 – Make the Soil Base
Combine equal parts peat moss and bonsai soil or potting mix in a bowl. Gradually add water, mixing constantly with your hands until you achieve a firm yet malleable consistency. Form the mixture into a ball about the size of a small orange or grapefruit.
Step 3 – Add the Plant
Gently remove the plant from its pot. Shake off any old soil clinging to the roots. Make a hole in the soil ball and carefully place the plant’s roots inside. Push soil around the root mass, leaving just the top of the plant exposed.
Step 4 – Wrap in Moss
Soak sheet moss or Spanish moss briefly in water until pliable. Place the moss on a flat surface. Put the soil ball in the center and lift the edges of the moss up around it. Wrap moss over the soil, enclosing it completely so no soil shows. Mist with water to help the moss adhere if needed.
Step 5 – Secure the Moss
Use floral wire to wrap around the moss-covered soil ball. Begin at the top and wind downwards, making at least 2 crisscrossing passes over the surface. Twist the ends of the wire together once the ball is fully wrapped. Trim off any excess.
Step 6 – Add Support
Poke a long wooden floral pick down through the center of the ball for stability and support. Angle it if hanging the ball.
Step 7 – Display Your Moss Ball
Show off your handmade moss ball in a wood bowl, hanging from fishing line, atop driftwood, or displayed in a clear vase or jar. Keep away from direct sun which can dry it out.
Caring for Your Moss Ball
-
Water by submerging the entire moss ball in room temperature water when it feels lightweight and dry.
-
Soak for 10 minutes then allow excess water to drain off before returning to its spot.
-
Mist occasionally between waterings to boost humidity.
-
Give weak fertilizer monthly.
-
Repack in fresh moss annually as the old moss dies off.
-
Repot in a larger moss ball or pot if the plant outgrows its space.
Tips for Making Perfect Moss Balls
-
Choose small, slow growing plants that like humidity.
-
Mix clay-heavy bonsai soil with peat for the growing medium.
-
Wrap moss over the ball very thoroughly leaving no gaps.
-
Use floral wire for a seamless hold and clean look.
-
Support larger moss balls with a pick or driftwood piece.
-
Display out of direct sunlight and heat sources.
-
Allow new moss balls to stabilize for 1-2 weeks before watering.
-
Check moss balls daily and water at first sign of dryness.
Get Creative with Moss Balls!
Once you get the basic technique down, let your creativity run wild! Here are some fun ways to use your homemade moss balls:
-
Make a moss ball terrarium or bottle garden for a self-contained ecosystem.
-
Craft a moss ball bonsai tree for a miniature garden.
-
Group them together for a striking moss ball centerpiece.
-
Hang moss balls at varying heights from fishing line.
-
Nestle moss balls into a tray of pebbles and gravel.
-
Display them in clear glass bowls or jars to showcase the moss.
-
Give made-to-order moss balls as gifts to fellow plant lovers.
The possibilities are endless when you make your own moss balls. It’s a soothing activity and they bring a natural, earthy feel to indoor decor. With proper care, these living works of art can thrive for years!
Hopefully you now feel equipped to begin crafting your own gorgeous moss balls. Just take it step-by-step and have fun making mini planted worlds encased in green. Your homemade moss balls will be a lovely addition to any home.
How to make a moss ball?
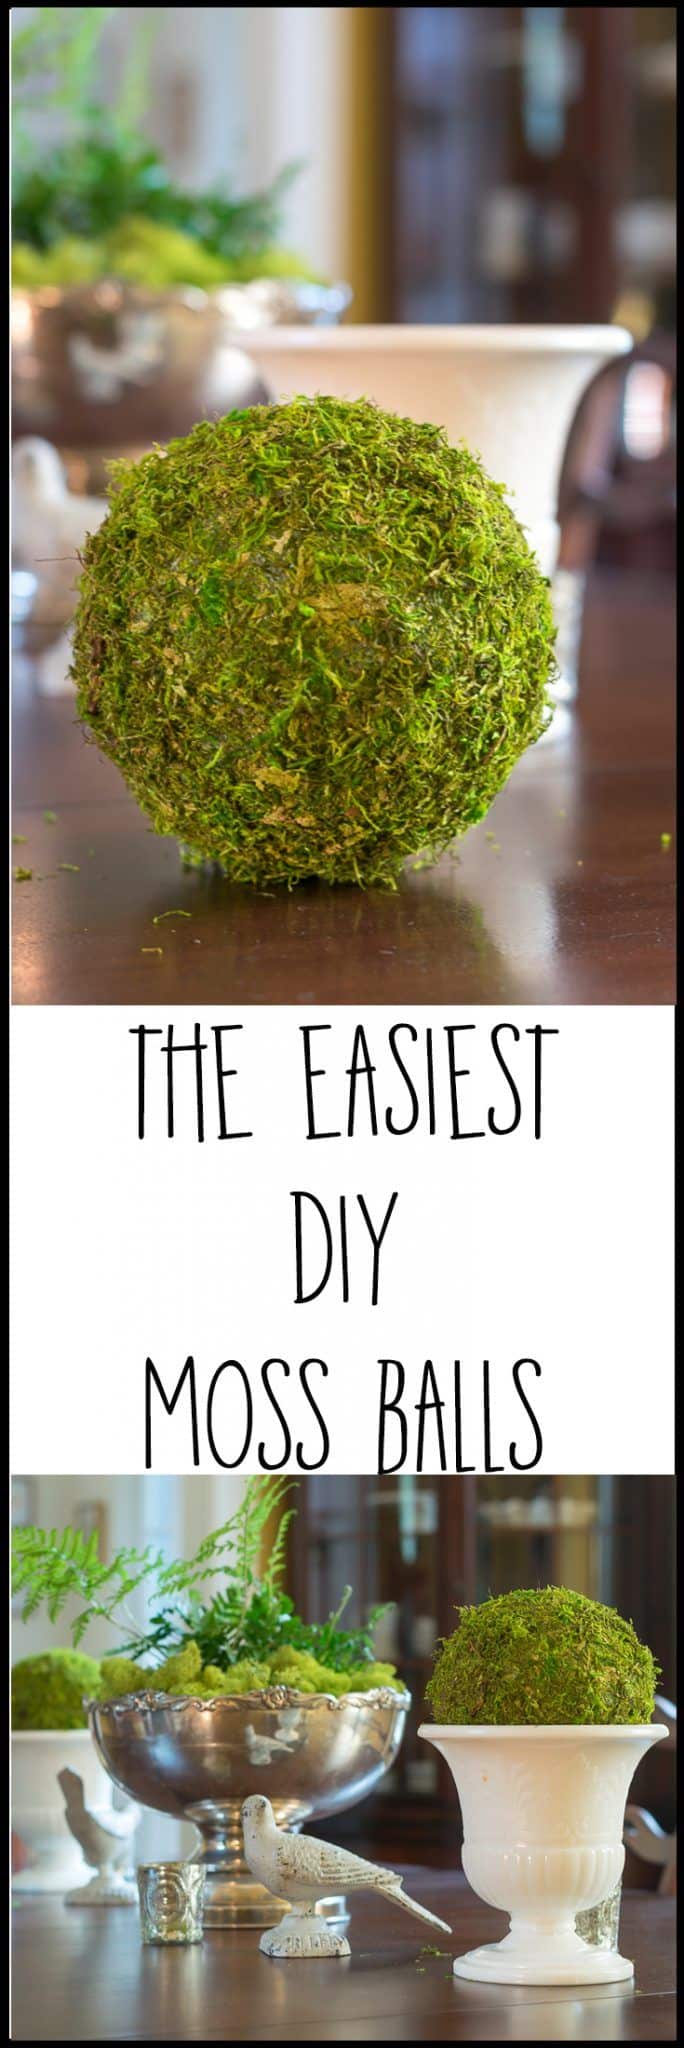
BUT…I didn’t like the idea of trying to cover a round object (a ball) with a square sheet of moss. What I really wanted was a “moss spray” to cover a foam ball. Since that wasn’t happening, I noodled what I think is the next best thing…pureed moss!.
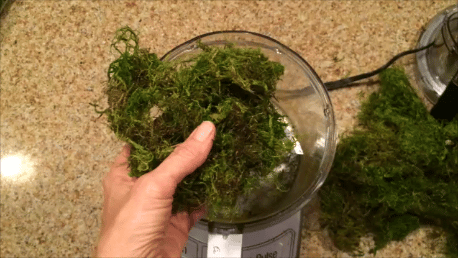
Say What? Yup…I put sheet moss in my food processor and pureed it. Let me say that I love my food processor. I use it for cooking, but I’ve also used it to crush eggshells for my garden, and now I’ve used it to puree moss.
For those who don’t like the idea of me pureeing food after moss, I put the moss puree through the dishwasher first.
Materials to Make Moss Balls
Some of these links take you to affiliate sites where I will get a small commission if you buy something. This does not change the price you pay, though. You can see my full disclosure policy here.
Only two “clumps” of moss puree were needed to cover the 6-inch ball. I know that’s not a lot, but just keep adding it until you have enough to cover the ball.

After I pureed the moss, I set it aside and sprayed my foam ball with spray adhesive. I put the ball on a stick and sprayed the glue outside because you shouldn’t do that inside.
Then I put the moss in a plastic grocery bag (something you can throw away when you’re done) and rolled the ball with glue on it through the moss.
If you have some bare spots, hit those spots again with your spray adhesive and roll them again.
You can follow along with this video as it shows you how to make your own decorative moss balls. It even has joyful music in it!
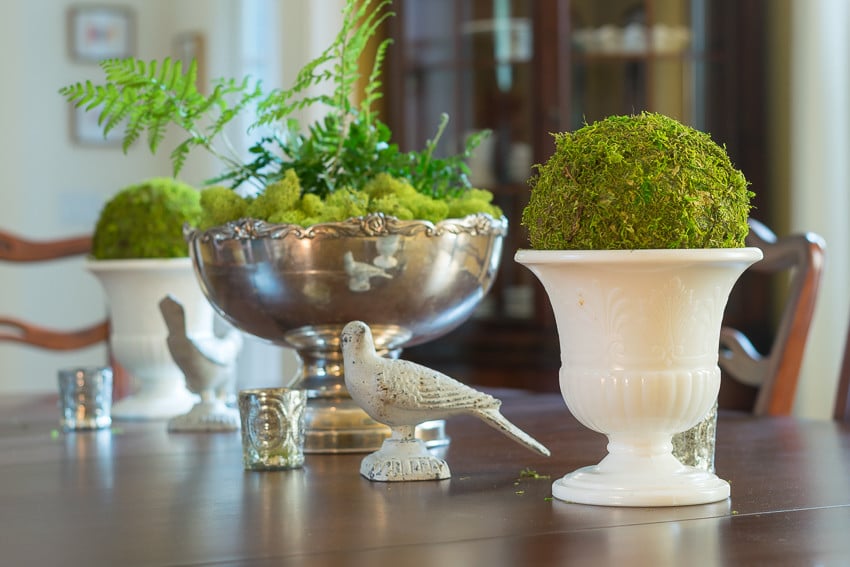
This spring I planted a fern that is doing well, and these little moss balls in urns that I made go well with it. I’m optimistic that my table’s spring decor will last several months longer.

Peep is still learning how to behave at the table (read: “get off the table”), but I don’t think she can hurt these DIY moss balls too badly for now. That doesn’t mean she won’t try.
Even though moss balls aren’t new, I was really happy that I could make them so quickly when I couldn’t find what I needed in stores nearby.
To find this post about how to make moss balls again, save this page or pin the image below.
Step-by-step kokedama ball making, with We Smell The Rain
FAQ
What do I need for a moss ball?
Can you grow your own moss ball?
What is a Japanese moss ball?
A Japanese moss ball makes a personalized gift or simply an interesting accent for a favorite plant specimen. You can practice the art of Kokedama yourself with just a few items and minimal skill. What is Kokedama? What is a Kokedama? It is a form of Japanese garden art that is centuries old and tied into the practice of bonsai.
Can You Make Your Own Moss ball?
When you’re making your own moss ball, it’s up to you to decide what to plant in it. It can be tempting to just pick your favorites, but there are a few criteria to consider. Firstly, moss balls are made from relatively dense clay soil that doesn’t allow much airflow around the roots.
How do you make a Japanese moss ball?
The traditional art form relied upon a carefully composed soil with a heavy clay base that would adhere to itself. This soil is called akadama and also contains peat moss as a moisture retainer. You can purchase bonsai soil or make your own mixture of clay and 15 percent peat moss as a base for the Japanese moss ball.
What is a moss ball?
It is a form of Japanese garden art that is centuries old and tied into the practice of bonsai. It is an accent to that mode of plant display where a moss ball is the focal and supporting point for a sculpted tree or plant. The moss ball is fixed to a platform or suspended from string with the plant growing out from the sphere.
- How to Grow Gorgeous Climbing Roses on a Wooden Fence - March 24, 2026
- Avoid These Plants When Companion Planting with Oregano - March 24, 2026
- 15 Great Trees to Plant Near Your House - March 24, 2026