We’re going to show you how to grow mushrooms because they’re tasty, good for you, pretty, and interesting.
The number of species of mushrooms is over 10,000, and they live in a wide range of places. These include both wild and cultivated mushrooms. Here, we’ll talk about how to grow shiitake, oyster, reishi, lion’s mane, and turkey tail mushrooms, which break down wood. These kinds of mushrooms can be grown on inoculated logs.
Take our Immersive Permaculture Design Certificate Program to learn more about how to grow mushrooms and how they can fit into your garden or homestead. You’ll really learn by doing.
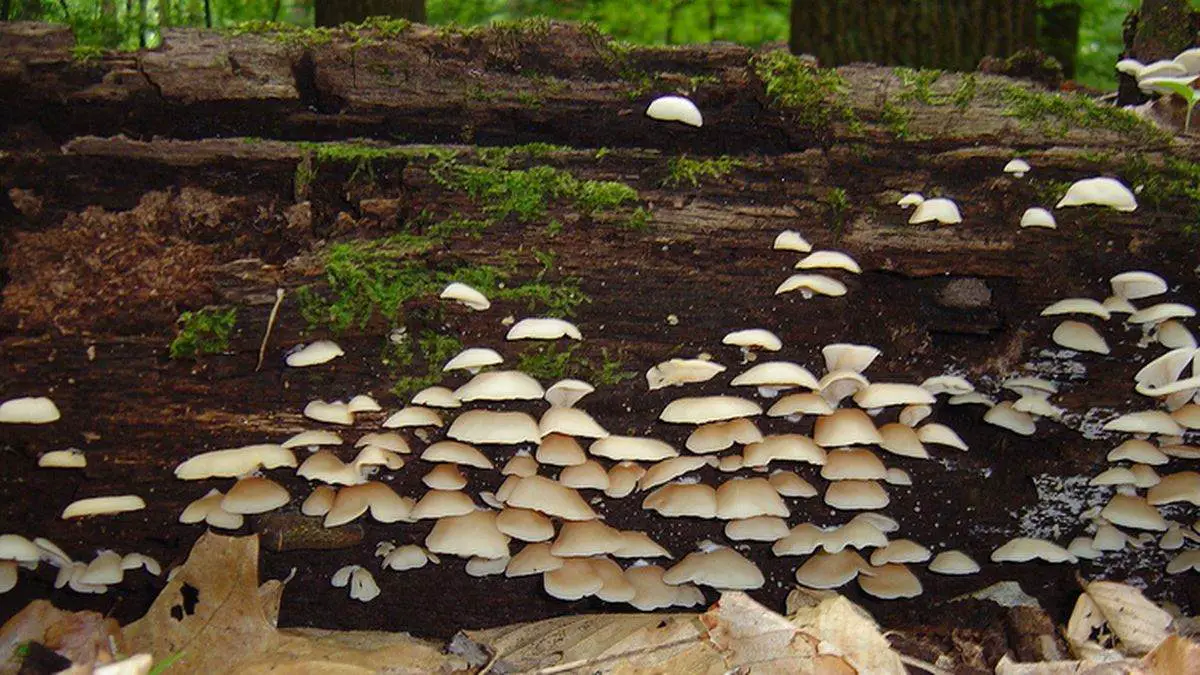
Growing tasty mushrooms at home is easier than you think with DIY mushroom logs. Mushrooms like oyster, shiitake, and lion’s mane naturally grow on decomposing logs in the forest. You can recreate this environment by inoculating fresh cut logs with mushroom spawn. Follow this simple step-by-step guide to make your own mushroom log and enjoy homegrown mushrooms!
Why Make a Mushroom Log?
Cultivating mushrooms on logs has several advantages:
-
Logs provide the ideal growing environment mushrooms naturally thrive in.
-
The setup is low maintenance compared to other mushroom growing methods
-
Logs produce fresh mushrooms for years with little effort
-
Mushroom logs fit easily in the garden, requiring just a shady spot and occasional watering.
-
Homegrown mushrooms from logs taste far superior to store-bought.
Plus it’s fun to grow your own food and learn about fungi up close!
Step 1: Obtain a Fresh Log
The first step is finding a freshly cut untreated hardwood log about 3-12 inches in diameter and 3-4 feet long. Good wood types are oak, maple, birch, poplar, alder or beech. Avoid pine.
Recently felled logs have high nutrient content for mushrooms. Old, dried out logs won’t work as well. Cutting your own or sourcing one from a local tree service or logger is best.
Step 2: Prepare the Log
Use a drill with a 5/16″ bit to make rows of holes about 1″ deep, spaced 4-6″ apart diagonally across the log’s length. Stagger the rows about 2-4″ apart. Wipe away sawdust.
Seal any damaged areas on the log with cheese wax or beeswax to retain moisture. Also seal the log ends. Avoid submerging the entire log in water at this stage.
Step 3: Inoculate the Log
For inoculation, you’ll need mushroom plug spawn suited to your climate. Insert plugs into the drill holes, hammering them flush with the log’s surface. The white mycelium in the plugs will start colonizing the log.
Seal each plug with a drop of wax to prevent dehydration. Store inoculated logs in a cool, shady spot while the mycelium spreads over the next few months. Mist occasionally if dry.
Step 4: Fruiting and Harvesting
When mycelium has fully colonized the log (indicated by white patches), move it to a shady area in your yard or garden. You can stack logs or lean them against a structure.
To initiate fruiting, soak logs in non-chlorinated water for 24 hours before returning them to their shady spot. This mimics rainfall and triggers mushroom formation.
Pinhead mushrooms will emerge from the drill holes in a week or two! Use scissors to harvest them when the caps start flattening out. Store fresh mushrooms in paper bags in the fridge.
Soak and rest logs between harvests to maximize productivity for years. Enjoy!
Troubleshooting Tips
If you don’t get great results, try these troubleshooting tips:
-
Ensure logs are fresh – old wood won’t colonize well.
-
Avoid treess like cedar that contain antimicrobial oils.
-
Keep logs moist but not saturated during colonization.
-
Give logs more shade if pins won’t form after soaking.
-
Disinfect tools between logs to prevent contaminaion.
-
Try a different mushroom species if your climate is unsuitable.
With some tweaking and adjustments, you can overcome problems and grow beautiful mushrooms!
Choosing a Mushroom Type for Log Culture
Many gourmet mushrooms thrive on log culture. Consider these top choices for beginners:
-
Oyster – Fast colonizer, ideal for warmer climates. Produces in clusters. Great on poplar and aspen logs.
-
Shiitake – Meaty mushrooms perfect for cooking. Prefer oak and maple logs. Require some cold weather.
-
Lion’s Mane – Shaggy, cascading mushrooms with a seafood flavor. Grow well on a variety of hardwoods.
-
Wine Cap – Hardy mushrooms that fruit in both spring and fall. Enjoy them sauteed or grilled.
-
Chicken of the Woods – Prized for its chicken-like taste. Grows as orange shelf-like brackets on oak.
Talk to your local nursery to choose a species suited to your region and preferred wood type. The possibilities are diverse!
Alternative Mushroom Log Materials
While hardwood logs are traditional, other materials can be inoculated too:
-
Coffee grounds – Packed into buckets or bags with mycelium to produce oyster mushrooms.
-
Straw – Chopped straw formed into compact bricks makes great mushroom substrate.
-
Cardboard – Used as an eco-friendly log substitute; often layered into plastic bags.
-
Wood pellets – Dense compressed pellets support oyster mushroom growth with less mess.
-
Wood chips – Works best when supplemented with bran or other nutrients and packed into a bin.
Experiment with recycled urban materials like cardboard or coffee grounds to grow mushrooms sustainably.
Ideas for Using Your Homegrown Mushrooms
Once your logs start producing, put those mushrooms to use in all kinds of delicious ways:
-
Saute with butter and herbs for the perfect steak, chicken, or veggie topping.
-
Make mushroom soup stocks by simmering them with bones and aromatics.
-
Stuff whole mushroom caps with savory fillings of sausage, veggies, cheese, etc. before grilling or baking.
-
Slice thinly and use raw in salads for a meaty texture.
-
Powder dried mushrooms in a blender to make umami-rich seasoning salt.
-
Candy mushrooms in sugar syrup for an earthy-sweet snack or dessert garnish.
Enjoy mushrooms fresh or preserve them by drying, freezing, or fermenting. Get creative in the kitchen!
Final Thoughts on DIY Mushroom Logs
Inoculating logs with mushroom spawn is a fun, simple way to produce your own gourmet mushrooms at home. Follow the basic steps of preparing fresh logs, installing spawn plugs, colonization, and fruiting to grow pounds of delicious mushrooms for years to come.
Position inoculated logs around your garden for edible landscaping. Learning this traditional mushroom farming method lets you sustainably harness the natural decomposing power of fungi. Get started on some DIY mushroom logs today!
Colonization and Fruiting of Mushroom Logs
After waxing, your logs are ready! The next phase is colonization of the logs by your selected fungus. Conditions that allow this are always moist, and often warm, depending on your particular variety of mushroom. The spawn migrates out of the hole that you filled and into the log. Once the log has been fully colonized, it is ready to bear “fruits,” or mushrooms. This can happen the same year that you inoculate, or, more commonly, the next year. The right temperature and moisture levels are needed for fruiting, which can be different from species to species and even between varieties of the same species. For example, there are warm-weather and cooler-weather fruiting shiitakes, allowing for a longer harvest period.
Drilling and Filling Holes in your Logs
No matter what kind of spawn you pick, the next step is to drill holes in your logs all over them to put the spawn in. For each type of mushroom you are growing, these holes should be a certain size, width, and depth. If you are only cutting a few logs, you can wrap tape around the right-sized drill bit at the right depth. There are specialized bits with built-in stops if you plan to do lots of logs. You can also get adapters that let you make holes with an angle grinder instead of a drill. This is faster, easier on the body, and well worth the money if you want to grow a lot of mushrooms.
Once your holes are drilled, it’s time to fill them with spawn. Either use the tool you’ve acquired for sawdust spawn or gently hammer in your plugs.
How to Grow Mushrooms on Logs | Complete Inoculation Walkthrough!
FAQ
How do you start a mushroom log?
What kind of wood is used for mushroom logs?
How to make a mushroom out of a log?
How long do mushroom logs last?
How do you make a mushroom log?
Make Your Own Mushroom Log! To start, you’ll need hardwood logs, plug spawn, a drill & 5/16ths bit, a mallet or hammer, and beeswax or paraffin wax. The hardwood logs (white oak, red oak, poplar, maple, birch, beech, etc.) should be at least 4-6 inches in diameter and 2+ feet in length.
How do you spawn mushroom logs?
If you’ve chosen the ease of plug spawn, all you’ll need is a mallet hammer. If you’re going with sawdust spawn, you’ll need a thumb press. Food-grade wax to seal the logs is essential. With wax, coat every drilled and plugged hole and the cut-ends of your mushroom logs. This critical step ensures moisture stays in and competing fungi stay out.
How do you seal a mushroom log?
Food-grade wax to seal the logs is essential. With wax, coat every drilled and plugged hole and the cut-ends of your mushroom logs. This critical step ensures moisture stays in and competing fungi stay out. Paraffin or soy wax are your best most cost-effective options. To apply the wax sparingly, use a foam paint brush, or wool wax daubers.
How do you grow a mushroom log?
The place you put a mushroom log can impact its success and speed of results. The conditions are what make fruiting fruition! A place that is cool, shady, and moist, with bright indirect light, and a subtle breeze, is best. A water source where you can spray the logs or fill a tub for soaking them is also ideal.
- How to Grow Gorgeous Climbing Roses on a Wooden Fence - March 24, 2026
- Avoid These Plants When Companion Planting with Oregano - March 24, 2026
- 15 Great Trees to Plant Near Your House - March 24, 2026