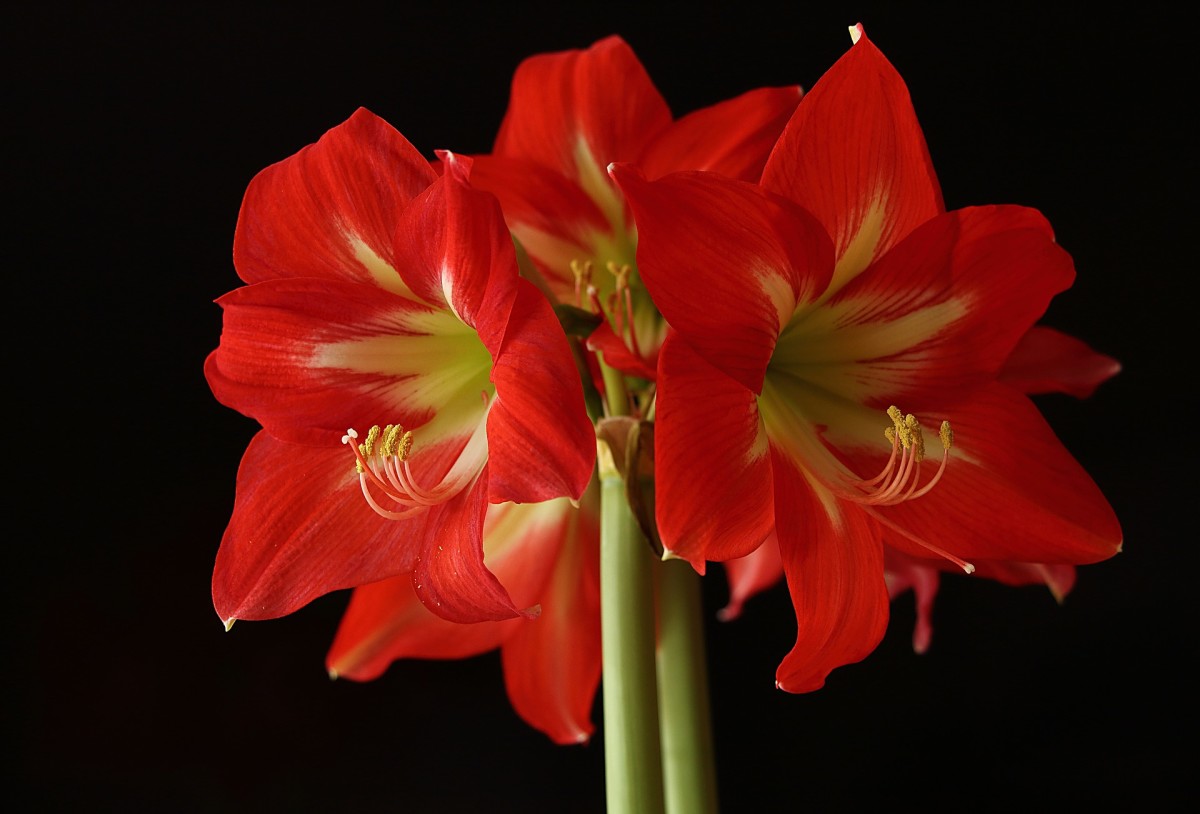
As the daylight hours grow shorter and the weather turns colder, houseplants like amaryllis can bring welcome color and life indoors. The giant lily-like blooms of amaryllis are a breathtaking sight that brighten dreary winter days.
Though amaryllis bulbs are often sold already potted up, learning how to plant amaryllis bulbs yourself is easy. With a little knowledge about amaryllis care and growth habits, you can have these tropical beauties flowering in your home for years to come
What You Need to Plant Amaryllis Bulbs Indoors
Growing amaryllis indoors requires just a few simple supplies:
-
Amaryllis bulbs – Look for large, firm bulbs that are about 2-3 inches across. Often the bulbs are sold packaged with detailed planting instructions.
-
Pot and potting mix – Choose a container that is about 2 inches wider than the diameter of the bulb. Terra cotta pots work well, as amaryllis like slightly dry soil. Use a well-draining commercial potting mix, not garden soil.
-
Stake or support – Wind can damage tall, top-heavy amaryllis blooms. Have a bamboo stake or rod ready to support the flower stalks.
When to Plant Amaryllis Bulbs
Amaryllis can be planted anytime from October through January. Planting in October or November will allow enough time for roots to develop before the blooming period. However, even bulbs planted in December or January can sometimes flower later in the winter.
For the best results, aim to have bulbs potted up and growing about 6-8 weeks before you want them to bloom. Amaryllis take 6-8 weeks from planting to bloom.
Step-by-Step Guide to Planting Amaryllis Bulbs
Planting amaryllis bulbs properly helps encourage them to grow and bloom. Follow these simple steps:
Choose a Pot
Pick a pot that is about 2 inches wider than the diameter of the bulb. Shallow pots work well for amaryllis. Terra cotta pots are recommended over plastic, as terra cotta breathes better and prevents overwatering.
You can plant multiple amaryllis bulbs together in a larger container, just leave 2 inches between bulbs.
Use Fresh Potting Mix
Fill the pot about halfway with fresh commercial potting soil or a potting mix formulated for bulbs and African violets.
Avoid using garden soil, which is too heavy. The potting mix should be light, well-draining, and sterile.
Plant the Bulb
Make a hole in the potting mix to hold the bulb. The hole should be just deep enough so that the top 1/3 of the bulb remains above the soil line.
Place the bulb root side down in the hole and add potting mix around it to fill any gaps.
Press the potting mix gently around the bulb to stabilize it. Be careful not to press too hard.
Water Sparingly After Planting
Water the potting mix well after planting to settle the soil and eliminate any air pockets around the bulb.
After initial watering, water sparingly until new growth emerges. Too much moisture can cause bulb rot.
Provide Warmth and Sunlight
Amaryllis bulbs thrive at temperatures between 65-75°F. Keep bulbs away from drafts from windows or doors.
Place bulbs in a sunny spot or under grow lights. Turn pots regularly to prevent stems from leaning toward the light.
Stake Flower Stalks
As flowers begin to grow, tie them loosely to bamboo stakes or thin rods for support. This prevents damage to the tall, top-heavy blooms.
Check ties regularly to prevent damage to the stems as flowers grow and get taller.
Caring for Amaryllis Through Growth and Blooming
Proper care while bulbs are sprouting, growing leaves, and blooming will keep amaryllis healthy and maximize flowering.
Water Carefully
Amaryllis prefer evenly moist but not soggy soil while actively growing. Wait for the potting mix to dry out some between waterings.
Crowning while blooming can cause floppy flowers. Reduce water slightly if this occurs. Resume regular watering once flowers fade.
Apply Liquid Flower Food
Feed bulbs with a balanced liquid fertilizer every 2-4 weeks while leaves and flower stalks are actively growing. Avoid overfeeding.
Discontinue fertilizer if foliage yellows or floppy growth occurs. Resume at half strength after blooming finishes.
Monitor for Pests
Inspect bulbs regularly for common amaryllis pests like aphids, mealybugs, and thrips. Treat promptly to prevent damage.
Sticky traps help capture flying pests like fungus gnats. Remove any affected parts immediately to prevent spreading.
Enjoy the Flowers!
Once giant amaryllis blooms open, enjoy their presence in your home for several weeks. Individual flowers may last 2-3 weeks.
Turn the pot regularly so flowers face forward to display their full beauty. Remove faded blooms promptly.
Ongoing Amaryllis Care
Do not discard amaryllis bulbs after they bloom. With proper care, bulbs can be coaxed into blooming again year after year. Here’s how:
Allow Leaves to Grow
Allow the foliage to grow and mature over the spring and summer after blooming finishes.
Leaves produce energy the bulb needs to bloom again next year. Water and fertilize normally during this time.
Stop Watering in Late Summer
Allow the potting mix to dry out completely in late summer. Remove shriveled foliage, stalks and roots.
Store unwatered bulbs in a cool, dark place for 6-8 weeks. This rest period is needed to trigger reblooming.
Repot in Late Fall
Repot bulbs in fresh mix in fall, planting just as you did originally. Water sparingly until growth resumes.
Bulbs may be divided every few years if they become overcrowded. Amaryllis often rebloom smaller than their first year.
With the right care, diligence, and patience, the exotic blooms of amaryllis will brighten up your home every winter for years to come. Their brilliant colors and bulbous shape stand out against most other houseplants. Getting amaryllis to rebloom again requires giving them a proper resting period coupled with adequate sunlight and nutrition while they are actively growing. Follow the steps outlined here, and you will be rewarded with a colorful amaryllis display each winter.
How to Plant an Amaryllis Bulb Indoors
Are you missing the many blooms of summer already? Well, we have the next best thing for you. The bright colors of amaryllis flowers make the house feel happy, and growing them inside might be just the flower you need to feel better.
Because they can bloom inside, amaryllis flowers are great for the holidays. Many people like the bright reds and pure whites that these flowers offer. These bulbs also make for a beautiful gift.
Here is a step-by-step guide on how to plant an amaryllis bulb so that you can bring a beautiful flower into your home. We have amaryllis kits for sale in the garden center, which we used for this demonstration. Each kit comes with everything you need – soil included!.
If you already have a bulb, these instructions are still for you. If you still need a planter, amaryllis bulbs like it when they are a little crowded, and a clear glass bowl is a popular choice. About an inch or two should be between the edge of the bowl (or pot) and your bulb. We recommend using soil that is well-draining and high in organic matter. Mixing perlite and peat moss into all-purpose potting soil should set you up for success.
Skip to Step 2 if you are not using our amaryllis kit.
Hydrate the Cocopeat disk with about 1½ cups of water. Allow the disk to absorb the water and expand into the growing medium. This can take up to 15 minutes.
Fill about 2/3 of the pot with planting mix and create a shallow hole for the bulb.
Place the bulb roots down in the soil.
Add additional planting mix around the bulb to secure it. About a third of the bulb should be left out in the open. Clean off any dirt that gets on or inside the bulb.
Top-dress with moss or decorative pebbles (optional).
Water in your bulb and place it in bright light.
Water sparingly until you see stocks begin to emerge. From there, water weekly to keep the soil moist but not wet. The leaves of your amaryllis will likely appear first and then bloom.
Turn the pot occasionally to prevent your plant from leaning. The stems may not be strong enough to hold the flower up all the time, so you may need to stake the plant so the stems don’t fall over.
For an in-depth guide on amaryllis, head to Laura at Garden Answer’s YouTube page and check out her video.
Along with amaryllis, our garden center has many gift options this time of year. Everyone will find something they love when they shop with us! If you need help with do-it-yourself projects, join one of our workshops. You’ll find the complete list here.
By Riley Stewart
My Amaryllis Passion Grows! How to Plant, Propagate, & Rebloom Amaryllis Bulbs + Cut Amaryllis Tips!
How do you grow Amaryllis indoors?
To bring your amaryllis care indoors, partially fill a five- to seven-inch pot with a quality, well-draining sandy loam potting mix. Then, plant the amaryllis bulb so the top third is exposed when you fill in the rest of the pot with potting mix. The bulbs should be planted 10 to 12 weeks before you want them to bloom.
How do you plant Amaryllis in a container?
If you’re planting more than one amaryllis in the same container, place bulbs shoulder to shoulder. The bulbs should feel firm and have plenty of roots at the bases. Add more potting mix but leave the top third of the bulb uncovered. Tamp down the soil around the bulb with your hands to settle the potting mix.
How do you plant amaryllis bulbs?
Plant bulbs in a nutritious soil so one-third of the bulb is sticking out. Make sure to dig a hole deep enough in the soil to house the other two-thirds of the bulb. Almost any regular potting mix/soil will do for this as amaryllis plants don’t require any specific type of soil. You can find these mixes at most home goods stores.
Can I plant Amaryllis outside?
You should plant the bulb so the stringy roots are in the soil. Avoid damaging the roots when you plant your amaryllis. If you are planting your amaryllis outside, be careful to avoid planting in a clay-based soil as this drains more slowly than sand-based soil. If the roots sit in water for too long, they will get waterlogged and may begin to rot.
- How to Grow Gorgeous Climbing Roses on a Wooden Fence - March 24, 2026
- Avoid These Plants When Companion Planting with Oregano - March 24, 2026
- 15 Great Trees to Plant Near Your House - March 24, 2026