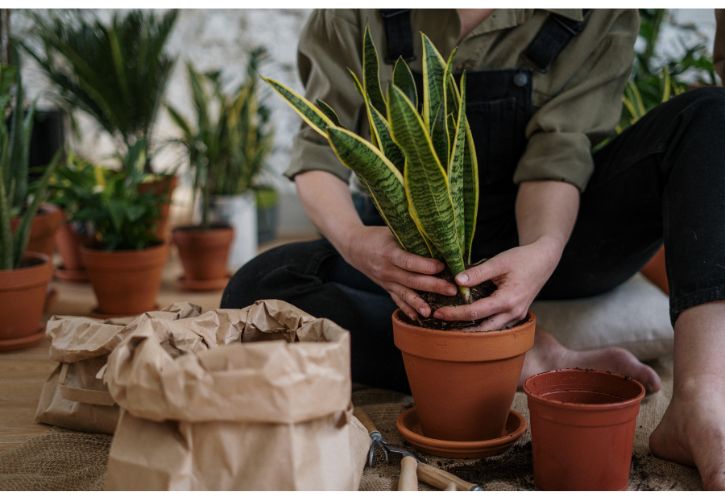
Removing a plant from its pot without damaging the roots can be tricky. The roots often cling to the sides of the pot or become root bound, making extraction difficult. However, with some simple tips and proper technique, you can remove even the most stubborn plant from its pot with minimal root damage.
Why Repotting is Important
Repotting gives your plant fresh soil and allows the roots to spread out into new space. This encourages healthy growth Plants often outgrow their pots and become root bound The roots circle round and round, eventually choking themselves off. Air cannot penetrate to feed the roots, and water has trouble draining. The plant will struggle in this condition. Carefully removing the root ball to transplant it into a larger pot solves these problems.
Repotting is also needed when using poor quality or old potting mix. After a year or two, most potting soils compact anddrain poorly Nutrients are used up. An application of new, nutrient-rich soil revitalizes the plant Sometimes, repotting is even required to change the pot size or style according to the owner’s wishes.
Whatever the reason, repotting should be done with care to avoid root damage.
Preparing to Remove the Plant
Proper preparation is key to removing a plant from its pot without trouble.
First, water the plant a day or two before repotting. Moist soil loosens from the sides of the pot more easily. Dry soil clings stubbornly. However, make sure the soil is just damp, not soggy.
Next, use pruners to trim away any roots emerging from the pot’s drainage holes. This eliminates obstacles when sliding the root ball out.
Have the new pot ready nearby so the plant is not left to dry out after removal from its old home. Fill it partway with fresh potting mix.
Finally, spread newspapers or a tarp on your repotting surface to catch drips and spills. Repotting can be a messy process. The protective layer saves cleaning time later.
Techniques to Remove the Plant
With preparation complete, it’s time to coax the plant out without damage. Here are some safe methods:
1. Turn and Tap
This technique works well for smaller pots.
-
Turn the pot upside down, cradling the plant in your hand to support it.
-
Hold the pot and plant over a table or counter edge.
-
Firmly tap the pot’s rim on the hard surface.
The tap should be hard enough to jar the root ball loose for removal, but not so hard as to damage the plant. A couple of good raps should do it.
-
As the root ball drops down, catch it gently in your hand.
-
Slide the pot off, and you’ve successfully removed the plant!
2. Compress and Twist
For plastic pots with some flexibility, try compressing and twisting them.
-
Lay the pot on its side.
-
Press inward on its sides in a few spots with a firm squeezing motion.
-
As you compress one area, twist the pot back and forth.
This helps dislodge the root ball. Rotate the pot and repeat the compressing and twisting all the way around. The root ball should come free after working your way around.
3. Slice with a Knife
If the plant still won’t budge, try slicing the edges.
- Take a sharp knife and insert the tip down along the inside wall of the pot.
Slowly run the knife all around the perimeter, separating any roots clinging to the pot.
- After slicing through any stubborn spots, twist and pull the pot gently to remove it.
4. Soak the Pot
For extremely root bound or drought-stressed plants, try a long soak before removal.
-
Water the plant as usual, then set the whole pot in a bowl or sink full of water.
-
Let it soak for 20-30 minutes. This thoroughly rehydrates the root ball.
-
Remove the pot and follow the tap or twist methods above. The soaked soil should release much easier.
5. Break the Pot
In rare cases of completely uncooperative plants, the pot itself must be sacrificed.
-
For plastic pots, use strong scissors or shears to cut the pot off of the plant. Snip from top to bottom on opposite sides of the pot.
-
For clay or ceramic pots, place the pot on a hard surface and use a hammer to crack it. Watch out for flying shards!
Breaking the pot open allows easy access to the root ball. While drastic, destroying the container is better than damaging the plant. The pot can always be replaced.
Post-Removal Care
Once the plant is free, immediately place it in the prepared new container to avoid root drying.
-
Check that the top of the root ball sits slightly above the surrounding soil level.
-
Start filling in around the root ball with fresh potting mix.
-
Use your fingers to gently loosen any circling, matted roots at the sides and bottom, spreading them outward into the new soil.
-
Add enough potting mix to fully cover the roots and fill the pot.
-
Press down gently to settle the soil.
-
Give the plant a thorough watering to moisten the new potting mix.
Finally, place the repotted plant in proper lighting conditions. Avoid direct sun immediately after repotting to prevent stressing the disturbed roots.
With a little care and the right technique, you can easily remove a plant from its pot without root damage. Follow these tips for healthy, thriving plants. Happy repotting!
Common Problems When Removing Plants from Pots
Repotting sounds simple, but many complications can arise:
-
Dry, compacted soil – Makes the root ball cling stubbornly to the pot. Always water a day before repotting.
-
Tangled roots – Years of circling in a too-small pot causes severe root mats that resist extraction. Soak and gently loosen.
-
Broken roots – Pulling too roughly damages and tears fragile root strands. Use care when handling the root ball.
-
Cracked pots – Trying to pry the pot off stresses its material. Tap or compress pots instead of pulling them.
-
Lost soil – The loose potting mix crumbles away from the roots without support. Repot over a tarp to collect spills.
-
Stressed plants – Disturbed roots can shock the plant. Provide post-repotting shade while new root growth establishes.
With the proper technique and care, these pitfalls can be avoided. The key is using gentle leverage to free the root ball, rather than brute force.
FAQ About Removing Plants from Pots
Several common questions arise when it’s time to extract a plant for repotting:
How often should I remove a plant from its pot?
- For annuals, when moving them from nursery pots into your garden
- For perennials and houseplants, every 1-2 years as they outgrow their containers
When is the best time to take a plant out of its pot?
- Early spring, when new growth is starting but before heavy water needs
Can I transplant a flowering plant?
- It’s best to wait until after flowering to reduce stress on the plant
How do I get a big plant out of a pot?
- Use larger pots with less root binding, and rotate sides when compressing and twisting
What if the roots are wound around the bottom?
- Before removing, reach through the drain holes with pruners to cut the circling roots
Can I reuse old potting mix when I repot a plant?
- Old mix should be refreshed with new soil to replenish nutrients and prevent compaction
What if I break roots when removing the plant?
- Prune any broken roots, then plant as normal. Extra watering and shade helps the plant recover.
How can I make removal easier next time?
- Annually loosen roots and replace a portion of soil to prevent severe tangling and compaction.
In Summary
Removing a plant from its container can seem daunting, but a gentle touch and the right technique prevents root damage. Prepare with proper watering and tools. Use leverage instead of force. Dislodge the root ball with tapping, compressing twists, or knife trimming. Take care after removal to immediately replant in fresh soil. Avoid stress, and the plant will quickly re-establish in its new home. Follow these guidelines for healthy plants that thrive indoors and out.
Step 5: What to Do With Roots When Transplanting a Plant
People who garden have a lot of different opinions on this, but for me, it all comes down to how big the roots are.
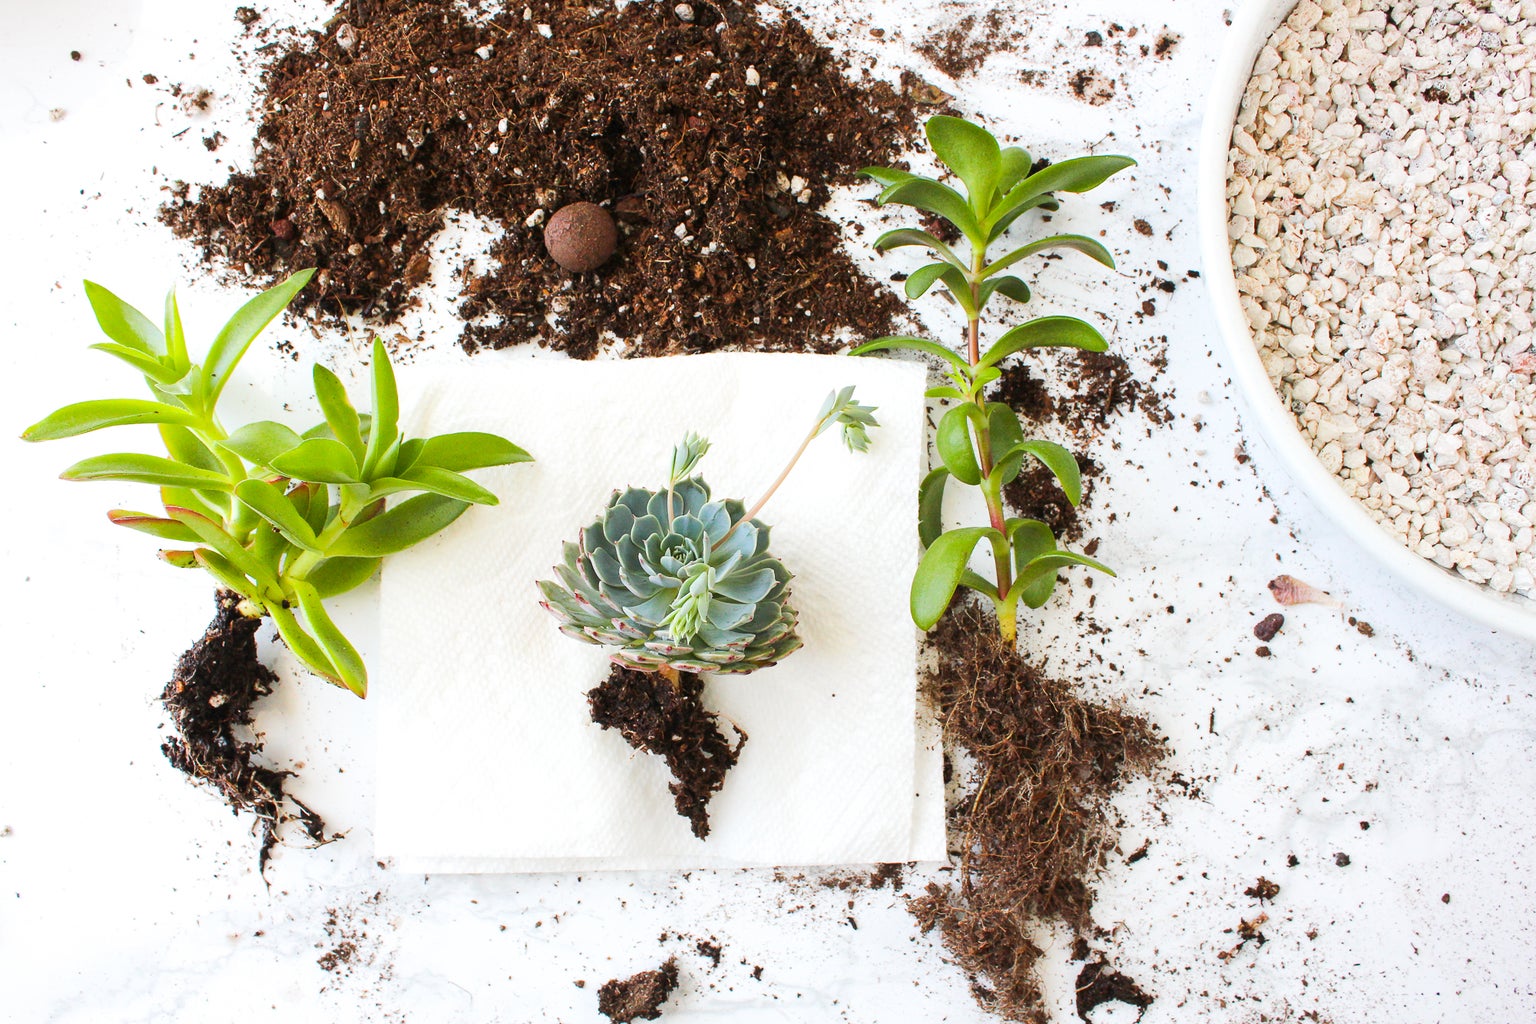
When I move succulents to a new pot, I like to take away any extra soil or peat from the roots to help them grow quickly in the new soil. This is because they have very shallow root systems compared to other plants an grow more slowly.
Most of the time, when I repot vine, grass, or tree plants, I don’t bother with the roots. I might shake off some extra soil or use my hands to loosen a root ball if the plant was rootbound, but other than that, I don’t worry about them. Their roots will spread easily into new soil.
There are really only two times I mess with the roots of foliage plants:
- I often take out as much soil as I can from the roots of a sick plant to look for signs of root rot and other issues.
- I like to get rid of as much soil as I can when I cut the plant into smaller pieces. This helps me either separate the roots into their own sections or find the best spot to cut the root system so it can be divided.
Soaking the roots and soil in a bowl of room-temperature water is the best way to get rid of extra soil around plant roots. (Be careful—water that is too hot or cold can hurt the plant!) Lightly move the plant around in the water to loosen the soil, and “fluff” the roots with your fingers to separate them. (Don’t pour the dirty water down the drain; do it outside instead.) ).
Step 4: How to Remove Plants From a Plastic Pot
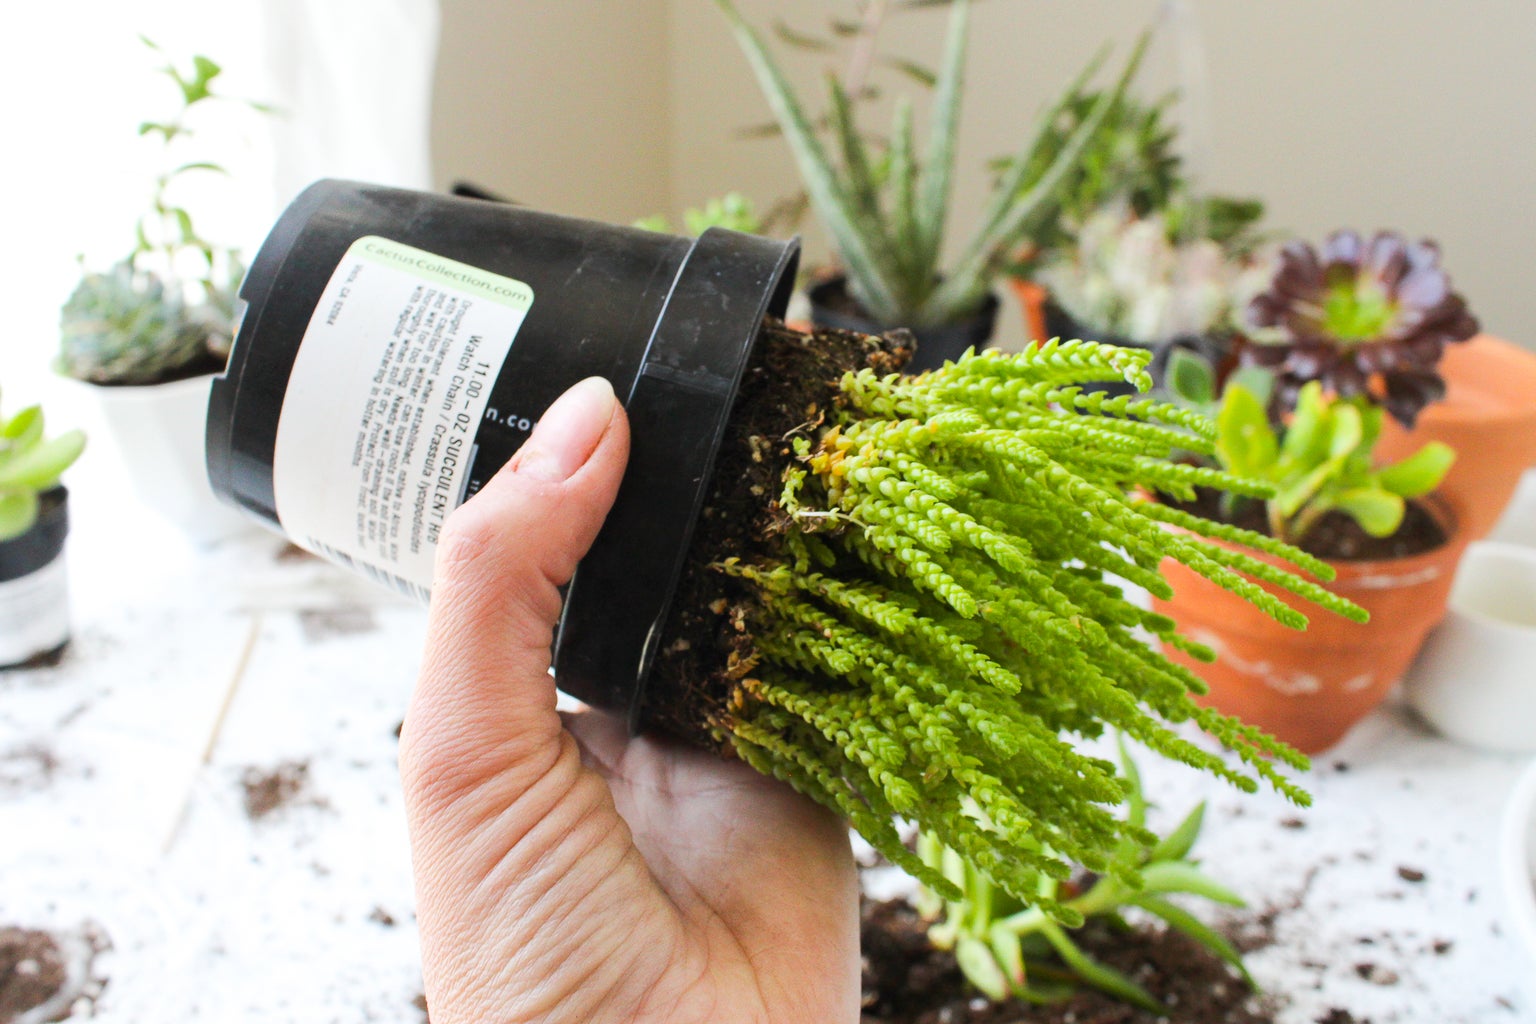
Removing plants from a plastic pot is much easier than harder pots like terra cotta or ceramic. Before I do this, I don’t care if the soil is wet or dry. This is because you probably won’t have to “dig” a plant out of a plastic pot. First, I take both hands on the pot and press down on the sides to loosen the soil around the edges. Then I flip the pot on its side or with the opening facing down. With one hand I hold the plant and pot, and the other I press down on the bottom of the pot. If you did this right, the plant should easily come out of the pot! If it doesn’t, you may have a rootbound plant that needs a little more massaging on the sides and bottom of the pot before it will come out.
P. S. If the plant is very big or has a lot of roots, don’t be afraid to cut it out of its pot. This is especially true if the pot is made of thin plastic. Often cutting the plant out will be less stressful for it and less damaging to the roots. It was too heavy and root-bound for a 10-inch pot when I tried to repot a Philodendron selloum this weekend, so I had to cut it out.
How to remove a stuck, potbound plant out of a pot. Trish, The Gong Gardener.
- How to Dig a Garden Bed: A Step-by-Step Guide for Beginners - April 14, 2026
- The Moderate Growth Rate of the Stunning Edith Bogue Magnolia - April 10, 2026
- Cultivating Vibrant Dahlias in Garden Beds – A Complete Growing Guide - April 10, 2026