Poinsettias are a classic holiday plant that can often last through Christmas and beyond when cared for properly. With their bright red, pink, or white bracts, poinsettias add a pop of color to any winter decor. While poinsettias don’t usually last forever, you can extend their lifespan by providing good care and repotting them when needed. Repotting gives your poinsettia fresh soil and room for its roots to grow, allowing it to thrive.
In this article, we’ll cover everything you need to know about repotting a poinsettia, including:
- Signs It’s Time to Repot Your Poinsettia
- Supplies You’ll Need
- Step-by-Step Instructions
- Aftercare Tips
Armed with this information, you’ll be able to give your poinsettia the right care to help it look its best all season long.
Signs It’s Time to Repot Your Poinsettia
Poinsettias do best when slightly rootbound meaning the roots have mostly filled up the pot. But there are a few signs that indicate it’s time to move your plant to a larger container
-
Roots are growing out of the drainage holes. This is a clear indicator that the plant has outgrown its current home. Visible escaping roots mean it’s desperate for more space.
-
The plant is top-heavy and tips over easily. A too-small pot means less stability for the top-heavy plant. Repotting into a heavier pot will lower the center of gravity.
-
Water runs straight through the pot. If water pours right through without saturating the soil, it could mean the roots have crowded out the soil and can’t absorb water properly. More room to spread out is needed.
-
The plant is more than 2 years old. Poinsettias prefer to be somewhat rootbound, but repotting every 2-3 years in fresh soil replenishes nutrients and encourages new growth.
If you notice any of these signs it’s time to repot your poinsettia. Keep reading to learn how.
Supplies You’ll Need
Gather these supplies before repotting:
-
A pot 1 to 2 inches larger than the current container. Don’t go too big or the soil may stay soggy.
-
Bagged potting soil formulated for containers. Regular garden soil may be too heavy.
-
Small knife or gardening shears to loosen roots if needed.
-
Tray to set the poinsettia on while repotting.
-
Watering can to moisten dry soil.
-
Gardening gloves to protect your hands.
Step-by-Step Instructions
Follow these steps to successfully repot your poinsettia:
Water the Plant
Water your poinsettia thoroughly before repotting if the soil is dry. This makes removal from the pot easier and minimizes stress.
Remove from Current Pot
Tip the plant upside down with one hand supporting the stems. Gently slide off the pot. You may need to loosen stubborn roots by running a knife around the inside edges.
Prune Away Dead Roots
Inspect the root ball and prune off any dead, diseased, or circled roots with clean shears. Leave healthy white roots intact.
Prepare New Pot
Choose your new container and add an inch of fresh, moist soil to the bottom. This helps with drainage.
Place the Plant
Center the root ball in the pot. The top should sit just below the rim so water doesn’t overflow.
Backfill With More Soil
Hold the plant steady and fill around it with more potting mix. Tap firmly to prevent air pockets. Leave 1 inch below the rim for watering.
Water Thoroughly
Water well until it drains from the bottom. This settles the soil. Let excess water drain away before returning the plant to its spot.
Monitor Soil
Check the soil a few days later. The plant may settle, leaving room for more soil. Add more if needed to stabilize it.
And that’s it! With a roomier pot and fresh soil, your poinsettia is ready to continue thriving.
Aftercare Tips for Repotted Poinsettias
Repotting is stressful for poinsettias, so it’s important to give them proper aftercare:
-
Provide bright, indirect light. Keep the plant in a sunny room away from direct sun, which can scorch leaves.
-
Water as usual. Stick to your normal watering routine. The new soil likely contains fertilizer to support it.
-
Don’t fertilize. Too much fertilizer on top of the nutrients in the potting mix can burn roots. Wait a month before fertilizing.
-
Monitor for wilting. Check leaves daily and water promptly if you notice any wilting, which indicates under-watering.
-
Mist leaves. Misting mimics the poinsettia’s tropical origins. Just avoid getting water directly on the colored bracts to prevent spotting.
-
Keep room temps cool. Poinsettias prefer daytime temperatures around 70°F and 60-65°F at night. Keep away from drafts and heat vents.
Follow these aftercare tips, and your newly repotted poinsettia should recover quickly. The extra space and fresh soil will help it look lush and healthy just in time for the holidays. And next year, your poinsettia can go through the process again for another season of beauty. With the right care, repotting can extend your poinsettia’s lifespan for years of holiday enjoyment.
Troubleshooting Stress Signs
Spot a sad Poinsettia post-repot? Dont panic. Stress can manifest as wilting or yellowing leaves. If you notice these symptoms, evaluate your care routine. Too much water? Too little? Maybe its throwing a fit over the light situation. Also, don’t forget to look for pests or mold that might have shown up without permission. They love to show up when a plant isn’t there.
Finally, keep a nose out for any funky smells from the new soil, which could signal bacterial growth. If the soil seems to stay wet for too long, consider aerating it or adjusting your watering habits. Remember that Poinsettias like it when their feet are a little dry, so wait a little while before watering again.
Damaging the Roots
When repotting, think of yourself as a plant surgeon. The roots are delicate, and rough handling can lead to trauma. Gently tease the roots apart and inspect for damage. If you find any dark, mushy roots, trim them away. Remember, a clean cut can save a life, or in this case, a plant.
Post-repotting, your poinsettia isnt thirsty for a flood. Overwatering is the express lane to soggy plant despair. Let the top inch of soil dry out before reaching for the watering can. And dont even think about fertilizing; your plant needs time to settle in, not a nutrient party.
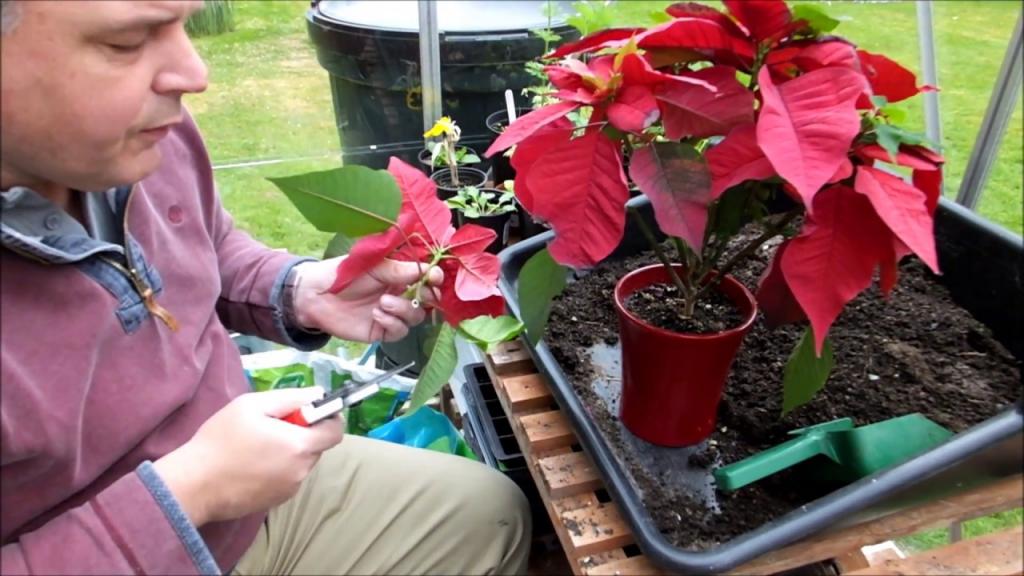
Cutting back and repotting my poinsettia (Euphorbia pulcherrima)
How do you repot a poinsettia?
Keep the temperature around 60 degrees Fahrenheit. In mid-May, do the following: Cut the stems back to about four inches and repot your poinsettia into a slightly larger container filled with new potting soil.
Do poinsettias rebloom?
The trick: Provide enough filtered sun, warmth, and water, and your poinsettia will thrive. If you’re especially motivated and follow a regimen of specific care, your plant might rebloom next holiday season. If grown as a landscape shrub in warm climates, poinsettia requires a sunny location and well-drained soil.
When should you repot a poinsettia plant?
Knowing when to repot, choosing the right pot and soil, and transplanting the plant without damaging the roots are key to successful repotting. Poinsettias should be repotted in the spring, after they have finished blooming. This allows the plant to recover from any stress caused by repotting before the next blooming season.
How do you remove a poinsettia plant from a pot?
Place the pot on a gardening sheet and remove the poinsettia. If it’s difficult to remove, loosen the pot’s inner sides with chopsticks. Surprisingly, there were hardly any roots when I removed the plant. It seemed that an oasis seedling was directly planted into the soil. An oasis seedling is a cutting rooted in a water-absorbing sponge.
- How to Grow Gorgeous Climbing Roses on a Wooden Fence - March 24, 2026
- Avoid These Plants When Companion Planting with Oregano - March 24, 2026
- 15 Great Trees to Plant Near Your House - March 24, 2026