Nothing beats the stunning beauty and sweet fragrance of lilies in full bloom These elegant flowers are always a welcome addition to gardens as well as fresh flower arrangements. But did you know you can collect and grow lily seeds from the spent blooms of cut lily stems? With a little know-how, those discarded floral stems can yield bountiful seeds for propagating new plants
In this article we’ll explore harvesting and growing lily seeds from cut flower stems. Follow these tips and you’ll soon have loads of lush lily seedlings ready for transplanting right from your floral bouquet!
An Overview of Collecting Seeds from Cut Lily Stems
Many cut flowers like lilies continue their life cycles even after being cut and placed in vases. As the flowers fade seed pods begin swelling as the seeds inside mature. Before the pods split open and scatter the seeds, you have a prime opportunity to harvest them.
Here are the basics of gathering lily seeds from cut stems:
-
Watch for seed pods to form after blooms finish. Pods will be green and plump.
-
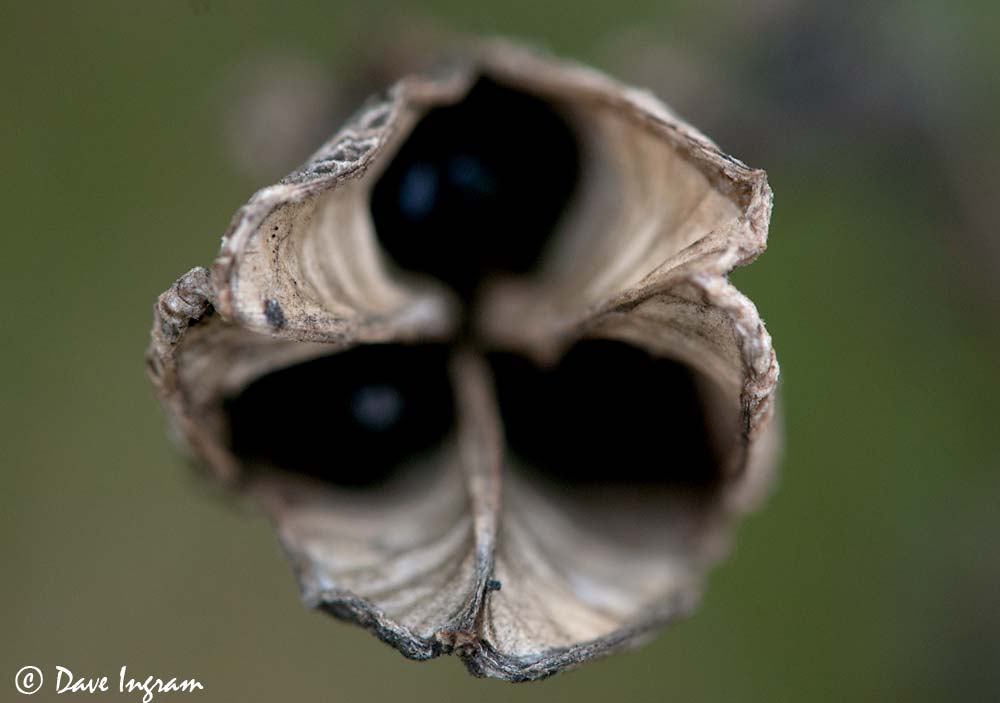
Collect the ripe seed pods when they turn yellowish and bumpy.
-
Carefully split pods and extract the flat, winged seeds inside.
-
Save seeds in an envelope or jar to plant immediately or store.
-
Sow seeds in trays and provide warm, moist conditions for germination.
With ideal care, those rescued lily seeds will grow into bulbs that flower in 2-3 years. It’s a simple, rewarding way to make the most of cut lilies!
Step-by-Step Guide to Harvesting Lily Seeds from Cut Stems
Follow these step-by-step instructions for successfully collecting seeds from cut lily flowers:
Choose the Right Lily Variety
Ensure the lilies you select produce viable seeds. Trumpet, oriental, and LA hybrid lily types are excellent seed producers. Verify the specific variety is not sterile or genetically modified before harvesting seeds.
Identify Mature Seed Pods
Allow cut lily stems to remain in water 2-4 weeks after the flowers finish blooming. Watch below the spent blooms for green, rounded seed pods to form and slowly enlarge.
Monitor for Ripe Pods
Mature lily seed pods will turn yellowish or brown and develop a bumpy, cracked appearance when fully ripe. The pods may split open soon after, so daily monitoring lets you catch them at peak ripeness.
Remove Pods Gently
Use pruners or scissors to carefully snip off the mature seed pods. Try not to crush or damage the pods during removal. Gently place pods into labeled envelopes or paper bags.
Split Pods and Extract Seeds
Working over a sheet of white paper, use your fingers to gently pry pods open. Spill out the flat, winged seeds onto the paper. It’s normal for some seeds to stick inside; carefully scrape out remnants.
Dry and Store Lily Seeds
Spread seeds out on the paper and allow to fully dry for about a week. Place dried seeds in envelopes or jars labeled with the lily variety and date. Store in the refrigerator until ready to plant.
With attentive harvesting, those fading cut lily blooms can yield abundant seeds for raising new plants!
Optimal Conditions for Growing Lily Seeds
Lily seeds require very specific conditions to successfully sprout and grow into bulbs. Here are their key preferences:
-
Soil: Rich, humus-heavy potting mix with excellent drainage. Maintain mild acidity around 6.0-6.5 pH.
-
Light: Bright, filtered light is essential. Avoid intense direct sunlight.
-
Water: Keep soil consistently moist but not saturated. Allow pots to partially dry out between waterings.
-
Temperature: Ideal germination temperatures are 60-70°F (15-21°C). Maintain warm soil after sprouting for vigorous growth.
-
Fertilizer: While sprouting, use only half strength balanced fertilizer. Increase to full strength once seedlings establish.
Observing these optimal conditions will ensure your harvested lily seeds flourish into sturdy bulbs.
Step-by-Step Guide to Growing Lilies from Seeds
Here is a step-by-step guide to planting and raising lilies from the seeds you’ve harvested:
Sow Seeds in Trays
Fill starter trays with moist, well-draining seed starting mix. Sow 2-3 seeds per cell, 1⁄4 inch deep. Gently water after planting to settle soil without washing out seeds.
Provide Warmth
Set trays on heat mats or above heating pads set to 65-70°F (18-21°C). Bottom heat is vital for robust germination. Cover trays with plastic domes to retain moisture.
Germinate in Low Light
Keep seeds in low light as they germinate over 14-30 days. Once sprouted, move to brighter filtered light. Turn seedlings frequently to prevent leggy growth.
Thin Seedlings
Clip off weaker seedlings with scissors once 2 sets of true leaves appear. Leave only the strongest seedling per cell to grow on. Handle emerging plants very gently.
Transplant into Individual Pots
Carefully transfer lily seedlings into 3-4 inch pots filled with rich potting mix once they outgrow cells. Bury stems just below soil level; give adequate space between plants.
Grow On in Cool Conditions
Move pots to a cool spot with filtered light around 60°F (15°C) to simulate overwintering. Allow 1-2 years for small bulbs to form and generate foliage. Cease watering once leaves die back.
Transplant Bulbs Outdoors
After 2 years of growth into bulb form, transplant dormant lily bulbs into garden beds in fall. Site in partial shade; mulch heavily for cold protection.
With attentive care and perfect conditions, those rescued lily seeds will reward you with elegant blooms in just a few years!
Common Problems When Growing Lilies from Seeds
Even if care protocols are followed precisely, issues can still pop up when raising lily seeds. Watch for these potential problems:
-
Seeds fail to sprout: Ensure seeds are fresh and soil temperatures are sufficiently warm. Scarify very hard outer coatings prior to planting.
-
Leggy, weak growth: Give more sunlight immediately after germination. Turn seedlings frequently to prevent leaning toward light.
-
Yellowing leaves: Usually signals overwatering. Allow soil to partially dry out more between waterings. Improve drainage if needed.
-
Bulbs don’t form: Seedlings grown too warm or without overwintering period will only form foliage, not bulbs. Move pots to cool location for bulb development.
-
Bulbs rot in pots: Drainage issue from too much moisture retention. Repot in a very porous container mix. Allow soil to moderately dry out.
With attentive care and troubleshooting, home gardeners can beat the odds and successfully grow lily seeds into flowering bulbs. Just be prepared for a multi-year labor of love!
Tips for Collecting Seeds from Other Cut Flowers
Many popular cut flowers set abundant seeds that can be harvested and grown into new plants. Follow these tips:
Sunflowers
Allow cut blooms to fade completely on the stalk. Heads will droop and the back will turn brown when seeds are ripe. Cut entire heads and dry upside down in bags. Rub heads to extract seeds.
Marigolds
Pick dried flower heads when petals fall off naturally. Rub the heads between your hands over a bowl to remove seeds. Spread seeds on paper towels to fully dry before storage.
Zinnias
Harvest dry zinnia heads when flower petals detach easily. Further dry on trays or paper bags. To remove seeds, simply rub the dried flowers gently.
Dahlias
Wait for tubers to re-sprout after flowering ends. When new growth emerges in spring, detach and dry the small tubers attached to old stems. These mini-tubers can be replanted.
Lavender
Watch for flower heads to fade completely after bloom. Clip them off into paper bags. Rub heads firmly between hands over a bowl to extract tiny seeds. Allow to fully dry before planting or storing.
Many fading cut flowers can yield a bountiful seed harvest with the right harvesting techniques. Get propagating!
Enjoying the Rewards of Growing Lilies from Seeds
Raising lilies from the seed of floral bouquets takes time and dedication. But the payoff is years of enjoyment watching those rescued seeds flourish into elegant, fragrant blooms.
There’s immense satisfaction in nurturing delicate seeds into bulbs and ultimately gorgeous flowers. You’ll gain the skills of a patient gardener able to grow plants from start to finish.
Each lily bulb that bursts into bloom will stand as a reminder of the beauty hidden within a faded blossom. That simple floral gift can become a legacy flowering for years in your garden.
So before you discard the spent stems of gifted lilies, take a moment to check for plump seed pods. You never know what abundant new life may be waiting within!
Details Plant type: perennial Height: 4 to 7 ft Site: suitable for some degree of shade Days to maturity: 160 to 180 days Plant spacing: 12 in Pinch: not necessary
Start seed in trays 8 to 12 weeks before last frost and lightly cover. Germination takes 3 to 4 weeks at 70°F. Transplant out when seedlings are 2 to 3 in tall and all danger of frost has passed. Plants are easy to establish and care is minimal. For colder climates, mulch with straw to overwinter.
Harvesting/Vase Life Harvest when the first flower bud on a stem begins to crack open, and blooms will continue to open daily on a stem. Lily pollen is very messy and will stain, so as soon as the blooms open, take a piece of tissue and pull off the pollen anthers. Expect a vase life of 7 days.
Seeds for this exquisite lily came from our dear friends at 3 Porch Farm. This plant blooms in late summer and has thin, trumpet-shaped flowers that are mostly white with a few pink spots on the outer petals. When flowers die, they dry out and turn into beautiful seedpods that look great in dried flower arrangements or winter wreaths. This perennial usually blooms the second year after seed is sown, but it’s worth the wait. One of the few lilies that thrive in hot, humid conditions.
Please note: All parts of lilies are poisonous to cats. Use caution around pets.
6 Ways to Propagate Lilies || Scaling, Bulbils, Division, Cuttings, Bulblets & Seed
Do lilies make good cut flowers?
Lilies make excellent cut flowers, as they are long-lasting, bright, and fragrant. The most popular cut lily varieties are the Asiatic, Oriental, and daylilies, which boast large blooms in vibrant shades of pink and white. The sturdiness and beauty of lilies also make them perfect to use as centerpieces or to line the aisle at weddings.
Are lilies seeds ripe?
According to a species of lilies, there is a huge difference in lilies seeds. At the end of summer, seeds ripe properly for the sow. The ripe seed is dark, strong and dry. After seeds collection and before implanting seeds in the garden we must storage seeds in the cold and dry place. Lily will grow anywhere if its seeds are sow appropriately.
How to grow lilies from seeds?
Seeds should be cleaned and husk free. According to a species of lilies, there is a huge difference in lilies seeds. At the end of summer, seeds ripe properly for the sow. The ripe seed is dark, strong and dry. After seeds collection and before implanting seeds in the garden we must storage seeds in the cold and dry place.
How to grow a lily flower?
Planting lily is easier than any other flower. It mostly grows from blubs or seeds. Lily flower requires suitable seeds, sapling, mould and weather to grow perfectly. It grows well in the cold milder temperature. There are various types of lily flower and that is why there are different processes for cultivating this flower.
- How to Grow Gorgeous Climbing Roses on a Wooden Fence - March 24, 2026
- Avoid These Plants When Companion Planting with Oregano - March 24, 2026
- 15 Great Trees to Plant Near Your House - March 24, 2026