As spring arrives and the weather warms up, it’s time to start planning this year’s garden. If space is limited, consider planting strawberries in a barrel! This unique and compact gardening method allows anyone to grow juicy, homegrown strawberries, even with minimal yard space.
In this post, I’ll walk you through the simple 8 step process to create your own strawberry barrel. With a few basic supplies, a bit of handiwork, and some tender strawberry plants, you can have a vertical, space-saving strawberry planter up and running in no time. Let’s get started!
What You’ll Need
To build a strawberry barrel planter, you will need:
- 3 plastic barrels or food-grade containers, approximately 55 gallon size
- A jigsaw or reciprocating saw to cut the barrels
- A power drill with a large bit or hole saw
- A mix of planting soil, compost, and optionally peat moss or coco coir (enough to fill barrels)
- Strawberry plants, either bare root or potted (about 10 plants per barrel)
- (Optional) A weatherproof lid or cover for the top barrel
The materials are simple enough to source even if you’re an amateur DIYer. The triple stack of barrels forms a tiered vertical planting system while taking up minimal ground space. Now let’s get to the fun part – building this innovative strawberry planter!
Step-By-Step Instructions
Follow these 8 straightforward steps to create your own space-saving strawberry barrel garden:
Step 1) Cut the Barrels
Using a jigsaw or reciprocating saw, cut the tops off the three barrels, keeping two thirds of each barrel intact. This will allow you to stack the barrels. Leave one barrel intact to form the base.
Step 2) Drill Drainage Holes
It’s crucial to drill plenty of drainage holes in the bottom of the barrels to allow excess moisture to escape. Use a power drill with a large bit or hole saw to add 10-12 holes in the bottoms of the cut barrels and the solid base barrel.
Step 3) Stack and Arrange Barrels
Stack the barrel sections on top of the intact base barrel. The cut barrels will nest neatly into each other when stacked. Arrange the barrels in the final position for your strawberry planter.
Step 4) Fill Barrels with Soil
Start by filling the base barrel with a few inches of soil. For the remaining barrels, fill each about 2/3 full with a mix of potting soil, compost, and peat moss or coco coir.
Step 5) Add Middle Barrel and Repeat
Place the middle cut barrel into position on top of the base barrel. Add more soil mix until this barrel is also about 2/3 full.
Step 6) Add Top Barrel
Finally, put the top cut barrel in place and fill with planting mix until it reaches about 2 inches below the rim.
Step 7) (Optional) Add Cover or Lid
If desired, attach a cover or lid to the top barrel to protect your strawberry plants from harsh weather. Make sure it still allows sunlight to penetrate.
Step 8) Insert Strawberry Plants
Now comes the best part – planting your strawberries! Insert plants into the soil mix, spacing them about 12″ apart. Gently firm up the soil around each plant. Add 10 plants per barrel for a total of 30 plants.
And that’s it – in just these 8 simple steps you’ve created a vertical, space-saving strawberry barrel ready for growing! The triple stack design makes perfect use of small spaces.
Caring for Your Strawberry Barrel
With the set-up complete, you’ll want to provide basic care for your barrel strawberry garden. Here are some tips:
-
Water 1-2 times per week, taking care not to oversaturate the soil. The drainage holes will prevent excess moisture.
-
Fertilize your strawberry plants every 2-3 weeks during the growing season with a balanced liquid fertilizer. This will nourish the heavy producing plants.
-
Prune off dead leaves or runners as needed to keep plants tidy and direct energy to fruit production.
-
Protect berries from birds with netting as they start to ripen.
-
Pick berries when fully red for maximum flavor and juiciness. Enjoy immediately or freeze for later.
-
When the growing season ends, trim off leaves and berries and let plants go dormant. Renew with fresh compost before next spring.
The Benefits of Growing Strawberries in Barrels
This simple barrel gardening method offers many advantages:
-
Perfect for small patios or decks with limited space
-
Vertical design provides maximum yield in a small footprint
-
Elevated design keeps plants safely away from pests and ground diseases
-
Aesthetically pleasing “tower” suits any garden style
-
Provides an abundance of sweet, homegrown berries all season long
-
Allows for easy care and harvesting at waist height
-
Fun, unique project for novice or experienced gardeners alike
Delicious, Juicy Homegrown Strawberries
I hope these simple step-by-step instructions have inspired you to try out your own space-saving strawberry barrel this year. In just an afternoon, you can set up this compact vertical garden and enjoy homegrown berries by summer.
The volume and flavor of harvest from these tiered planters will astound you. Just imagine biting into sun-ripened, juicy strawberries, knowing you grew them yourself using this innovative barrel method. Your garden-fresh berries will be amazing on breakfast waffles, blended into smoothies, layered onto cakes, or simply eaten by the bowlful.
Finding a Wooden Barrel
First, though, you have to locate a suitable barrel. Pickles, molasses, nuts, bolts, rum, salt fish, nails, crackers, and other things were shipped in iron-bound, wood-slat barrels 100 years ago. Back then, every farm had a 40-gallon water barrel under the downspout and five to thirty-gallon berry barrels on each side of the front porch steps.
There are still weak nail kegs made of thin pine slats and wire hoops that aren’t worth the trouble. Also, you might be able to find an old wooden keg in the feed store’s back room. If your budget allows it, the homesteading gear catalogs that advertise in MOTHER sell brand-new, high-quality casks by mail.
However, the only real strawberry barrels I’m aware of that you can buy in stores are 30-gallon kegs made from sweet white oak or beech wood staves. Big box stores that sell lumber and home and garden supplies cut the kegs in half and sell them as patio planters for around $30 each. Some are brand new and made of raw wood or wax-coated wood. Others are used whiskey barrels from Tennessee and Kentucky that are charred on the inside but still smell great with the scent of Jack Daniels Old No. 7. The law says that these well-made steel-strapped white-oak casks can only be used to age whiskey once. When you use them to make berry barrels, you are recycling a great American forest product that has already done a great and noble job. Your strawberries might even carry a hint of aperitif fraises.
Get two half-kegs for each strawberry barrel, and mate them rim-to-rim like a clam shell. When it’s time to add more soil, it’s easier to do if you can split the barrel instead of having to go deep into a single cask of any size. Get some rust-proof fine-mesh window screening and a length of perforated plastic leach-field pipe at the building center. The length should be 6 inches shorter than the height of the barrel when the halves are joined together, which is usually 30 inches for a 30-gallon cask. Get the largest-diameter perf-pipe you can. By replacing the soil in the middle of the barrel that the berry plants wouldn’t use, it will drain the soil inside and make the barrel lighter.
Reinforcing a Wooden Barrel
To make the keg halves stronger, you should use an electric drill with a 3/32-inch metal-cutting bit to drill through the steel hoopstraps and into the middle of each stave about 1/2 inch. Insert 3/4 inch #6 stainless steel roundhead wood screws.
Get a 5 or 6 foot length of 1 inch by 2 inch red oak or another hardwood when you pick up the barrel halves from the yard. When you get home, cut the oak into four 8-inch-long slats with angled ends. These will fit snugly against the sides of the barrel. Lay them on the bottom of each half-keg inside, straight up against the slats that make up the end plugs. Fasten two reinforcing slats to each end plug-angled ends tight against barrel sides, parallel to one another. Use stainless screws.
Cut a circle of wood a bit bigger than the drain pipe around the end of the half-barrel that will be the bottom. Use a saber saw with a long blade to do this. Cut out the middle of the other end, which will be the top half, leaving only a strip of one-inch-wide top boards around the outside. (Yes, you may be cutting out some of the cross-braces you installed. But if you hadn’t put them in, the half-barrels could have fallen apart at this phase. ).
Mark the spots where the planting holes will go. Place one between the rim and the first metal hoop, another between the two metal hoops that surround each half of the barrel, and a third between the bottom hoops if you have a 7-hoop Scotch-whiskey-style aging barrel. When a big barrel is cut in half, some have two hoops on each half. Some hoops are spaced so that you can drill two levels of holes, while others only let you drill one level. Locate holes in every other stave in each tier and stagger holes above the other in adjoining tiers. Cut out the planting holes with a 2-inch hole-saw on a hand drill or by drilling a circle of smaller holes one after the other. Stack the halves together as mirrors for now, and drill out another ring of planting holes along the seam, spaced out between the last rings of holes in each half.
Place the barrels–small end cutouts down–where your berry plants will get full daytime sun. Take out a circle of sod and topsoil that is a foot wider than the barrel. Then, put leveled flat rock or bricks on top of a disc of well-tamped crushed rock. The firm but permeable base will give the barrel a stable base, help the soil drain inside, and keep the wood on the bottom dry and free of rot for longer than if the barrel sat directly on the ground.
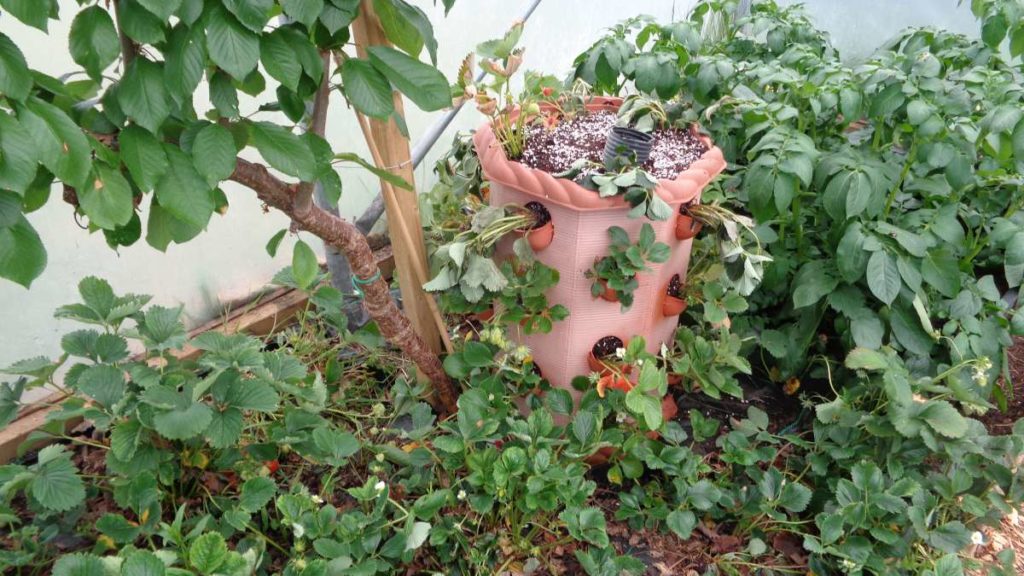
Strawberry Barrel Planter
FAQ
Can you grow strawberries in a barrel?
How many strawberry plants are in a wine barrel?
Can you plant strawberries in a wheelbarrow?
What is the best container for growing strawberries?
- The Moderate Growth Rate of the Stunning Edith Bogue Magnolia - April 10, 2026
- Cultivating Vibrant Dahlias in Garden Beds – A Complete Growing Guide - April 10, 2026
- Mediterranean Pink Heath in Summer – Tips for Care and Maximizing Bloom - April 9, 2026