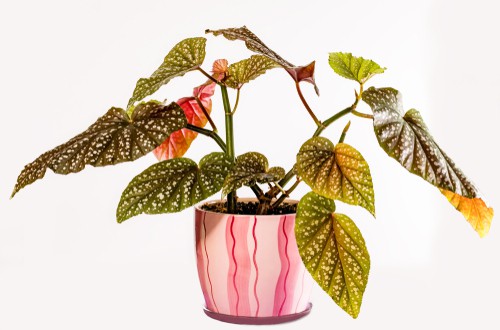
The polka dot plant, also known as hypoestes phyllostachya, is a popular houseplant known for its brightly colored foliage. This tropical plant is native to Madagascar and features oval shaped leaves decorated with pink white or red spots, hence the common name “polka dot.”
While polka dot plants add a pop of color to indoor spaces, their leaves can start turning brown much to the frustration of plant parents. But don’t despair if you notice browning leaves on your polka dot plant. This issue is usually easily fixed once you identify the cause.
In this article, we’ll cover the most common reasons for polka dot plant leaves turning brown and what you can do to restore your plant to health.
Overwatering Is the Most Common Cause of Brown Leaves
The number one reason polka dot plant leaves turn brown is overwatering. These tropical plants prefer soil that is consistently moist, but not wet or saturated. When grown as houseplants, they need a well-draining potting mix and should only be watered when the top inch or two of soil has dried out.
If the soil stays soggy, the roots are deprived of oxygen. This leads to root rot and the plant responds by dropping leaves, starting with the lower ones. Eventually the brown spots spread upward until the whole leaf turns crispy and brown.
Check the moisture level by sticking your finger in the soil before watering. And always make sure excess moisture can drain out of the pot. A pot with drainage holes is essential.
If you suspect overwatering, allow the soil to dry completely before giving the plant more water. Trim off all the dead and dying leaves to encourage fresh new growth.
Low Humidity Also Causes Brown Leaves
Polka dot plants are tropical plants that naturally grow in humid conditions. When humidity is too low, such as in most homes, the leaves lose moisture faster than the roots can supply it. This causes the leaves to dry out and brown along the edges.
Misting the plant daily helps increase humidity right around the foliage. Use room temperature distilled or filtered water so salts in tap water don’t build up.
You can also set the pot on a pebble tray filled with water, which boosts local humidity as the water evaporates.
Put a humidifier nearby or move the polka dot plant to higher humidity areas like bathrooms and kitchens.
Other Potential Causes of Brown Leaves
While overwatering and low humidity are the most likely culprits, here are a few other possible causes of polka dot plant leaves turning brown:
-
Too much or too little light: Polka dot plants need bright, indirect light. Too little light causes fading and browning leaves. But too much direct sun scorches the leaves.
-
Cold drafts or temperature swings: These tropical plants prefer warm conditions between 65-80°F. Keep them away from drafty windows, doors, and air vents.
-
Old leaves: As new leaves form, old leaves naturally turn brown and drop off. This is normal and not a cause for concern. Just pinch off the dead leaves.
-
Mineral deficiency: If the plant is not fed regularly, it may develop browning leaves from a lack of nutrients. Apply a balanced liquid fertilizer every 2-4 weeks in spring and summer.
-
Transplant shock: Re-potting or moving the plant to a new location can disrupt the roots and cause leaf wilt and browning. Allow it to recover in consistent conditions.
-
Pests: Spider mites, aphids, mealybugs and other pests can attack polka dot plants. Check for insects under the leaves or get a close look with a magnifying glass. Treat any infestations immediately.
-
Diseases: Bacterial and fungal diseases are not common but can sometimes cause leaf spots and eventual browning. Improve airflow and isolate affected plants to prevent spreading.
How to Fix and Prevent Polka Dot Plant Leaves From Turning Brown
If your polka dot plant has brown leaves, start by identifying and addressing the underlying cause. Here is a summary of tips to restore health and prevent future leaf browning:
-
Check soil moisture before watering and only water when the top inch is dry. Pour off excess water in the saucer.
-
Provide higher humidity through misting, trays of pebbles, humidifiers or relocation.
-
Give the plant bright, indirect light by placing near an east or west window. Rotate to evenly distribute light.
-
Keep plants away from cold drafts, AC vents, and other temperature fluctuations.
-
Apply a balanced liquid fertilizer every 2-4 weeks in the growing season.
-
Prune off all dead or dying leaves and stems to improve appearance.
-
Transplant only when rootbound into fresh, well-draining potting mix.
-
Monitor for pests like spider mites and treat promptly if seen.
-
Improve air circulation and isolate plants with disease. Remove badly affected foliage.
-
Allow soil to dry out completely between waterings and reduce watering in winter when growth is slower.
Displaying Polka Dot Plants to Show Off Vibrant Foliage
Once your polka dot plant is thriving again, you’ll want to show off its unique and eye-catching foliage. Here are some tips:
-
Choose a pot that compliments or contrasts with the leaf colors. Bright ceramic or metallic pots showcase the colorful dots nicely.
-
Add a mossy stick, small trellis or bamboo stakes for the slender stems to climb on and add height.
-
Prune regularly by pinching off the top few sets of leaves to encourage bushy full growth. More leaves equal more polka dots!
-
Group with other plants with purple foliage like oxalis, coleus and deep green foliage for a striking color combo.
-
Plant in hanging baskets or arrange in elevated planters so the foliage can trail down. The downward cascading leaves look spectacular.
-
Rotate the pot weekly and prune to promote even growth on all sides for the fullest shape. The rounder the plant, the better.
How to Propagate Polka Dot Plants From Cuttings
Once your polka dot plant becomes overgrown after shaping and pruning, you can use tip cuttings to propagate more plants. Here’s how:
-
Take 3-4 inch cuttings from the top of the plant where leaves are most colorful. Cut just below the node or joint.
-
Remove the bottom set of leaves and place the cutting in a vase or cup of room temperature water.
-
Change the water every 2-3 days. Roots should form within 2 to 4 weeks.
-
Once several inches of roots have grown, plant the cuttings in a small pot with well-draining potting mix. Keep evenly moist.
-
Gradually transition the new plant to higher light levels. Pinch back tips to promote bushiness as it establishes.
-
Once growing strongly, the propagated polka dot plant can be repotted in a standard potting mix and treated like a mature, established plant.
Propagating from cuttings is an easy, inexpensive way to make more polka dot plants to expand your collection. And it ensures the new plants have the exact same colorful leaf patterns and habit as the parent plant.
Fun Varieties of Polka Dot Plants to Collect
While the classic polka dot plant has pinkish-red and white spotted leaves, there are many fun leaf colors and patterns available:
- Pink Splash has bright pink leaves with freckles
- Red Splash features deep red and pale pink foliage
- Rose is covered in rose-pink spots
- White Splash has white leaves heavily splashed with pink
- Peach offers unique peach and light green foliage
- Freckles is dotted with tiny pinkish-red spots
- Cherry has large cherry-red spots on green leaves
By adding different polka dot plant varieties to your collection, you can create eye-catching arrangements. Complementary colors like pink and red or contrasting combos like red and white offer fabulous drama.
The polka dot plant provides unique, vivid color that looks almost artificial. Although its leaves can be prone to browning, the solutions are usually simple. Pay close attention to your plant’s care and needs, and you’ll be rewarded with a healthy, bushy specimen exploding with colorful polka dotted foliage.
Pebble Trays: Old School but Gold
Its like your grandmas tried-and-tested method: a tray with pebbles and water beneath the plant pot. Its a classic for a reason. As the water evaporates, it gives your Polka Dot Plant that humidity hug it craves.
Monitor and Adjust
Lastly, keep an eye on the humidity levels. You dont need to be a weatherman, just get a simple hygrometer. If the airs too dry, its time to turn up the humidity game. If its too moist, dial it back. Its all about finding that perfect balance.
Remember, your Polka Dot Plant isnt just another pretty face. It has needs, and meeting them doesnt have to be a chore. With these tips, you can prevent those brown spots and keep your plant looking as fabulous as ever.
Polka dot plant care and tips to avoid curling leaves/ Hypoestes Phyllostachya
What do Polka Dot leaves look like?
Polka dot leaves have a pink, red, or white flush. However, they should not have any brown spots, blotches, or edges. Brown leaves are frequently brittle, dry, and crisped. Another point of concern is browning at the leaf tips. This is particularly true if you notice some water-soaked lesions on the foliage.
Why do Polka Dot leaves turn brown?
Insufficient water and humidity can cause the polka dot plant’s leaves to turn brown or start drooping. Also, too much sunlight can burn the leaves. Hard water and overfertilization are other reasons for a polka dot plant’s leaves turning brown. Adjust your humidity or watering habits to revive the plant.
Why is my polka dot leaf dropping?
Leaf drop should be taken seriously as if it happens for any reason other than natural aging, the condition causing the problem can be fatal if left unattended. Other problems that can appear with a Polka Dot plant include yellowing leaves which usually indicate overwatering.
How do you know if a polka dot plant is dying?
Another telltale of a dying, damaged, or sick plant is leaf drop. Your polka dot plant is taking precautions to increase its chances of survival. Dropping some leaves aids in conserving as much energy and water as possible. Defoliation is frequently used as a last resort. Other symptoms, such as yellowing, wilting, and drooping, will appear first.
- The Moderate Growth Rate of the Stunning Edith Bogue Magnolia - April 10, 2026
- Cultivating Vibrant Dahlias in Garden Beds – A Complete Growing Guide - April 10, 2026
- Mediterranean Pink Heath in Summer – Tips for Care and Maximizing Bloom - April 9, 2026