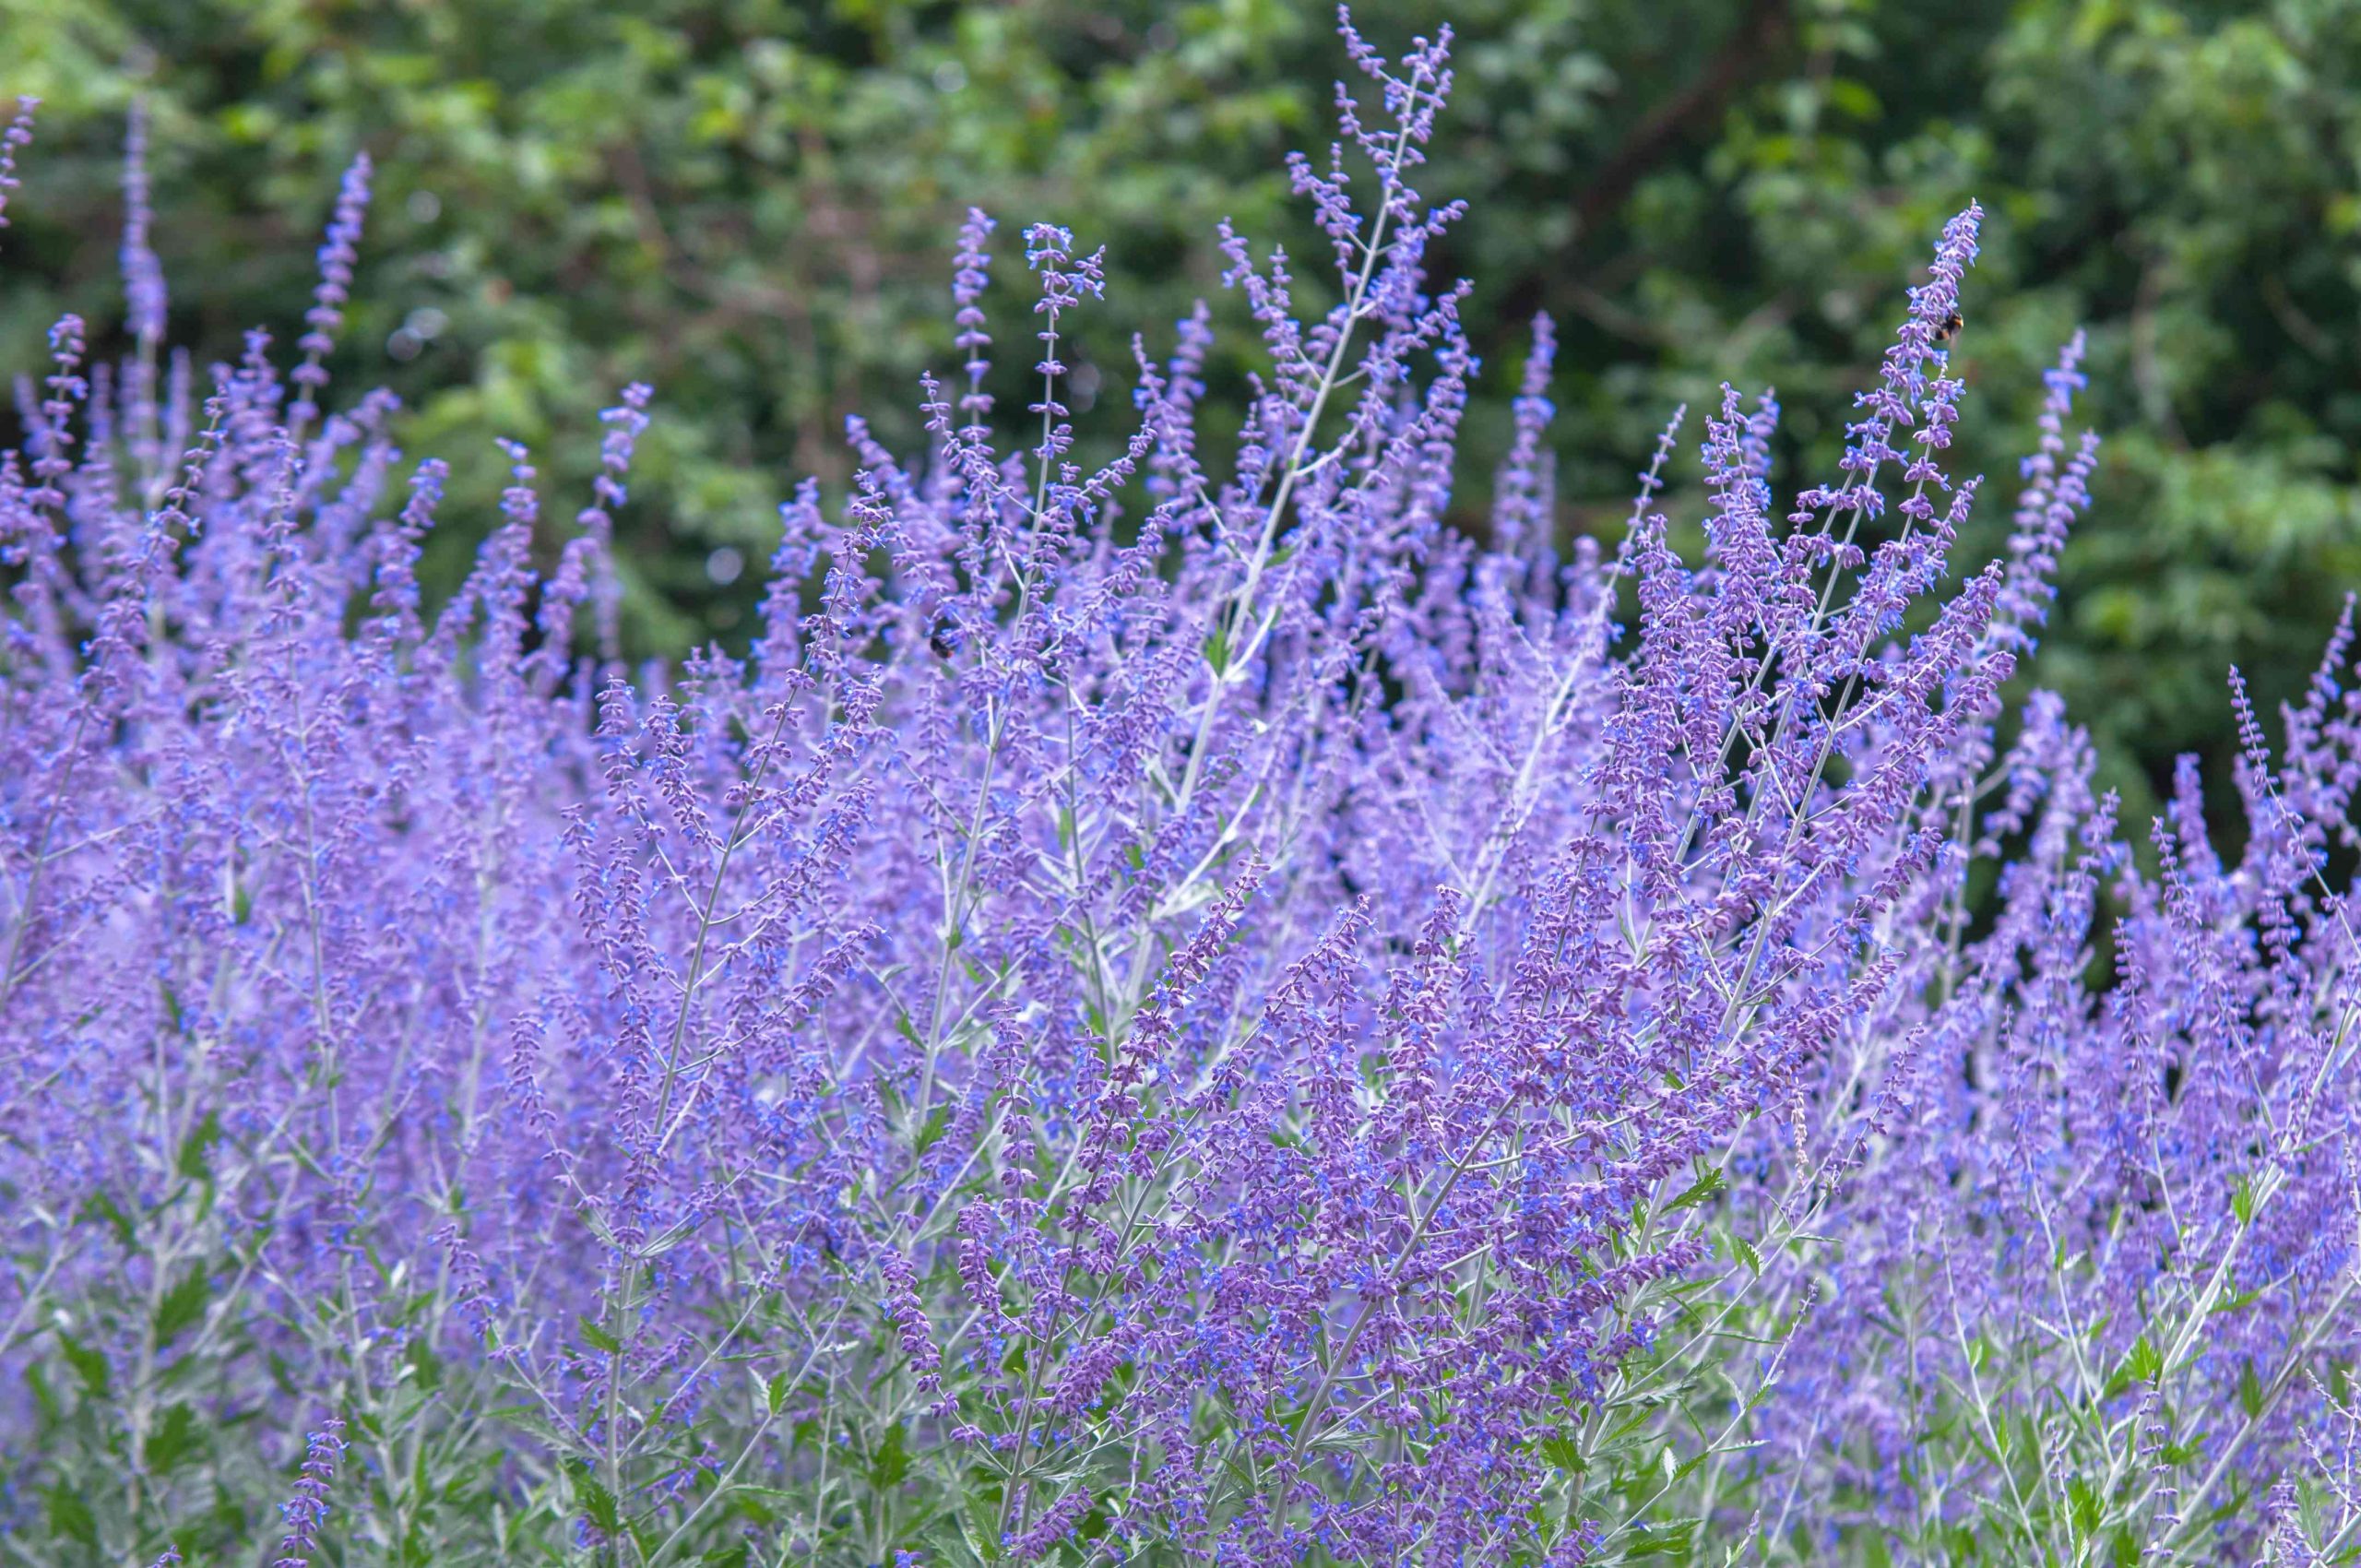
Russian sage, which is now known as Salvia yangii but used to be called Perovskia atriplicifolia, has bright purple flowers that look like lavender. They go well with its gray-green leaves and give any garden more color. This hardy perennial plant can grow in USDA plant hardiness zones 3–9. It can handle drought, and even though it’s called “sage,” it’s not the same plant as the edible culinary sage. Move your Russian sage to a spot that won’t flood in the winter or soak the roots too deeply, which is bad for the plant.
With its airy purple flower spikes and silvery foliage, Russian sage (Perovskia) is a gorgeous addition to gardens It thrives in full sun and is highly drought tolerant However, you may find it necessary to transplant an existing Russian sage plant to a new location. Knowing the optimal time to move this perennial is key to success.
In this article, we’ll explore when Russian sage can be safely transplanted for the highest survival rate We’ll go over the best times to transplant in spring, summer, fall, and winter
An Overview of Transplanting Russian Sage
Russian sage is a long-lived perennial in zones 3-9 that can grow quite large under ideal conditions, reaching up to 5 feet tall and wide. It features an extensive root system.
When transplanting, it’s important to move as much of the intact root ball as possible to limit shock to the plant. Watering well after transplanting and providing good aftercare helps Russian sage recover and continue growing vigorously.
While Russian sage can technically be moved at almost any time, early spring is generally considered the optimal time for transplanting. Let’s look at why this season is preferred along with other good options.
Spring – The Best Season to Transplant Russian Sage
Transplanting in early spring allows Russian sage to establish roots before summer heat. In most regions, April is an ideal month.
Here are some tips for spring transplanting:
- Wait to transplant until daytime temperatures are consistently above 50°F. This reduces cold damage to new roots.
- Cut back stems by 2/3 their height before digging up. This reduces transpiration.
- Water deeply the day before transplanting to make digging easier.
- Move the plant quickly and replant at same depth it was originally
- Water thoroughly after transplanting and provide shade for a few days.
- Apply mulch around transplants to conserve moisture and suppress weeds.
- Avoid fertilizing at time of transplant as it can damage new roots.
When spring transplanted properly, Russian sage experiences minimal stress and recovers quickly after becoming established.
Summer Transplanting
Summer is a viable option for transplanting Russian sage but does carry some extra risks.
To minimize transplant shock in summer:
- Transplant in early morning or evening to avoid midday heat.
- Ensure soil stays evenly moist after transplanting to prevent drying out.
- Water transplants daily for the first 1-2 weeks unless rain occurs.
- Provide temporary shade if transplanting during a heat wave.
- Mist transplants daily until new growth appears to reduce stress.
With adequate watering and care, Russian sage adapts well even to summer transplanting as long as you avoid hot, dry weather.
Fall Transplanting Conditions
Early fall can also be appropriate for transplanting Russian sage. Ideal timing is around Labor Day or 4-6 weeks before first frost.
Benefits of fall transplanting include:
- Cooler air temperatures reduces stress.
- Less need for constant watering than summer transplants.
- Plants can establish roots before going dormant.
- Less competition with weeds compared to spring transplants.
The main disadvantage of fall planting is potential cold damage to new root growth. Provide winter mulch after ground freezes to protect fall transplants.
Winter Transplanting Challenges
Winter is the most challenging season to transplant Russian sage. Frozen soil makes digging up plants difficult if not impossible in some regions.
Dormant transplanting has these drawbacks:
- Unable to assess root health until spring growth.
- High risk of root damage due to digging in frozen soil.
- Damage or death of new roots from freeze-thaw cycles.
- Inability to water transplants until ground thaws in spring.
- Increased winterkill of top growth due to moisture stress.
- Heavy mulching required to protect root zone from hard freezes.
If winter transplanting can’t be avoided, wait until ground is still fully frozen. Transplant on a mild day above freezing if possible. Water deeply in fall before ground freezes to pre-hydrate plants. Mulch heavily over the root zone after transplanting.
How to Transplant Russian Sage
Here is an overview of how to properly transplant Russian sage step-by-step:
- Prepare new planting site well in advance by digging in compost and other organic matter. Make sure drainage is excellent.
- Water existing plants 1-2 days before digging them up.
- Prune back top growth by 2/3 to reduce water loss after transplanting.
- Dig up plant carefully keeping as much of the root system intact as possible.
- Quickly replant in new site at same depth plant was originally grown.
- Water deeply after planting and as needed until established.
- Mulch around transplants to retain moisture and reduce weeds.
- Stake larger plants if needed to prevent toppling until roots regrow.
- Avoid fertilizing at time of transplant to prevent root damage.
Aftercare for Transplanted Russian Sage
Proper aftercare improves transplant success and vigor. Be sure to:
- Check soil moisture frequently and water as needed until established.
- Apply organic mulch like wood chips or shredded leaves to retain moisture.
- Stake larger plants if they become loose or start tilting from inadequate root anchorage.
- Mist transplants daily for the first week to reduce moisture stress.
- Avoid excess nitrogen fertilizer the first year which can damage new roots.
With attentive aftercare, Russian sage should recover quickly after transplanting and grow vigorously. Avoid transplanting during hot, dry weather to prevent excessive shock.
Signs of Transplant Shock in Russian Sage
Watch for these symptoms of excessive transplant stress:
- Leaves wilting or turning yellow despite regular watering.
- Few or no new leaves appearing within 2-3 weeks of transplanting.
- Stems becoming loose or plants falling over due to poor root establishment.
- Woody stems snapping off at soil level indicating root or stem rot.
- Failure to leaf out normally the following spring.
Key Tips for Russian Sage Transplanting
Here are the key takeaways when transplanting Russian sage:
- Spring and early fall provide the best conditions for transplanting.
- Prune back top growth before digging up plants.
- Water transplants regularly until new roots become established.
- Provide shade immediately after transplanting in hot weather.
- Mulch around transplants to conserve moisture and reduce weeds.
- Stake larger plants if they become loose before roots regrow.
- Avoid winter transplanting whenever possible due to high failure risk.
With proper timing and aftercare, Russian sage readily adapts to being transplanted. Pay close attention to watering and care in the first weeks after transplanting. Transplanting in spring or early fall provides the highest success rate.
When to Transfer Russian Sage
Transplanting Russian sage can take place any time during the growing season. It grows best in full sun with well-draining soil thats slightly dry or has medium moisture. Russian sage that doesn’t get at least eight hours of direct sunlight a day will flop, but pruning it in the spring can stop this from happening.
Loosen the soil and add compost to prepare the new growing site before transplanting Russian sage. The soil for growing Russian sage must be loose to encourage water to drain. Mixing compost over the planting site improves drainage and provides evenly moist soil. Use a garden fork to break up the soil on the new growing spot to a depth of 12 to 15 inches whenever it’s not frosty outside. Cover the ground with 2 to 4 inches of compost. Use a garden fork to mix it into the soil.
Digging Up Russian Sage
Russian sage requires careful removal to minimize damage to its root system. The roots of Russian sage can be very big, growing 3 to 5 feet tall and 2 to 4 feet wide. This means that some damage is bound to happen. Digging up the plant carefully is unlikely to cause serious harm. For the Russian sage, drive a garden fork into the ground about a foot from the stem in the middle. Then, lift the fork’s end up.
Repeat this around the plants base, slowly working the root ball out of the soil. When you touch the plant, wear gloves because the leaves may irritate or bother some gardeners who are sensitive. Lift the plant out, and put it down on the soils surface. Break off excess soil in areas that contain no roots, to lighten the plants weight.
As soon as you dig up the Russian sage, move it to a new spot to grow so that its roots don’t dry out. Russian sage can handle drought and doesn’t need much care, so it shouldn’t have a hard time being moved. However, planting it again right away increases its chances of success. Make a hole that is 2 1/2 feet wide and as deep as the root ball of the Russian sage, which is usually about 1 foot. Place the plant in the hole so that its level and sitting at its original growing depth. You may need to add or remove soil at the base of the hole. Fill in the holes around the root ball with the dirt you dug up, and then firmly place the plant in its hole.
HOW TO TRANSPLANT A RUSSIAN SAGE
FAQ
When can Russian sage be divided?
Does sage transplant well?
How do you treat Russian sage transplant shock?
What happens if you don’t cut back Russian sage?
- The Moderate Growth Rate of the Stunning Edith Bogue Magnolia - April 10, 2026
- Cultivating Vibrant Dahlias in Garden Beds – A Complete Growing Guide - April 10, 2026
- Mediterranean Pink Heath in Summer – Tips for Care and Maximizing Bloom - April 9, 2026