As any gardener knows, plants can be expensive to purchase. Starting plants from seeds can take a long time. That’s why learning techniques for plant propagation is a valuable skill for multiplying your garden’s bounty. Propagation allows you to turn one plant into many new plants quickly, easily, and for free.
In this guide we’ll explore the top 12 methods for plant propagation both indoors and outdoors. Mastering these simple propagation techniques will enable you to expand your flower beds boost your vegetable harvest, share plants with friends, and preserve favorite heirloom varieties.
What Is Plant Propagation?
Plant propagation refers to methods for creating new plants from parts of existing plants: stems, roots, leaves, or reproductive structures like seeds and spores. This cloning process allows plants to multiply and spread quickly in nature. As a gardener, you can imitate natural propagation to intentionally grow more plants.
Reasons for propagation include:
- Increasing plant yield and harvests.
- Propagating specimens from gifted plants or rare varieties.
- Creating identical clones of a plant for consistency.
- Filling garden beds and spaces quickly.
- Sharing or selling plants.
- Backing up valuable plants by making new starts.
Types of Plant Propagation Methods
There are two main forms of plant propagation:
1 Sexual propagation
This involves plants reproduced from seed or spores resulting from genetic recombination. The new plants are unique offspring, not clones.
2. Asexual or vegetative propagation
This involves taking plant parts like stems, roots, or leaves and growing them into new genetic clones or replicas of the parent plant. No seeds are required.
Let’s explore the top methods for sexual and asexual propagation in detail:
Sexual Propagation Methods From Seed
1. Direct sowing outdoors
This simplest seed planting method involves scattering seeds directly into prepared garden beds. Seeds can also be planted in pots or planting trays. Some seed requires light to germinate, while others need darkness. Read packet instructions.
2. Start seeds indoors
For a head start on the growing season, begin seeds indoors 6-8 weeks before your region’s last expected frost. Use a seed starting mix in trays or pots. Provide warmth and light. Harden off before transplanting.
3. Stratification
Some seeds require a period of cold treatment before germinating. Place them between damp paper towels in the refrigerator for the recommended time.
Asexual or Vegetative Propagation Methods
These cloning techniques create new plants from parts of existing plants. Offspring are identical to the parent.
4. Division
Many bulb and perennial plants are propagated by digging up overcrowded clumps and dividing them into smaller sections, ensuring each has roots or stems. Replant divisions.
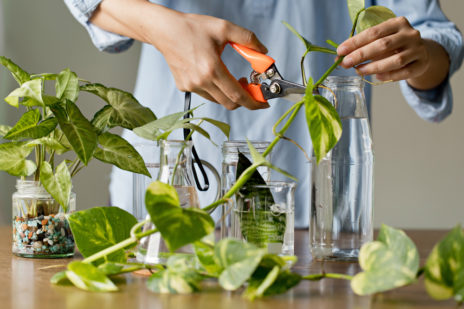
5. Cuttings
Take 3-6 inch cuttings from the stems, tips, or leaves of plants. Place into soil or rooting compound. Keep humid until new roots form. Then transplant. Softwood, semi-hardwood, and hardwood cuttings root at different times.
6. Layering
Bend low-growing stems to the ground and bury a section in soil. New roots will sprout at the buried joint. These rooted stems can be cut free and replanted.
7. Grafting and budding
Joining two plant parts together allows you to propagate an exact genetic replica onto established rootstock. Methods like splice grafting, whip grafting, and T-budding take skill but offer disease resistance or other benefits.
8. Air layering
Remove a ring of bark from a stem. Cover with sphagnum moss or other rooting medium and wrap in plastic. New adventitious roots will sprout above the wound. Cut and replant the new plant.
9. Suckers and offshoots
Some plants produce new shoots called suckers that can simply be dug up, severed from the parent plant, and replanted in soil. Rhizomes spread under the soil surface and sprout new shoots called offshoots that can also be propagated.
10. Bulbs and tubers
Plants that grow from bulbs and tubers will generate tiny new bulbs called bulbils or offsets/cormels around the parent. These can be detached and grown into new plants.
11. Runners and stolons
Low-growing plants often spread using horizontal shoots called runners or stolons. New baby clone plants form at the nodes which can be snipped off and rooted. Examples are strawberries and spider plants.
12. Tissue culture
This high-tech laboratory technique cultures new plants from tiny bits of tissue. Callus tissue grows on sterile nutrient gel, generating plantlets. Used to propagate orchids and other difficult plants.
Mastering a variety of propagation techniques enables you to dramatically expand your gardening horizons. Share, trade, and preserve treasured varieties more easily. Fill beds and pots quickly from just a few parent plants. Discover the satisfaction of growing beautiful flowers and bountiful vegetables for free.
Asexual Propagation – Other Methods
Plant stems that are still attached to their parent plant can grow roots if they touch a rooting medium. This way of vegetative propagation usually works because there isn’t too much water stress and there are plenty of carbs and minerals. It is called “layering” when roots grow on a stem while the stem is still connected to the parent plant. A layer is a rooted stem after it has been removed from the parent plant. Some plants propagate naturally by layering, but sometimes plant propagators assist the process. You can improve layering by cutting the stem on the side where the roots will grow or by bending it very sharply. The rooting medium should always provide aeration and a constant supply of moisture. Some common forms of layering are as follows. However, keep in mind these protocols are sometimes modified.
Tip layering. Dig a hole 3 to 4 inches deep in the rooting medium. Insert the tip of a current seasons shoot and cover it with soil. The tip grows downward first, then bends sharply and grows upward (Figure 13–12). Roots form at the bend. The recurved tip becomes a new plant. Remove the tip layer and plant it in late fall or early spring. Examples of plants propagated this way include purple and black raspberries, trailing blackberries, and dewberries. The aforementioned plants also do this naturally.
Simple layering. Bend the stem to the ground. Cover part of it with soil, leaving the remaining 6 to 12 inches above the soil. Bend the tip into a vertical position and stake in place (Figure 13–13). The sharp bend often induces rooting, but wounding the lower side of the bent branch may help. Simple layering can be done on most plants that have low-growing branches. Examples include azalea, forsythia, boxwood, honeysuckle, rhododendron, and wax myrtle.
Compound (serpentine) layering. Bend the stem to the rooting medium as for simple layering, but alternately cover and expose stem sections. Wound the lower side of the stem sections to be covered (Figure 13–14). This method works well for plants producing vinelike growth such as heart-leaf philodendron, pothos, and grape.
Mound (stool) layering. Cut the plant back to 1 inch above the ground in the dormant season. Dormant buds produce new shoots in the spring. Mound soil over the new shoots as they grow (Figure 13–15). Roots develop at the bases of the young shoots. Remove the layers in the dormant season. Mound layering works well on apple rootstocks, cotoneaster, daphne, quince, and spirea.
Air layering (pot layering, circumposition, marcottage, Chinese layering, gootee). Air layering is a way to grow new plants from large, overgrown houseplants like rubber plants or dieffenbachia that have lost most of their lower leaves. It can also be used to grow some woody ornamentals like camellias. The process varies depending on whether the plant is a monocot or dicot. For plants that only have one type of leaf, like corn plants (Dracaena fragrans ‘Massangeana’), cut the stem about one-third of the way up. This is normally done on a stem about 1 foot from the tip. The cut is held open with a toothpick or wooden matchstick. Dust the wound with rooting hormone and surround with damp, unmilled sphagnum moss. Wrap the moss with plastic and hold in place with twist ties or electricians tape. Alum foil can also be used; it doesn’t need tape or twist ties to stay in place.
The process for dicots is similar except a 1-inch ring of bark is removed from the stem. Scrape the newly bared ring to remove the cambial tissue in order to prevent callus from forming. Wrap and cover using the same procedure as that described for monocots (Figure 13–16).
After the rooting medium is filled with roots, sever the stem below the medium. The new plant requires some pampering after planting until the root system becomes more developed.
Natural forms of layering. Sometimes layering happens without the help of a propagator. Runners and offsets are specialized structures that facilitate propagation by layering.
A runner produces new shoots where it touches the growing medium. Plants that produce stolons or runners are propagated by severing the new plants from their parent stems. Plantlets at the ends of runners can root either while still attached to the parent plant or when they are separated and put in a rooting medium. Examples include strawberry and spider plants (Figure 13–17).
Rose-shaped stem plants often make new shoots, which are called offsets or offshoots, at the base or in the leaf axil. Sever the new shoots from the parent plant after they have developed their own root system. Unrooted offsets of some species may be removed and placed in a rooting medium. Some of these must be cut off, whereas others may simply be lifted from the parent stem. Examples include date palm, haworthia, bromeliads, and many cacti.
Separation and division are the easiest and quickest ways to propagate many plants. Separation uses naturally occurring vegetative structures such as bulbs and corms. Individual bulbs or corms are separated from a clump.
Most of the spring- and summerflowering bulbs are propagated this way. Digging up the plant or taking it out of its pot and cutting it into separate pieces is what division means. Division uses specialized vegetative structures such as rhizomes and tubers. Indoor plants that can be propagated by division include ferns, snake plant, prayer plant, and African violet. Outdoor plants that can be divided include many perennials such as daylily, hosta, iris, liriope, and verbena. Separation and division are normally done in the fall or early spring.
Budding and grafting are asexual ways to spread plants by joining parts of two or more different plants together so they grow as one. These methods are used to make new cultivars that don’t grow well from cuttings or to change something about the plant, like making it weep or grow taller. Most fruit and nut trees are propagated by budding or grafting.
This is the part of the graft that grows into the top of the grafted plant. It is made up of a short stem piece with one or more buds. The rootstock, which is also known as stock or understock, gives the new plant its roots and sometimes the lower part of its stem. Seedling rootstocks are used commonly.
Six conditions must be met for bud grafting to be successful:
- The scion and rootstock must be compatible (capable of uniting).
- It is important that both the scion and the stock plant are at the right stage of growth.
- The cambial part of the scion and the stock need to be close to each other, if possible touching.
- It is important to keep the right polarity (the buds on the scion should be facing upward).
- As soon as the graft is done, all cut surfaces must be kept from drying out.
- Proper care must be given to the graft after grafting. (See “Care of Buds and Grafts”).
The stock plant’s top is cut back to the bud union once the bud has healed and broken to form a shoot.
Not all plants can be grafted. The two plants should be closely related taxonomically. Grafting between clones and seedlings of the same species is usually successful.
A bud graft, also known as budding, is when one bud from a scion plant is joined to a stem of a rootstock plant, with or without a small piece of bark. It is especially useful when scion material is limited. It is common for buds to form during the growing season, from June to August in the Southeast US, when the bark is slipping, which means it is soft and easy to peel back from the cambium. However, buds can also form in late winter or early spring.
T-budding—This is the most commonly used budding technique (Figure 13–18). Cut through the rootstock’s bark vertically (along the same axis as the rootstock) when the bark is slipping. Be careful not to cut any buds on the stock. At the top of the vertical cut, make a horizontal cut that crosses over it, making a “T” shape. Loosen the bark by slightly twisting the knife at the intersection. Remove a shield-shaped piece of the scion, including a bud, some bark, and a thin section of wood. Push the shield under the loosened stock bark at the “T. ” Wrap the union, leaving the bud exposed. Many fruit trees are propagated by this method.
Chip budding—This method can be used when the bark is not slipping. For chip budding and T-budding, the basic steps for working with budwood and stock are the same. However, the cuts that are made for chip budding are very different. For both the stock and the scion, the first cut is made 45o to 60o downward to a depth of about ⅛-inch (Figure 13–19). Start the second cut about ¾-inch higher and bring it down to meet the first cut. This should be done on a smooth part of the rootstock. (The exact spacing between the cuts varies with species and the size of the buds. ) Then remove the chip. Both the scion (to take out the bud) and the rootstock (to put the bud in) should have cuts that are the same size. There is no right or wrong place for the bud, but it is usually put one-third of the way down from the start of the cut. If the bud shield is significantly narrower than the rootstock cut, line up one side exactly. Wrapping is extremely important in chip budding. If all exposed edges of the cut are not covered, the bud dries out before it can “take. Chip budding has become more popular in the last five years since thin (2 mil) polyethylene tape became easier to find and use. As shown in Figure 13–20, this tape is wrapped around the whole injury, including the bud. It then forms a small plastic greenhouse over the healing graft.
Grafting is the union of the stems of two plants to grow as one. There are different ways to graft, and the best one to use depends on the plants’ age and type.
Whip and tongue grafting—This method is often used for stems ¼-inch to ½-inch in diameter. The scion and rootstock are usually of the same diameter. This graft provides excellent cambial contact and heals quickly. Make a cut that is 1 to 2½ inches long and sloped at the top of the rootstock. Do the same thing on the bottom of the scion. Cut down into the stock and up into the scion on the cut surface so that the pieces will fit together when you put them together. Place the pieces together so that at least one side of the cambium matches. Next, wrap and tie or wax the graft union.
Cleft grafting—Cleft grafting is one of the oldest and most widely used methods of grafting. If you want to make a weeping ornamental tree or change an older fruit tree cultivar to a newer, better one while keeping the old root system, these are the two most common times to use this method. It is best to do cleft grafting in early spring, when the stock plant’s buds are starting to swell but growth has not yet started. The scions, however, must be fully dormant. Collect scion wood ⅜ to ⅝ inch in diameter during the dormant season and refrigerate it until needed.
Cut the limbs to be reworked at a right angle to the main axis of the branch. Cut the branch in half with a heavy knife and make a 2-inch cut through the middle of the stub that needs to be joined. Be careful not to tear the bark. Keep this cut wedged apart. Get two 3 to 5 inch long scion pieces ready. Cut the bottom of each scion piece into a wedge shape. Insert the scions at the outer edges of the cut in the stock. To make sure the cambial layers of the scion and stock touch, tilt the top of the scion outward a little and the bottom a little inward. Remove the wedge propping the slit open, and cover all cut surfaces with grafting wax (Figure 13–22). If both scions grow, one can be removed later.
Some other types of grafting include splice, side, stub, side veneer, and side tongue. Check reference books for additional information. Each method has advantages for special situations.
Techniques to Break Dormancy
External dormancy results when a seeds hard seed coat is impervious to water and gases. The seed will not germinate until the seed coat is altered physically. Scarification is any process that breaks, scratches, or mechanically changes the seed coat so that water and gases can pass through it. In nature, this can happen in the winter when the seed coat cracks because of the cold, or while the seed is in the ground and microbes change the seed coat. Scarification may also occur as the seed passes through the digestive tract of an animal.
Scarification can be forced, rather than waiting for nature to alter the seed coats. Commercial growers scarify seeds by soaking them in concentrated sulfuric acid. Depending on the species, seeds are put in a glass container with sulfuric acid on top. The seeds are then stirred gently and left to soak for 10 minutes to several hours.
Reference books give appropriate concentrations and durations. When the seed coat has been modified (thinned), the seeds are removed, washed, and sown. Sulfuric acid can, however, be very dangerous for an inexperienced individual and should be used with extreme caution. Some species can be killed with vinegar, which is safer. The process is the same as with sulfuric acid.
In mechanical scarification, the seed coat is broken by filing, rubbing, or lightly cracking the seed with a metal file, sandpaper, or hammer. Another method is hot water scarification. Put the seeds in the water after the water has boiled (212°F). Take the pot off the stove. Soak the seeds until the water cools; then remove them and let them dry.
The second type of imposed dormancy, internal dormancy, is regulated by the inner seed tissues. These periods of dormancy stop seeds from many species from sprouting when the conditions are not right for the seedlings to survive. There are several different types of internal dormancy. “Shallow” dormancy, displayed by many vegetable seeds, simply disappears with dry storage. No special treatment is necessary. However, other types require a particular duration of moist-chilling or moist-warming periods, or both.
For cold stratification, also known as “moist-chilling,” seeds are mixed with the same amount of a moist medium (like sand or peat) in a closed container and put in the fridge. Periodically, check to see that the medium is moist but not wet. The length of time required to break (remove) dormancy varies by species; check reference books for recommended times. This type of dormancy may be satisfied naturally if seeds are sown outdoors in the fall. Warm stratification is similar except temperatures are maintained at 68 to 86°F depending on the species.
Seeds of some species exhibit double dormancy. This is a combination of two types of dormancy, such as external and internal dormancy. To get seeds that are both externally and internally dormant to sprout, they must first be scarified and then stratified for the right amount of time. If the treatments are administered in reverse order, the seeds will not germinate. After completing these treatments, plant the seeds under the proper environmental conditions for germination.
How to Propagate Plants: 4 Methods to Master
FAQ
Why is it illegal to propagate plants?
What is vegetative propagation 12?
What are the 7 methods of propagation?
What is cutting propagation?
This technique involves snipping a part of a plant and encouraging it to develop into a whole new, identical life. Numerous plants, including the jade plant, basil, pothos, spider plant, and more, can be propagated through cuttings. Discover the key to successful cutting propagation by locating nodes on mature vines.
How to propagate houseplants?
Learn how to propagate your houseplants through methods such as stem cutting, division, and leaf cutting. Propagation is an exciting way to expand your houseplant collection and share your favorite plants with others. With a few simple techniques and some patience, you can successfully propagate many common houseplants.
How do you propagate a plant asexually?
You can accomplish this seed-free vegetative propagation method by taking cuttings, layering stems (partially covering them with soil while they’re still attached to the parent), or by dividing a plant’s rhizomes or offsets. Other methods of asexual propagation include bud cuttings, cane cuttings, and root cuttings, but they won’t be covered here.
How long does it take to propagate a plant?
There are different ways to propagate plants. It also depends on what plant to propagate, too. One plant may be easier to propagate by cutting, while growing seeds can easily propagate another. Some plants can be successfully propagated in just a few days, and some take months. There are always successes and failures.
- Mediterranean Pink Heath in Summer – Tips for Care and Maximizing Bloom - April 9, 2026
- How to Grow Gorgeous Climbing Roses on a Wooden Fence - March 24, 2026
- Avoid These Plants When Companion Planting with Oregano - March 24, 2026