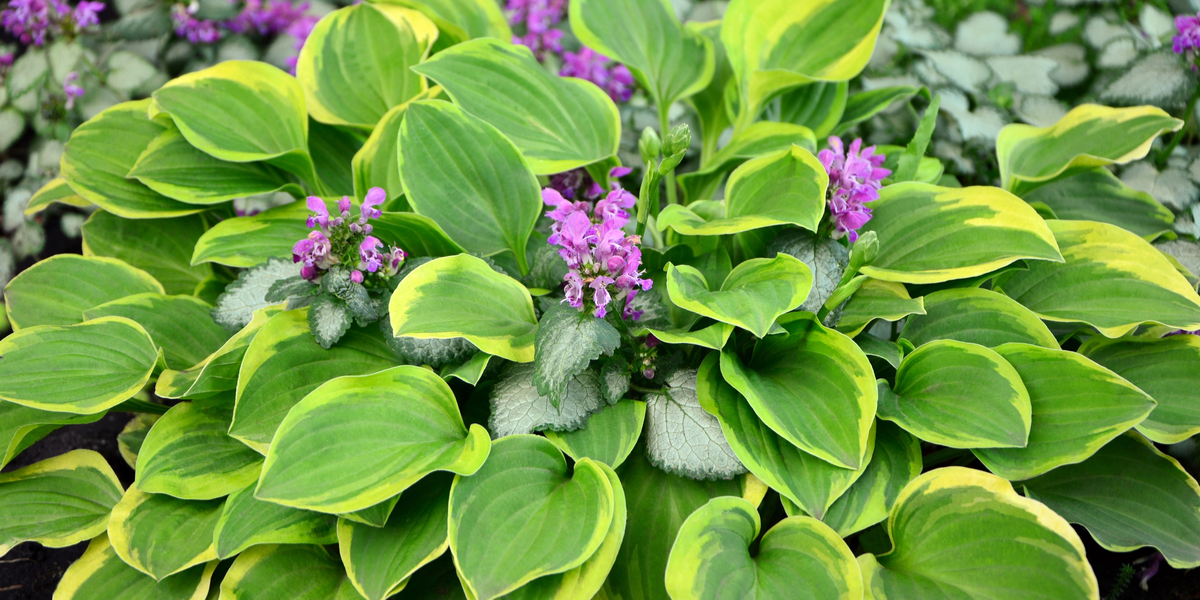
Dividing hostas is an easy way to propagate these popular shade-loving perennials While hostas can be divided in spring or fall, most gardeners prefer spring division. The key is timing it just right Follow this complete guide to learn when, how, and why to divide hostas in spring for optimal results.
When to Divide Hostas in Spring
Spring is the prime time for dividing hostas. The goal is to divide them when the emerging leaves are just showing but before significant top growth occurs. This gives the divisions time to establish roots before summer heat arrives.
The optimal spring dividing window is usually about 4-6 weeks long Watch for the first hosta sprouts to push through the soil This is your sign that dividing time has arrived,
Specific timing varies by USDA planting zone and weather patterns. Generally, aim to divide hostas in spring approximately:
- Zones 3-5: Late April to mid May
- Zones 6-7: Mid to late April
- Zones 8-9: Mid March to mid April
Once the leaves reach about 3 inches long, the dividing window starts closing. Avoid dividing hostas once the leaves unfurl and expand.
How to Divide Hostas in Spring
Follow these simple steps for dividing hostas in spring:
1. Water the Hostas
Water hostas thoroughly a day or two before dividing if rains haven’t done the job Well-hydrated plants will bounce back faster from division
2. Dig Up the Entire Clump
Use a garden fork or shovel to dig around the hosta clump about 6-12 inches away from the outermost leaves. The goal is to lift out the entire clump undamaged.
Hosta roots often reach 10-12 inches deep. Don’t be afraid to dig deep enough to get the whole root system.
3. Wash Off Excess Soil
Use a garden hose to gently wash away extra soil clinging to the roots. This makes it easier to see the division points.
4. Divide the Clump
Use a sharp knife to split the clump into smaller sections. Aim for clump divisions with 3-5 eyes or growing points each.
For mature, overcrowded clumps, divide into more smaller sections. Just be sure each division has at least 1-2 eyes.
5. Prepare the Planting Sites
Select a shady planting site with organically rich, well-draining soil. Amend the soil with compost or aged manure.
Dig planting holes at least twice as wide as each division’s root ball.
6. Plant and Water the Divisions
Place divisions in their holes at the same depth they grew before. Firm soil gently around the roots. Water thoroughly after planting.
Add mulch around the divisions to conserve moisture and suppress weeds. Water spring divisions regularly until they become established.
Why Divide Hostas in Spring?
Dividing hostas revitalizes them by reducing root crowding and encouraging new growth. Spring division offers several key advantages:
-
Root recovery happens quickly when soil is still cool.
-
New roots establish well with spring moisture.
-
Divisions have the whole growing season to mature before winter dormancy.
-
Flower buds are less likely to be disrupted compared to fall division.
-
Transplant stress is reduced when divisions don’t have to cope with summer heat.
In addition to invigorating plants, dividing hostas propagates more of these great perennials for expanding your garden.
Tips for Spring Hosta Division Success
Follow these tips to ensure your spring-divided hostas get off to the healthiest start:
-
Choose a cloudy, cool day to minimize transplant stress. Avoid dividing in hot, sunny weather.
-
Keep divisions moist. Transport and plant them in buckets of water to prevent root drying.
-
Plant divisions at the same depth they grew before to prevent leaf scorch.
-
Water newly planted divisions daily for the first 1-2 weeks.
-
Allow divisions to become established for 4-6 weeks before applying fertilizer.
-
Mulch spring divisions well to conserve moisture while new roots develop.
-
Stake floppy-leaved varieties if needed while new roots anchor the plants.
-
Remove any flowers in the first season to direct energy to root and foliage growth.
-
Avoid disturbing or transplanting divisions again for at least 2 years after spring division.
Troubleshooting Divided Hostas
If your spring-divided hostas struggle, here are some common issues and solutions:
Leaves appear burned or shriveled: Plants were allowed to dry out. Water more frequently after division.
Few new leaves emerge: Division was done too late. Leave plants undisturbed to recover their strength.
No flowers: Flower buds were damaged. Don’t worry, flowers will return next year.
Divisions look stunted: Plants were divided into sections that were too small. Allow them time to mature and fill out.
Slugs are eating leaves: Apply slug bait and remove any hiding spots near plants.
Leaf spots appear: A fungal disease is likely. Improve air circulation and avoid wetting foliage.
Enjoy More Hostas Through Division
Dividing hostas requires only basic gardening tools and a bit of time. But the payoff is huge. Spring division revitalizes overgrown clumps so these shade garden favorites can put on their best show.
Follow the techniques outlined here to properly divide hostas in spring. You’ll discover how easy propagation can fill your landscape with more of these ornamental perennials to enjoy for years to come.
Step 5: Your Division
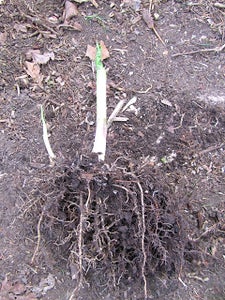
- Some of the dirt that was on your division should go back into the hole. If you need to, add more dirt to the hole you made.
- Your division should look similar to the one above.
Step 2: Decide Where You Are Going to Divide
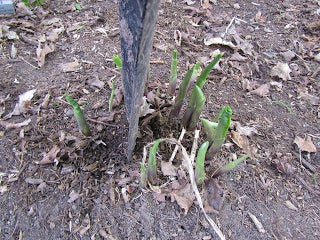
- Pick out the hosta you want to divide and find a spot where a few of the eyes (each pip sticking out of the ground) can be cut off. If you get too close to the edge, you might cut off an eye but not any roots.
- Place your shovel in the spot where you want to divide the land.
- Put your foot down hard on the shovel. I like to give it a few good whacks with my foot too. Going through hosta tissue is not easy.
- You should be able to tell when you’re through the whole plant.
How to Divide Hostas, Best Time to Divide Hostas and Other Planting Tips
FAQ
What month do you divide hostas?
What is the best tool for dividing hostas?
Do hostas go into shock when transplanted?
When should you divide a hosta plant?
You can do it at any time throughout the spring and early summer. The smaller the plants are, the easier it will be to divide them and to avoid damaging any leaves. If you are only dividing your hosta plants to maintain the size or to keep them healthy, you only need to do it every five to ten years.
How do you divide a hosta plant?
Water the hosta. If you haven’t had rain in the past day or two, a thorough soaking the day before you plan to divide your plant will reduce stress on it. Dig up the entire clump. Using a spade and/or garden fork, dig six to eight inches outside of the crown of the plant.
How does dividing a hosta plant work?
Here’s how it works. Dividing hosta plants is an easy way to maintain the size and shape of your plants, to propagate new plants for other areas of the garden, and to remove dead portions of the plant and to make it look nicer. Dividing is easy, once you know how to do it correctly.
How can I propagate a hosta plant?
The best method for propagating a hosta plant is to split it. It’s very easy to do, helps improve overall plant health, and can grow your garden in under an hour. Trust me, you won’t hurt the plant if you do it this way.

Follow me on YouTube
- A Complete Guide to Caring for Yuki Cherry Blossom Shrub - January 23, 2025
- Identifying Red Hot Poker Seeds: What to Look For When Harvesting Torch Lily Pods - January 23, 2025
- A Complete Guide to Harvesting Evening Primrose Seeds - January 23, 2025