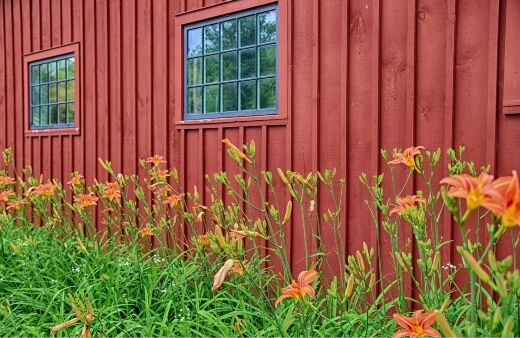
Daylilies are some of the most popular perennials in any flower garden, and it’s easy to see why. Coming in a huge array of colors and sizes, daylilies are versatile, reliable, and so easy to grow. But what if you want to share the love? You can (and should) divide the plants every few years, but if you want to try something new, why not collect and germinate your own daylily seeds? Keep reading to learn more about how to do that.
Daylilies are beloved for their rainbow of colors and summer-long bloom period. Luckily, propagating these hardy perennials is simple, allowing you to multiply your favorites for stunning repeat performances year after year. Read on for a complete step-by-step guide to propagating daylilies through division or seeds.
Why Propagate Daylilies?
Here are some key reasons you might want to propagate your daylilies:
-
Make more plants – Propagating lets you increase your supply of favored varieties to expand plantings,
-
Control mature size – Dividing overgrown clumps every few years keeps them blooming vigorously
-
Share with others – Friends will appreciate being gifted divisions of your prized daylily cultivars.
-
Revitalize plants – Division rejuvenates old clumps that have declined in flowering.
-
Experiment – Grow new varieties from collected daylily seeds and await flower surprises.
-
Save money – Propagating your own plants is cheaper than buying new ones.
How to Propagate Daylilies by Division
Dividing mature clumps is the easiest and most reliable way to propagate daylilies identical to the original plant. Follow these steps:
When to Divide
-
Divide in early spring as new growth emerges or in late summer after flowering completes.
-
Spring divisions may not bloom that first year but will be established for the following season.
-
Fall divisions often bloom lightly the next summer and vigorously thereafter.
Digging Up the Plant
-
Carefully dig up the entire mature clump using a garden fork, loosening the soil 6-12 inches out from the base.
-
Try to keep the root mass intact as you lift it. Some roots will likely break; don’t worry.
-
Remove excess soil clinging to the roots by gently shaking or hosing off.
Separating the Fans
-
Look for natural divisions where clustered fans meet at the crown.
-
Gently shake and pull apart into smaller clumps along these intersections.
-
Use two garden forks back-to-back to pry densely matted clumps apart if needed.
-
Make divisions with 3-5 fans each for quick establishment; single fans take longer.
Preparing Divisions
-
Trim each fan grouping to 4-6 inches tall to reduce transplant stress.
-
Inspect roots and trim any damage before replanting.
-
Optional: Dip trimmed ends in rooting hormone to stimulate new root growth.
Transplanting
-
Space divisions 12-18 inches apart in amended, well-draining soil in full sun to part shade.
-
Plant the crown 1 inch below soil level; avoid burying too deeply.
-
Water thoroughly after planting and provide good moisture until established.
Growing Daylilies from Seeds
Though less certain, growing daylilies from collected seeds can yield exciting new varieties. Here’s how:
Collecting Ripe Seeds
-
Allow spent blooms to dry on the scape after flowering completes.
-
Watch for seed pods to mature and split open, revealing shiny black seeds.
-
Collect seeds when pods open and store in an envelope or jar until sowing.
Preparing Seeds
-
Clean and dry seeds thoroughly before storage. Discard any that are moldy or discolored.
-
Optional: Place seeds in a moist paper towel in a sealed plastic bag and refrigerate for 4-6 weeks. This mimics winter and may increase germination rates when planted.
Sowing Seeds
-
Prepare a seed starting mix and sow seeds 1⁄4 inch deep in late fall or very early spring.
-
Keep seeded trays or pots in partial sun and maintain even moisture.
-
Germination should occur in 2-3 weeks if seeds are viable, producing tiny seedlings.
Transplanting Seedlings
-
Allow seedlings to grow on undisturbed under lights until they reach 2-3 inches tall with several leaves.
-
Harden off young plants. Then transplant into the garden after the last spring frost, spacing 12 inches apart.
-
Growth will be slow the first year but blooms should arrive by the third season.
Enjoying the Surprises
-
Remember, daylily seeds produce random new hybrids, unlike propagating by division.
-
Flower color, size, bloom period and plant form will vary unpredictably in seed-grown plants.
-
Watching mystery seedlings unfold into mature, blooming plants is an exciting journey!
Key Tips for Daylily Propagation Success
Follow these tips to get the most out of propagating your daylilies:
-
Use a sharp, sterile tool like a hori-hori knife to minimize injuries when dividing clumps.
-
Maintain ample moisture for divided and seeded plants until they become established.
-
Apply a balanced fertilizer when planting divisions and as needed to support growth.
-
Mark seeds and divisions with plastic tags to remember parent varieties as new plants mature.
-
Site propagules in organically enriched, well-draining soil with full sun exposure for optimal blooms.
-
Remove spent flowers but leave emerging seed pods to dry if you want to harvest more seeds for propagation.
Expanding your daylily collection through propagation is tremendously rewarding. In no time at all, you’ll have plenty of these cheerful perennials to brighten up your garden beds, borders and containers with summer-long color.
Why Daylily Seed Propagation?
The main reason for propagating daylilies from seed is hybridization. Daylilies cross pollinate very easily and can result in some very interesting results. You can have some truly unique (and maybe even very valuable) daylilies in your garden if you grow your own hybrids from seeds. To cross pollinate, just pick two parent plants with traits you’d like to see combined. Pick up the pollen from the stamens of one plant’s flowers with a cotton swab or painter’s brush and place it on the pistil of another plant. Mark the flowers with the deposited pollen to make sure you don’t accidentally pick them. Let the flower fade naturally; there’s a 20% chance that it will turn into a seed pod.
If the flower gives way to a seed pod, let it dry naturally on the stem. Pick it when it turns brown and starts to split open. Keep it somewhere warm and dry until you’re ready to plant it. It’s possible to plant the seed immediately.
How to Plant Daylily Seeds
Growing daylilies from seed is easy and can be sown directly in the ground in most climates. Fill the soil with lots of organic matter and water. Plant the seeds ½ to ¾ of an inch (1-2 cm) deep. ). Keep the soil moist until seedlings emerge, which should take one to two weeks. If you start the seeds indoors, don’t move them outside until there is no longer any chance of frost in the spring. It could be up to three years before your new daylilies bloom, but when they do, the flowers will be a color and pattern that no one has ever seen before!
Daylily Growing Guide! How to Plant, Grow and Divide Daylilies // Bare Root Daylilies
How to propagate daylillies?
Step-by-step guide on how to propagate Daylillies 1. Dig up the entire clump: Start by using a spade or digging fork to carefully dig up the entire clump of daylily plants from their current location. 2.
How do you plant daylilies?
Plants are available as container grown or bare root daylily bulbs. When planting daylilies, choose a site with full sun and rich, well-drained soil. Follow these steps and space plants 1-1/2 to 3-feet apart. Loosen soil in the planting area and amend with compost or other rich organic matter to add nutrients and improve drainage.
How do you divide daylilies?
Follow the steps below for dividing daylilies with the best results. Step 1 – Dig up the plant, keeping as much of the rootball intact as possible. Step 2 – Cut back the top growth by at least half so you can see where to divide the plant. Less foliage also helps the plant establish more quickly after transplant.
Can you grow daylilies from seed?
If the flower gives way to a seed pod, let it dry naturally on the stem. When it turns brown and just starts to split open, pick it and store it in a warm, dry place until you’re ready to plant. It’s possible to plant the seed immediately. Growing daylilies from seed is easy and can be sown directly in the ground in most climates.
- How to Grow Gorgeous Climbing Roses on a Wooden Fence - March 24, 2026
- Avoid These Plants When Companion Planting with Oregano - March 24, 2026
- 15 Great Trees to Plant Near Your House - March 24, 2026