First off, congratulations on realizing that you can grow your own loofah sponge. Most people think they grow in the ocean alongside other sponges, like Mr. SquarePants. If you live somewhere warm, it’s easy to grow loofah, but this guide will show you that you can do it almost anywhere.
As a matter of fact, no they do not grow in the ocean. Or the sea. Or any other body of water.
The biggest surprise for people when you tell them they can grow their own luffa sponges is that they grow on land, not in water. Loofah, also known as luffa, is a vegetable.
Loofahs, also known as luffas or sponge gourds have long been prized for their use as natural sponges and scrubs. But did you know that with proper care you can easily grow your own loofah plants at home from seeds?
In this comprehensive guide, I’ll walk you through the process of sowing and cultivating loofah seeds to end up with a bountiful harvest of your own organic loofah sponges. Follow these simple steps for loofah growing success!
Sourcing High Quality Loofah Seeds
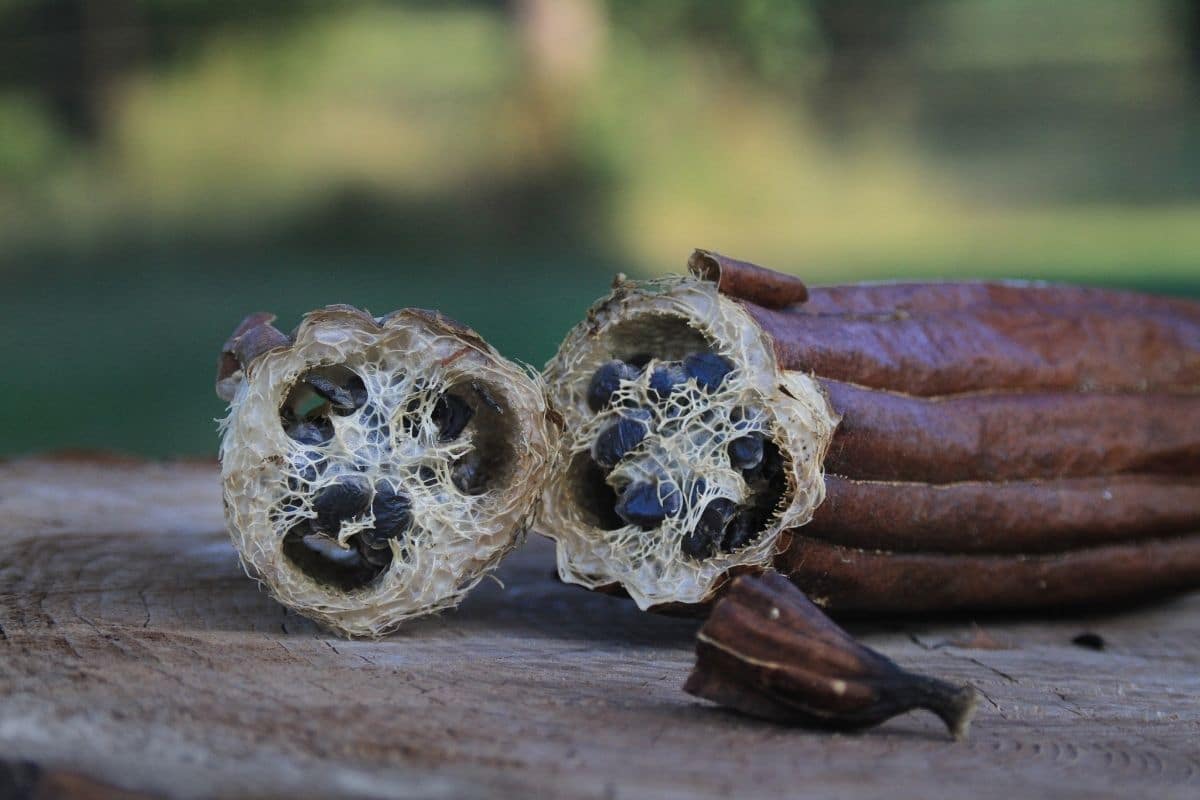
The first step is getting viable fresh loofah seeds. Look for heirloom varieties of either Luffa aegyptiaca (smooth loofah) or Luffa acutangula (ridged loofah). Reputable garden seed companies are the best source.
If you’re saving seeds from your own plants, choose plump, black seeds and discard any white, immature ones. Properly stored in a cool, dry place, loofah seeds remain viable for up to 5 years.
Starting Seeds Indoors
Loofahs require a long warm growing season, so starting seeds indoors gives you a head start on the season.
When to Plant
Begin 6-8 weeks before your last expected spring frost. In my zone 6 garden, I sow seeds in late March or early April.
Materials Needed:
- Seed starting mix or potting soil
- Small containers or seed trays
- Plastic dome or plastic wrap
- Optional: heat mat
Steps for Planting:
- Moisten seed starting mix and fill containers.
- Plant seeds 1/2 inch deep, 2-3 seeds per pot.
- Cover with plastic dome or wrap to retain moisture.
- Maintain temperature of 75-90°F. A heat mat helps.
- Once sprouted, remove dome and provide 14-16 hours of light.
- Thin to 1 seedling per pot once 2 true leaves appear.
In just 1-2 weeks you’ll have baby loofah seedlings ready for the next phase!
Transplanting Loofah Seedlings
Loofah seedlings need excellent care when transitioning to the garden. Here’s how:
Hardening Off
- Gradually expose seedlings to outdoor conditions by setting them outside for increasingly longer periods over 7-10 days.
- Bring plants indoors or cover if frost threatens. This toughens them up!
Preparing the Garden
- Choose a sunny spot with fertile soil and trellis or fence for vines to climb.
- Work compost into soil and erect trellises. Ensure good drainage.
- Hold off planting until 2 weeks after last spring frost date, when soil has warmed.
Planting Day
- Gently remove from containers, being careful of roots.
- Plant seedlings 12-24 inches apart near base of trellis.
- Water well and provide shade for a few days until established.
Ongoing Loofah Plant Care
Once your seedlings are happily growing in the garden, a little care makes all the difference:
- Water 1-2 inches per week. Loofahs thrive with consistent moisture.
- Fertilize lightly every 3-4 weeks with a balanced liquid fertilizer.
- Train vines to climb upward on their support structure.
- Prune off lower leaves once vining begins. This improves air circulation.
- Scout regularly for pests like aphids, cucumber beetles and squash bugs. Control organically if found.
- Weed carefully around plants so weeds don’t compete for nutrients.
With attentive care through the season, your loofah vines will flourish!
Harvesting Loofah Gourds
- Female flowers form green fruits that mature into loofah gourds.
- Allow gourds to grow until their skins turn brown/tan and they feel lightweight.
- Use gardening shears to cut gourds from vines, leaving a short stem attached.
- Bring gourds indoors and dry for 1-2 weeks in a warm location prior to processing.
Congratulations! You’ve successfully grown loofahs from seed to harvest. Now comes the fun part – peeling back the skin to reveal the treasured sponge inside.
With this simple seed starting method, you can grow armloads of all-natural loofah sponges to enjoy year after year. The satisfaction of scrubbing with the fruits of your gardening labor is unbeatable. Give loofah growing a try this season!
Dry gourds vs Green gourds
Over and over youll hear that you have to wait until the gourd is dry to pick it. And yes, thats the best time to pick it but its not the only time.
If you live in zone 6 or below chances are youll be harvesting them green. The lighter they feel in your hand, the greater chance theyll have fibres inside.
If you choose green luffas that aren’t fully ripe, they will be fleshy and gooey when you peel them.
But OTHERS will indeed have developed enough to have the coveted fibres.
- 1st luffa is immature with spongey flesh inside.
- The second luffa is lighter in color and weight, which is a sign that it may have grown fibers.
- The third luffa is almost dry and will definitely have a luffa sponge inside it.
- 4th luffa is the ideal time to pick. Once it’s completely dry and you can hear the seeds moving inside
I already said it’s not easy, and it’s especially not for a lazy gardener in colder places, but you can grow loofahs if you really want to.
How to Grow Luffa / Loofah Sponges From Seed!
FAQ
How long does it take to grow a loofah from seed?
Do you need to soak luffa seeds before planting?
Are Loofahs hard to grow?
How many Loofahs will one plant produce?
How do you grow a loofah?
Loofah requires large amounts of space to grow its long vines and will readily take to climbing sturdy structures like fences. For best growth, plants should be given full sun and competition around the roots should be avoided. Soils should be rich, high in organic matter, and with good drainage.
Can you grow loofah sponges from Luffa seeds?
Luffa Gourd Seeds Grow your own loofah sponges from heirloom luffa seeds. Luffa plants are easy to grow and don’t cross-pollinate with other vegetables, so they can be added to any garden.
How do you propagate loofah?
Since loofah is naturally an annual, it’s only propagated by seed. The seeds inside the mature gourds are dispersed short distances by the wind after the fruit breaks open. If you harvest dried sponges, you’ll easily collect the mature seeds once peeled. Store them in a dry, dark, and cool place until next spring.
How do you grow a loofah sponge?
The planting and growing requirements are basically the same, with just a few tweaks. Since they’re tropical plants, loofah sponges need a long, warm growing season. In fact, you’ll only have enough growing time if you live in zone 7 or higher. For zones 5 and 6, start seeds indoors so the fruit can be harvested before the first frost.
- How to Grow Gorgeous Climbing Roses on a Wooden Fence - March 24, 2026
- Avoid These Plants When Companion Planting with Oregano - March 24, 2026
- 15 Great Trees to Plant Near Your House - March 24, 2026