The ever-so-popular Tillandsia xerographica [pronounced: zero-grafika] is a favorite among air plant collectors, hobbyists and novices alike. This type of air plant has thick, silvery, curling leaves and bright orange flower spikes that make it stand out. It’s easy to see why this species has been so popular and often exported from Central America since the 1980s. But because trade was not regulated in the past, the Xerographica plants were taken from their natural habitats in the dry lowlands of Guatemala and southern Mexico, which almost wiped them out. The Convention on International Trade in Endangered Species of Wild Fauna and Flora (CITES) didn’t list the Tillandsia Xerographica species as endangered until 1994. This was after agricultural officials in the Netherlands were told about a strange shipment from Guatemala.
Because of the need to protect endangered species, CITES has allowed farmers to grow more Xerographica plants, which is great news for air plant lovers. Following strict guidelines, farms have been able to produce increasing quantities of the plant since the early 2000s. As part of propagation farming, you have to keep a certain number of offsets, which are cutely called “pups,” so they can grow into mother plants in the future. CITES checks the certified growers often to make sure the farms aren’t selling too many Xerographica plants so there are enough mothers for the next generation.
Asexual reproduction means that Xerographica plants can be spread by offsets, but sexual reproduction means that plants can be grown from seeds. The most common way to breed dogs is through reproduction, which is reliable and quick because the pups are ready to be sold after only two years. Until the last ten years, sexual reproduction from seeds was thought to be too hard because it can take eight years or more for a seed to grow into a “large” plant that is about eight inches across. However, growing Xerographica plants from seeds is better than propagation because it increases genetic diversity and the number of plants on the farms. Growing offsets only, on the other hand, will only produce copies of the mother plants, which could result in a weaker plant stock overall.
The process of growing Xerographica from seeds is hard and takes a lot of time, patience, and money to pay workers and build greenhouses. Farmers have to wait for the plants to bloom so that they can cross-pollinate, and they also have to look for Xerographica plants that are making seeds, since not all of them will. Once the seeds are gathered, they are prepared on wind screen material to begin the germination process. Hardy Xerographica seedlings will grow into adults in four or five years, but they will be much smaller than they were as seeds.
Fans of air plants will be able to enjoy the species for many years to come thanks to farms that carefully hand-pollinate Xerographica seeds to make them genetically diverse. At Air Plant City, we are dedicated to farming Tillandsia in an ethical and environmentally friendly way. We follow the appropriate regulations and support farms and farmers who do the same. Shop our Xerographica seedlings here.
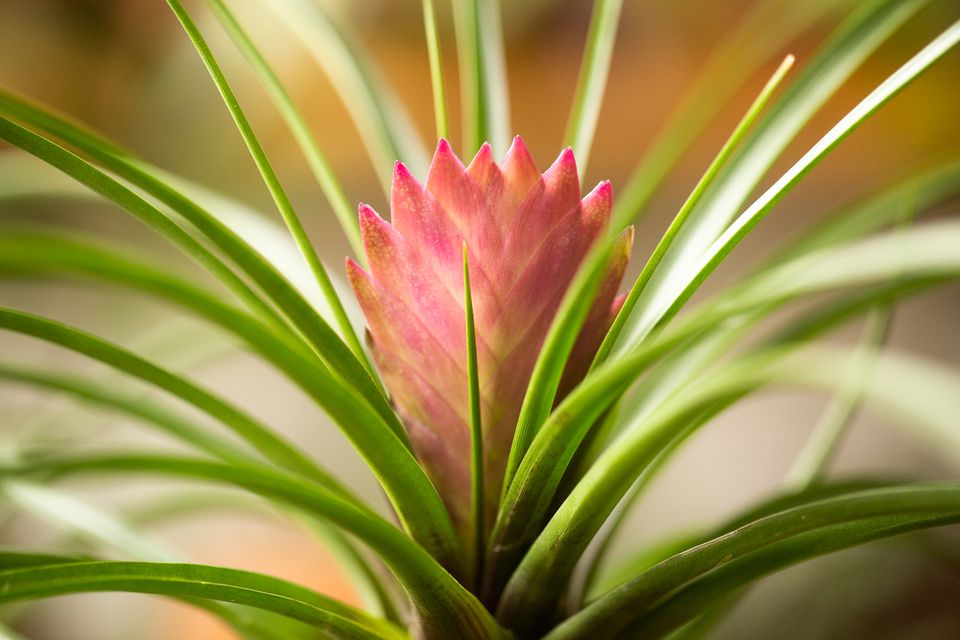
Tillandsia, commonly known as air plants, are epiphytic plants that derive moisture and nutrients from the air rather than soil Their minimal root systems make tillandsias perfectly adapted to grow attached to trees, rocks and structures without needing soil
While tillandsias are most often propagated through offsets and divisions of existing plants, it is possible to grow them from seeds as well Tillandsia seeds are tiny, dust-like particles that can be challenging to germinate. However, with the right techniques and care, you can successfully grow a tillandsia collection from seeds
In this complete guide, we will uncover everything you need to know about tillandsia seed starting, from gathering viable seeds to nurturing seedlings into mature air plants
Gathering and Preparing Tillandsia Seeds
The first step is acquiring fresh, high-quality tillandsia seeds. There are a few ways to obtain seeds:
-
Purchase seeds from reputable online sellers that specialize in air plant seeds. Opt for sellers that guarantee viability and freshness.
-
Harvest seeds from a mature, blooming tillandsia plant. Allow the seed pod to dry completely on the plant before collecting the tiny black seeds.
-
Join seed trade groups to exchange viable tillandsia seeds with other growers.
Inspect seeds for any signs of damage, mold or imperfections. Healthy seeds will be very small, round and black in color. Discard any compromised seeds.
For best results, use freshly harvested seeds within a few months. Viability decreases over time. Store seeds in a cool, dry place until ready to plant.
Choosing a Germination Method and Medium
Tillandsia seeds need very specific conditions to germinate successfully. The seed starting method and medium you choose will heavily influence the outcome. Here are some effective options:
Plastic Screen
- Stretch plastic window screen or mesh over an open frame. Mist it to provide constant airflow and humidity.
- The open structure allows the tiny seeds to receive light and air exposure while remaining securely in place.
- Water frequently to keep the screen moist but not saturated.
Nylon Stockings
- Stretch nylon stockings or pantyhose over a wire ring or frame. The thin material creates ideal air circulation and humidity.
- The stocking fibers provide anchorage for the seeds to establish.
- Maintain even moisture by misting frequently inside the stocking.
Tree Fern Fiber
- Attach a pad of dried tree fern fiber vertically to a wall or frame using fishing line or wire.
- The fibrous pads offer plenty of nooks for seeds to become established and promote air flow.
- Keep the wall-mounted fiber moist through frequent misting. Allow it to dry slightly between waterings.
Orchid Potting Mix
- Coarse orchid bark mixes blended with perlite or moss provide an airy, well-draining seed starting medium.
- Sow seeds thinly atop the medium and enclose in a ventilated case to boost humidity.
- Maintain even moisture levels; avoid over-saturation.
Sowing Tillandsia Seeds
Once you have your seeds, chosen medium and proper supplies ready, it’s time to sow! Follow these steps:
-
Prepare the germination medium ahead of time and moisten it slightly. Avoid over-saturating.
-
Use a toothpick, tweezers or other tool to carefully transfer seeds onto the medium’s surface. Space seeds evenly but thinly.
-
Gently press seeds onto the medium using a fingertip, cotton swab or soft brush. Secure contact ensures proper germination.
-
Enclose plastic screen and nylon methods in an open case or under plastic wrap to boost humidity levels around the seeds.
-
Place seeded fiber pads, orchid mix trays or open flats in bright, indirect light. Avoid direct hot sun.
-
Maintain a temperature range of 65-80°F for optimal germination. Avoid dramatic temperature swings.
-
Keep the medium consistently moist but not soaked. Mist gently when needed to restore moisture.
-
Wait patiently! Tillandsia seeds can take weeks or months to germinate. Persistence is key.
Caring for Tillandsia Seedlings
Once tiny seedlings emerge, they require extra care and attention to grow into mature air plants:
-
Gradually expose seedlings to increased light levels. This helps strengthen and develop foliage.
-
Slowly reduce humidity as plants grow by removing any covers and allowing more air circulation.
-
Monitor moisture levels diligently. Seedlings need frequent watering but are also prone to rot from over-saturation.
-
Transplant seedlings into individual small containers, mounted plaques or displays once they reach 1-2 inches in size.
-
Apply diluted orchid fertilizer or air plant food 1-2 times per month to nourish developing plants.
-
Ensure seedlings receive adequate airflow and periods of dryness between waterings to prevent disease.
-
Wait 1-3 years for plants to mature depending on species. Be patient and consistent with care.
Troubleshooting Common Seed Germination Issues
Growing tillandsia from seeds presents some unique challenges. Here are solutions to a few potential problems:
Seeds failing to germinate: Old, unviable seeds, insufficient moisture and incorrect temperatures are probable causes. Obtain fresh seeds and modify sowing conditions.
Seeds rotting: Overseeding the medium or excessive moisture causes seed rot. Sow more thinly and allow medium to dry adequately between waterings.
Seedlings dying off: Lack of humidity, light or improper temperatures can kill developing seedlings. Adjust conditions to meet seedling needs.
Mold or fungal growth: Excessive moisture and humidity fuels fungal and mold growth. Improve air circulation and reduce watering frequency.
Slow growth: Insufficient light, nutrients or improper temperatures retard growth. Increase sunlight exposure, fertilize regularly and maintain optimal temperatures.
Leggy or weak plants: Not enough light results in frail, stretched growth. Gradually provide seedlings with more direct sunlight.
Tip burn: Direct hot sunlight burns tender new leaves. Filter sunlight through a sheer curtain or provide gentle shade.
With attentive care and persistence, you can overcome challenges and witness the satisfaction of growing tillandsias from seed to maturity!
FAQ About Growing Tillandsia Air Plants from Seed
Here are answers to some frequently asked questions about propagating tillandsias from seeds:
Where can I buy tillandsia seeds?
Reputable online sellers of air plant seeds include Etsy shops, eBay sellers, Amazon market sellers, and specialty nursery websites. Local nurseries may also carry a limited seed selection.
What are the best tillandsia species for beginners to grow from seed?
Some easier starter species include T. ionantha, T. fuchsii, T. juncea and T. balbisiana. Avoid trickier species like T. xerographica for your first seed experiment.
How long does it take for tillandsia seeds to sprout?
Germination time can range widely from 2-3 weeks up to several months depending on species, freshness of seeds and growing conditions. Have patience!
Should I use filtered or distilled water for seedlings?
Either filtered or distilled water is preferable to tap water for watering young seedlings. The lack of minerals reduces the risk of buildup on leaves.
When can I remove humidity covers and expose seedlings to drier air?
Gradually reduce humidity over 4-6 weeks after seedlings have established stronger leaves and root initials. Then fully remove any humidity domes or covers.
How can I provide extra nutrients for tillandsia seedlings?
Apply a weak solution of specialized tillandsia or orchid fertilizer once every 2-4 weeks. Avoid over-fertilizing delicate seedlings.
What problems can occur when growing tillandsia from seeds?
Common issues include failure to germinate, seedling collapse, rot and fungal disease. Careful moisture control, airflow and cleanliness help prevent many problems.
Are plants grown from tillandsia seeds identical to the parent?
There can be some genetic variation when growing from seed. Hybrids will show wider variation than self-pollinating species. The offspring may not be identical to the parent plant.
Growing tillandsias from seeds requires focused care, patience and acceptance of some trial and error. But the reward of nurturing your own plants from seed to maturity makes it a uniquely fulfilling endeavor for air plant enthusiasts.
FREE Air Plant Fertilizer
Get a free fertilizer packet in your next order with only an email address.
Propagating Tillandsia from seed. Tricks to germinating Air plants.
- Mediterranean Pink Heath in Summer – Tips for Care and Maximizing Bloom - April 9, 2026
- How to Grow Gorgeous Climbing Roses on a Wooden Fence - March 24, 2026
- Avoid These Plants When Companion Planting with Oregano - March 24, 2026