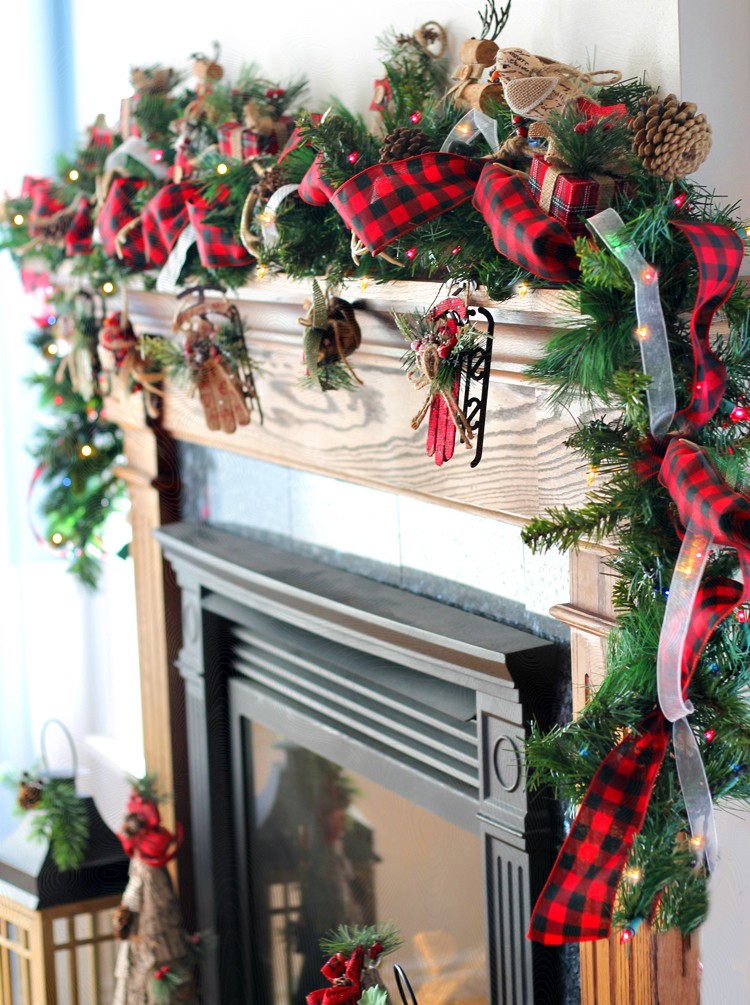
The front door is one of the first things guests see when coming to your home for Christmas. A gorgeous Christmas door garland serves as a warm, festive welcome and sets the tone for your entire holiday decor.
While you can certainly buy pre-made door garlands creating your own allows you to customize designs exactly to your taste. It also offers a fun DIY holiday project to get your family into the Christmas spirit.
In this guide we’ll walk through everything needed to craft beautiful Christmas door garlands to dress up your entryway for the holidays.
Supplies Needed
Making Christmas door garlands requires just a few simple supplies:
-
Greenery bundles – The base of your garland. Options like cedar, pine, fir, magnolia, eucalyptus, etc.
-
Ribbon – 1-2″ wide ribbon in your choice of patterns and colors.
-
Accent decorations – Ornaments, pinecones, berries, flowers, etc. to embellish the garland.
-
Floral wire – To attach elements of the garland together.
-
Scissors & wire cutters – For cutting ribbon, wire, zip ties as needed.
-
Zip ties – For securing the garland to your door.
-
Adhesive – Hot glue gun, craft glue, or similar to attach decorations.
-
Command hooks – To hang garland if desired.
That’s really all you need to create a beautiful Christmas door garland! Now let’s go over some steps and tips for putting it all together.
Step 1: Select a Greenery Base
The greenery forms the base structure and shape of your garland. When selecting greenery:
-
Choose flexible branches that can bend easily without breaking.
-
Mix greenery textures and colors for visual interest.
-
Purchase pre-made greenery bundles from craft stores for ease.
-
For loose greenery, estimate 1-2 bundles per foot of garland.
Popular greenery choices include:
-
Cedar – Provides soft, feathery texture. Has a nice scent.
-
Pine – Offers fuller, bold branches. Looks very traditional.
-
Fir – Has a classic triangular Christmas tree shape.
-
Magnolia – Features large, pretty leaves for bold impact.
-
Eucalyptus – Adds unique blue-green color and interesting pods.
Buy enough greenery so you have plenty of flexibility in designing your garland.
Step 2: Add Base Ribbon
Ribbon covers the greenery stems and provides a background color.
-
Use 1-2″ wide ribbon in a pattern or solid color.
-
Wrap ribbon around bundles overlapping edges slightly.
-
Twist ribbon at base of bundles to secure.
-
Tie ribbon in bows periodically for visual interest.
Opt for ribbon colors that coordinate with your front door or home decor. Buffalo check patterns offer a classic Christmas look.
Step 3: Embellish with Accent Decorations
Time for the fun part! Embellish the garland with ornaments, pinecones, flowers, berries, and other decorative elements you love.
Some ideas:
-
Pinecones – Large pinecones make a dramatic statement. Paint or glitter them for extra flair.
-
Ornaments – Choose shatterproof plastic or wood ornaments. Tie/wire them on securely so they don’t fall.
-
Berries – Faux red or white berry picks add pops of festive color.
-
Flowers – Go for classic poinsettias, velvety roses, or retro carnations.
-
Greenery accents – Extra fir, eucalyptus, holly, etc. helps fill things in.
-
Bows and bells – Wire in festive bows, jingle bells, door bows.
Mix and match decorations for your own unique style. Feel free to add non-traditional embellishments too like snowflakes, antlers, gift packages, etc. Have fun with it!
Step 4: Construct the Shape
Now it’s time to assemble all the pieces:
-
For a wreath – Wire a circle of greenery then decorate around it. Add a big bow at bottom if desired.
-
For a garland – Wire greenery bunches together end-to-end in a long line. Drape ribbon down the middle then embellish.
-
For a swag – Create loose bunches of decorated greenery. Connect the bunches together with wire and form into a swag shape.
Shape garlands to fit your door by arching wires, trimming pieces, or using command hooks for hanging. Check placements to determine needed lengths.
Step 5: Affix the Garland
Once your garland is fully decorated, securely attach it outside your door:
-
For wreaths, use a festive wreath hanger on the back.
-
For garlands/swags, adhere securely with sturdy zip ties. This prevents wind/rain damage.
-
Place zip ties every 6-12 inches as needed to keep garland in place.
-
For doors without frames, use removable 3M command hooks.
-
Check attachments periodically and re-secure as needed over the season.
Now step back and admire your gorgeous custom Christmas door garland!
Extra Tips and Inspiration
-
Light it up! Add battery mini lights or solar string lights to make it glow.
-
Incorporate door wreaths by wiring them into garland ends.
-
Transition to winter by keeping white, silver, blue as main colors.
-
Use large decorations like oversized ornaments, bows or flowers for dramatic impact.
-
Make a coordinating garland for your mailbox or porch rails to extend the look.
-
Stick to a color theme like classic red and green or elegant white and gold.
-
Accent with pops of trendy colors like aqua, rose gold, or sage green.
-
Display personalized family ornaments to give it a homemade touch.
-
Swap out decorations seasonally from Fall, Winter, to Spring themes.
-
Store garlands properly each year so they last and can be reused.
-
Remake faded garlands with new ribbon and embellishments as needed over time.
The options are endless when creating your own Christmas door garlands and wreaths! Start a new family tradition by getting everyone involved in the fun process each year.
With some creativity and our guide above, you’ll have a beautiful customized holiday garland welcoming guests into your home. Don’t be surprised if your door decor becomes the talk of the neighborhood!
How To Decorate Christmas Garland
- Double up the greenery
- Add lights.
- Add ribbon.
- Add a second contrasting ribbon.
- Add details and embellishments.
1. Double up the greenery. Most pine garlands are too thin to look expensive. To fix it, just wind two or three together for a fancy look and give all the branches a lot of air around them. It’s also a really high-end look to mix two or more different types of greenery together. Pine, cedar, juniper and eucalyptus all look great together.
2. Add lights. String them on thick and try to tuck the wires into the branches as much as possible. Even if your garland already has lights on it, you may want to add more to make it sparkle and shine at night. I also love the look of using two different kinds of lights together, like regular lights mixed with bigger bulb lights, star-shaped lights, or small fairy lights. It adds dimension and interest to the finished garland. One other thing to consider with lights is whether your garland will be near a plug. If not, there are lots of battery-operated light strings that will work. Nothing ruins the look of a garland like an extension cord running down the wall.
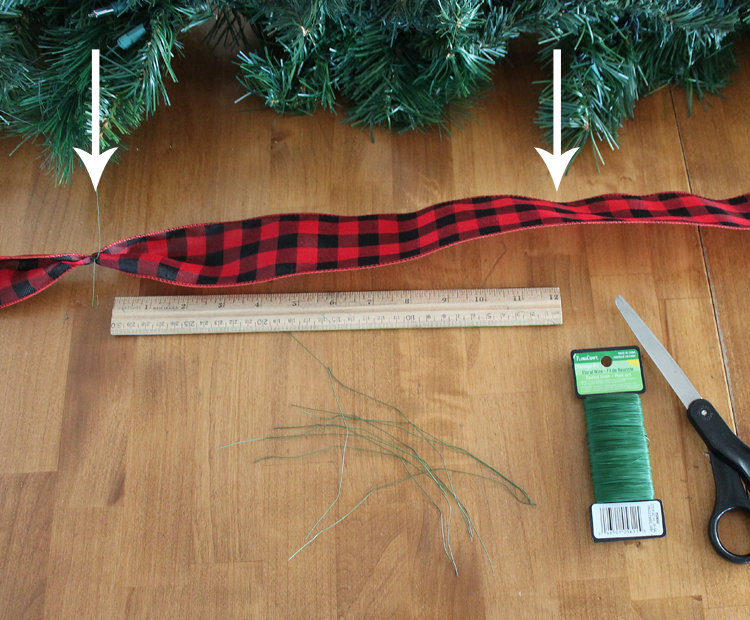
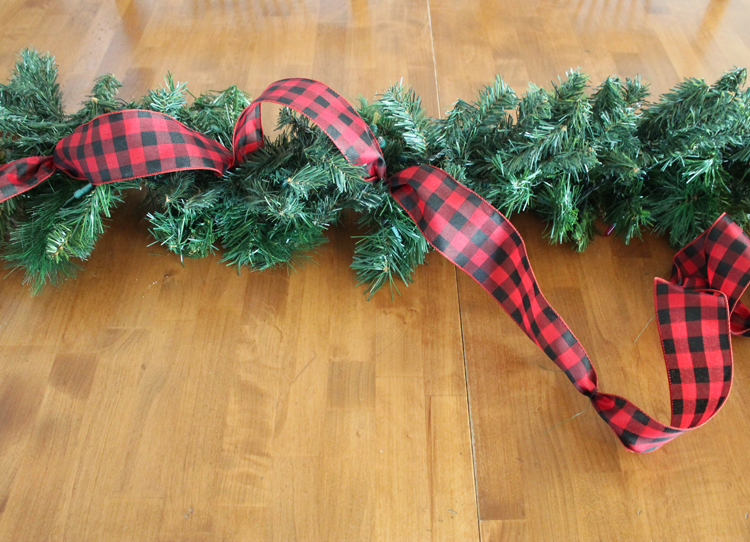
3. Add ribbon. To make ribbon look great on a garland, you need to buy wired ribbon and use florist wire. Prep your ribbon by twisting an eight inch piece of wire around the ribbon every 12 inches.
Then use the florist wire to attach the ribbon to the greenery. See how it makes the ribbon poof? So pretty!.
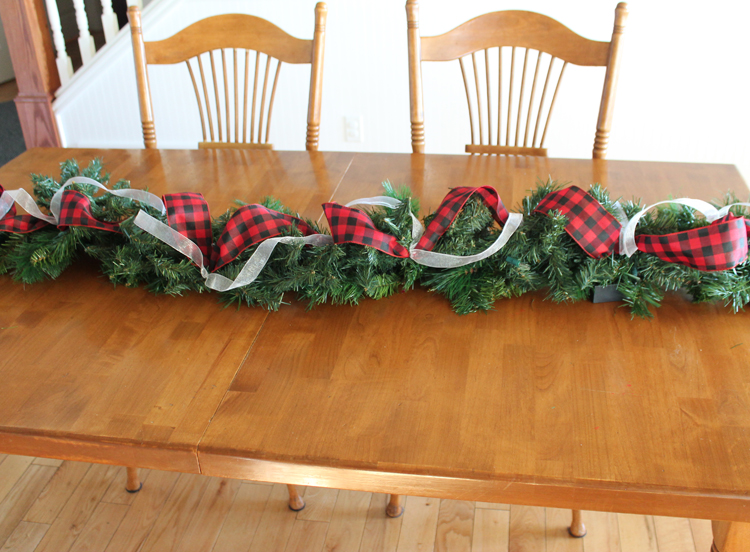
4. Add a second, contrasting ribbon. Since I used a wide printed ribbon, I chose a transparent solid ribbon as my second. I love transparent ribbon on garland because it catches the lights and makes things sparkle at night.
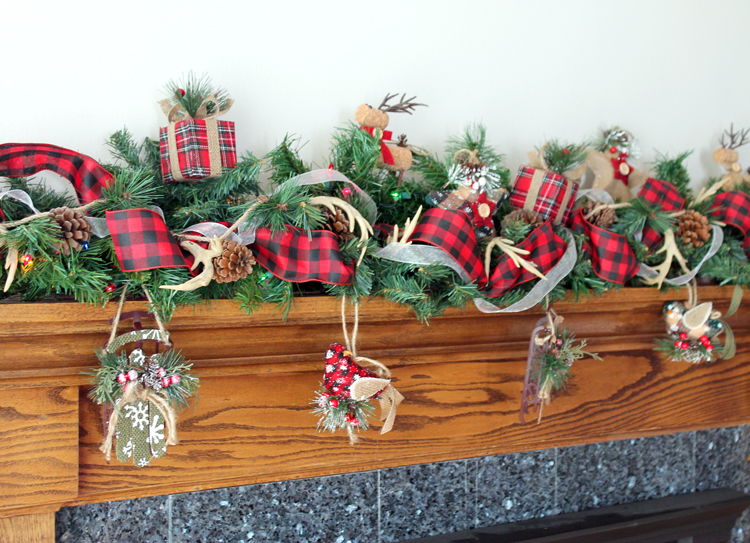
5. Add details. Here comes the fun part! You get to add all the cute ornaments, flower picks, and other things that make your garland stand out and make it unique. You can use anything you’d like for this part. Just make sure to attach anything breakable securely with florist wire. Putting my garland where it will go before adding the details helps me make sure it looks good.
Watch this 3 minute video tutorial to see exactly how I put my garland together.
Follow these step-by-step instructions to make a gorgeous, professional-looking Christmas garland to decorate your home for the holidays this year.
Garland is one of my favorite ways to decorate for Christmas. A pretty garland on the fireplace mantel is such a classic look. Today I’m going to show you how to create beautiful holiday garland. I’ll teach you all the tips and tricks to making it look professional and expensive and awesome. Christmas garland is something you can definitely DIY, so let’s do this!!.
And here are the step-by-step written instructions for creating stunning, expensive-looking DIY Christmas garland.
NEW!! DIY CHRISTMAS GARLAND FRONT PORCH + WREATH +BOX “I Love Christmas” ep 19 Olivia Romantic Home
FAQ
How do you attach Christmas garland to a door frame?
How to hang Christmas garland around front door without nails?
What are Christmas door garlands?
Christmas door garlands aren’t just decorations; they’re an invitation. Whether it’s lush pine branches wrapped with twinkling lights or an elegant swag of ribbons and baubles, these garlands can transform a simple entrance into a holiday statement. It’s like your front door’s way of saying, “Come on in; the holiday cheer is here!”
How do you decorate a Christmas door Garland?
To give your garland a lush, full appearance, layer different types of greenery and foliage. Mix in some thicker branches, eucalyptus sprigs, or faux ferns. Fluff up the branches and add layers of ornaments, berries, or ribbon to enhance the volume. 5. What are some unique ideas for decorating Christmas door garlands?
Can you put a garland over a door?
Christmas garlands draped over doors and porch railings tie all the festive holiday touches together. If you want to incorporate garland into your Christmas décor, there are plenty of low-cost and easy DIY ways to go about it.
How do you decorate a doorway with a gold garland?
Transform your doorway with a garland of shimmering gold leaves, metallic ornaments, and rich greenery. The subtle bronze accents and delicate gold details create a luxurious, elegant holiday look. Recreate this sophisticated style by combining gold and bronze elements with lush greenery for a refined and inviting entrance.
What can I do with a store-bought Christmas Garland?
Or you can refresh a store-bought garland by adorning it with ribbon, adding lights or ornaments, or layering in natural elements such as pine cones or dehydrated orange slices. Let these Christmas garland ideas from interior designers and DIYers inspire you.
How do you make a star Garland for a Christmas tree?
Use simple materials that you already have on hand to create a simple and charming DIY paper star garland for the tree. Inspired By Charm punched out stars from old book pages and shiny gold paper that were attached to simple string with glue for a handmade feel. Make the project go faster by using a star-shaped hole punch.
- The Ultimate Guide to Growing Strawberries in Raised Beds - August 8, 2025
- No-Dig Garden Beds: The Easiest Way to Grow a Beautiful Garden - August 6, 2025
- How to Protect and Preserve Wood for Raised Garden Beds - August 6, 2025


