The roots of a plant are the foundation on which that plant thrives. If a plant has good roots, it will probably be happy and healthy and be able to handle the harsh spring and summer weather. If your plants don’t have good roots, they won’t be able to grow to their full size and will be more likely to get insects and diseases. The most important factor for good roots is good soil preparation.
If you are a beginning gardener, properly preparing your soil can be daunting. However, there are some easy steps that you can take to get your beds ready to be planted.
There are three basic types of beds you might be preparing (click to jump to that section):
There’s something so satisfying about starting a brand new garden bed from scratch. Whether you want to grow flowers, vegetables, or a mix of both, building a garden bed allows you to create the perfect space tailored to your needs. Follow this comprehensive guide and you’ll have luscious plants growing in your custom-built bed in no time!
Choosing the Right Location
When planning a new bed, location is key. Consider these factors when picking a spot:
- Sunlight – Most plants especially vegetables need at least 6 hours of direct sun daily. Scope out sunny spots in your yard.
- Irrigation – Having access to water nearby makes caring for plants much easier. Situate beds near outdoor faucets or within reach of a hose.
- Plant needs – Are you growing sun-lovers like tomatoes or shade plants like hostas? Pick an area that suits the plants you want to grow
- Convenience – Easy access allows you to tend and harvest your bed frequently. Avoid far corners of your property.
Take time to observe your yard and determine the optimal place for your new bed before forging ahead. This will set your garden up for success.
Removing Grass and Weeds
Now comes the tough part – clearing a patch of grass or weeds to make room for your bed. Here are some options:
- Smother with mulch – Cover the area 6-8 inches deep with cardboard, layers of newspaper, etc then mulch on top. In 2-3 months, grass should die.
- Solarize – Cover the patch with clear plastic for 4-6 weeks during sunny weather. The heat will kill grass and weeds.
- Dig it up – Mow low, soak the area, then dig up the sod by hand with a shovel or sod cutter. Hardest work but immediate results.
- Herbicide – As a last resort, use a non-persistent herbicide like glyphosate. Avoid chemicals if possible by using a natural method.
Removal method depends on your timeframe, tolerance for chemicals, and how much sweat equity you want to invest!
Marking Out Bed Boundaries
Once your canvas is clear, mark out the shape of your new bed using stakes and string, a hose, or temporary spray paint. Consider these shape tips:
- Geometric – Right angles and straight lines give a formal look. Define the bed with squared corners.
- Curving – For a relaxed, natural look, use gently sweeping curves when laying out bed edges.
- Theme shapes – Make a fun shaped bed like a heart, star or animal for a playful garden.
- Match architecture – Echo the lines of your home with beds in complementary shapes and sizes.
Marking the outline first lets you visualize the shape and make adjustments before digging in. Take time to get the form just right.
Digging the Bed
Now comes the real muscle work – digging out your bed! Here are some tips to make it easier:
- Loosen soil – Use a shovel, rototiller or garden fork to break up and turn over the soil to at least 8 inches down.
- Remove debris – Take out rocks, roots, grass clumps and trash as you dig. These can impede digging and plant growth later.
- Mix in compost – For nourishment, mix 2-3 inches of finished compost into the top 6 inches of loosened soil.
- Mound raised beds – For raised beds, mound loosened soil into beds at least 6-12 inches high to improve drainage.
- Edge trench – Dig a 6 inch deep, narrow trench around the inside perimeter to defined the bed edges.
Thoroughly digging over the soil pays off later with healthier, faster growing plants and better drainage. Take time to do it right.
Building Up Bed Walls
For a raised bed look and improved structure, consider framing up the walls:
- Wood or stone – Use landscape timbers, bricks, rocks or pavers to create defined bed walls.
- Hardware cloth – Line beds with sturdy wire fencing bent into shapes to reinforce walls.
- Corrugated metal – Recycled roofing panels make instant, durable raised bed walls.
- Living walls – Plant edging plants like thyme or mini hostas tightly to create a “living” bed wall.
Built up beds warm earlier in spring, prevent soil compaction and provide vertical interest to gardens. Plus, they keep the lawn at bay!
Enriching the Soil
Great gardens start with nutrient-rich, healthy soil. Here’s how to improve the soil in a new bed:
- Add compost – Mix in 2-3 inches of compost when building beds to enrich soil.
- Work in manure – Blend in composted manure for long-lasting fertilization.
- Mulch beds – Maintain moisture and suppress weeds by topping beds with 2-3 inches of organic mulch.
- Fertilize plants – Feed plants with slow-release granular fertilizer or compost tea at planting time and again midseason.
- Rotate crops – For veggie beds, rotate families each year to avoid nutrient depletion and disease buildup.
Investing in building up your soil provides long-term dividends through healthier plants, better harvests and fewer pests.
Laying Out Plants Before Planting
Some gardeners are tempted to start plugging plants in the second the bed is dug. But taking time to lay everything out first makes a big difference. Here’s why it’s worth the extra effort:
- Test design – You can tweak and modify plant placements until the arrangement looks just right.
- Allow adjustments – Gives flexibility to adapt once plants are out of pots and in the garden.
- Ensure proper spacing – Avoid crowding by checking plant spacings when laid out.
- Confirm plant pairings – Make sure plant partners and color combinations coordinate well.
- Identify problem spots – Troubleshoot issues like shadows or drainage before planting.
Like a dress rehearsal before opening night, laying out plants beforehand avoids costly mistakes down the road.
Planting Properly
The fun part is finally here – time to put plants in the ground! Follow these tips for planting success:
- Loosen roots – Before planting, gently loosen root balls to encourage outward root growth into surrounding soil.
- Plant at proper depth – Check guidelines and plant at the depth matching the nursery pot.
- Water well – Water thoroughly after planting to soak roots and remove air pockets.
- Add mulch – Place mulch around new plants to retain moisture and inhibit weeds.
- Provide support – Add plant supports like trellises or cages at planting time.
Carefully planted perennials, shrubs, trees and vegetables establish better, experience less shock and take off faster.
Maintaining the New Bed
Your work isn’t completely done once planting finishes. Proper follow-up care ensures your new garden thrives.
- Weed weekly – Stay on top of weeds before they take hold through weekly weeding sessions.
- Water diligently – Check soil moisture frequently and water when the top few inches become dry.
- Monitor for pests – Catch problems early by checking for insects, diseases, and damage often.
- Replenish mulch – Maintain a protective 2-3 inch mulch layer by adding more as initial mulch decomposes.
- Prune and divide – Keep plants neat and vigorous through timely pruning, pinching, staking and dividing crowns.
Consistent maintenance keeps plants healthy and beds looking great as newly planted areas settle in.
Key Takeaways for a Successful New Bed
Creating an amazing new garden bed from scratch just takes some persistence paired with these key tips:
- Pick the right spot considering sun, water access and plant needs
- Remove existing vegetation completely using smothering or digging methods
- Outline the shape with stakes and strings or a hose to define bed
- Prepare the soil by digging down 8+ inches and mixing in compost
- Build up raised bed walls with wood, stone or other materials if desired
- Enrich soil further by adding more organic matter and fertilizer
- Lay out all plants and make adjustments before planting
- Plant properly at recommended depth and spacing for each species
- Maintain regularly through activities like weeding, watering and pest patrol
Follow this process and you’ll have a thriving new garden bed you can enjoy and expand on for years to come. Happy gardening!
EXISTING BEDS WITH PLANTS
The third type of bed is one that already contains some perennials, bulbs and/or shrubs. These beds can be a bit trickier. You cant simply broadcast a thick layer of compost and then turn it under. You will need to be careful when working around the established plants that you dont harm their roots. You do still want to add organic matter. This can be done either in spring or fall, or in both spring and fall.
General Rules for Existing Garden Beds that are Empty:
- Put down two to three inches of compost and turn it into a bed.
- Work the soil when it is moist, but not wet.
- At least 12 inches of soil should be turned over.
- Add another layer of compost on top to keep weeds down and water in.
How to Create a New Garden Bed: Removing Grass, Planting, Watering, and Mulch! | Joshua’s Garden
How do you make a new garden bed?
Turn the soil. Use a tiller, spade/shovel, or garden fork to turn the soil over. A spade or shovel may be the best to use for a very new and firm bed. The soil should be damp, but not wet when you are working with it. It should break apart, look moist, and not stick to your tools. If the soil is not moist, you can add water with a garden hose.
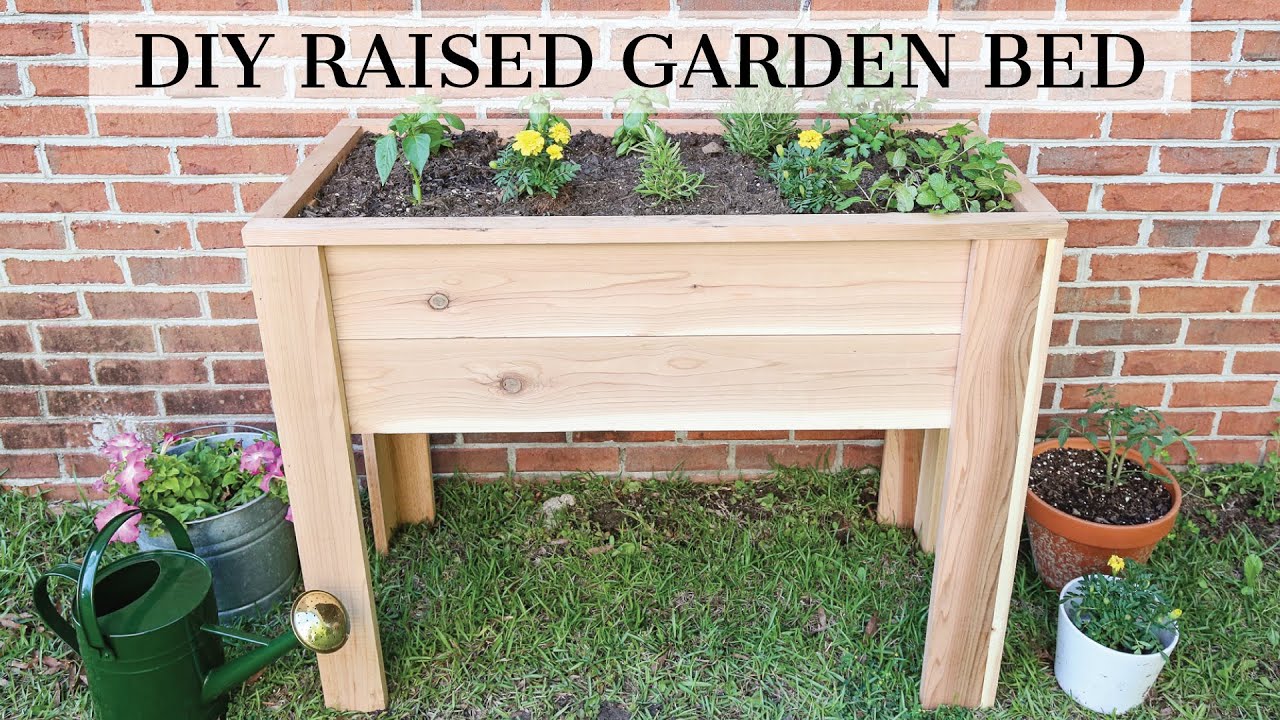
How to build a garden with a raised bed?
A raised bed will allow the water to drain well. You can use a wooden border or rocks constructed a few inches high around the parameter of the garden so that the soil is packed securely inside. With a raised garden, you don’t have to dig out the area and till the soil first.
What can I plant in a raised garden bed?
Here are some planting suggestions for your garden bed: Root Vegetables: Carrots, radishes and beets all grow well in the loose soil of a raised bed. Leaf Vegetables: Kale, lettuce and spinach do very well in the warm, fast-draining soil of a raised garden bed. Melons: Raised beds and melons work well together thanks to the loose, warm soil.
Can you build a raised bed without a frame?
Raised beds are usually open on the bottom, so the plant roots can access soil nutrients below ground level. Of course, a raised bed can be even simpler than that: you could build a raised bed without a frame, mound the soil 6 to 8 inches high, and flatten the top. This requires no additional materials (beyond soil). What Is Hügelkultur?
- How Much Water Do Peonies Need? An Expert Guide to Proper Peony Irrigation - May 28, 2026
- How to Prepare Soil for Hydrangeas – A Comprehensive Guide - May 28, 2026
- How Often Should You Water Raised Garden Beds? - May 26, 2026