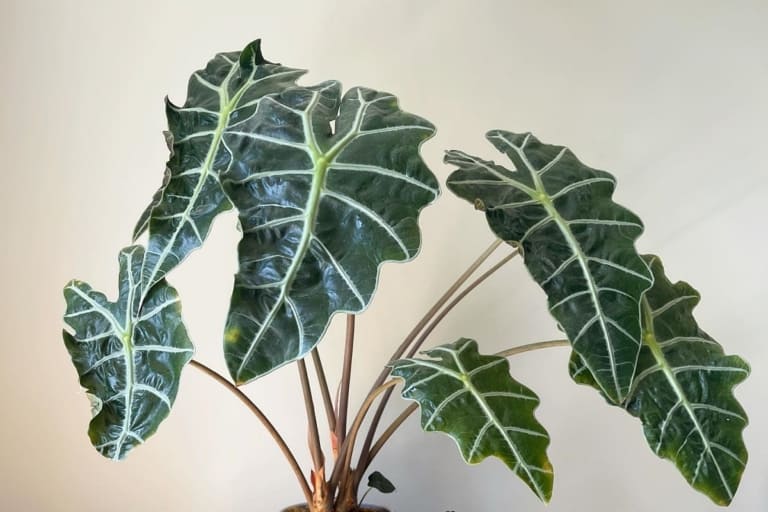
With their dramatically shaped, glossy leaves in shades of metallic green, silver and even purple, Alocasia ‘Polly’ makes a striking statement in any indoor garden Luckily, propagating these beauties is straightforward, allowing you to expand your plant collection
In this article, we’ll look at when and how to propagate Alocasia Polly using division. Read on for tips to multiply these tropical stunners.
When is the Best Time to Propagate Alocasia Polly?
Alocasia Polly is a tuberous plant, meaning it stores energy and nutrients in an underground stem called a rhizome This rhizome sends up new shoots and foliage
The best time to propagate Alocasia is during the active growing season in spring and summer when the rhizomes are plump and healthy. This provides the new propagations the best chance to establish before going dormant in fall and winter.
How to Propagate Alocasia Polly Through Division
Division is the most effective propagation method for Alocasia and takes advantage of their naturally clumping growth habit. Follow these steps:
Supplies Needed
- Clean, sharp knife or pruning shears
- Container slightly larger than root mass
- Houseplant potting mix amended with perlite or orchid bark
- Optional: Rooting hormone powder
Step 1: Water Plant Well
- Water your Alocasia Polly thoroughly 1-2 days before dividing. This makes removal from the pot easier and lessens stress.
Step 2: Remove from Pot
- Turn pot on its side and gently slide plant out. You may need to loosen edges with a knife.
Step 3: Rinse Roots
- Rinse or soak roots in water to remove soil and inspect rhizome. Look for offsets connected to main rhizome.
Step 4: Divide Rhizome
- Carefully separate offsets from main rhizome using sterile knife or pruners if needed. Avoid damaging tubers.
Step 5: Prepare Pots
- Fill pots 2/3 with well-draining potting mix amended with perlite or orchid bark.
Step 6: Plant Offsets
- Plant divisions at same level as before. Water well. Consider rooting hormone to encourage establishment.
Step 7: Provide Warmth and Humidity
- Place in bright, warm location out of direct sun. Mist leaves daily and keep soil evenly moist but not soggy.
Within a few weeks, your new Polly plantlets will settle in and resume active growth. Pot up into larger containers as they become rootbound.
Caring for Newly Propagated Alocasia Polly Plants
With the right care, your propagated Alocasia Polly will quickly flourish:
-
Acclimate new plants gradually to lower humidity and light levels.
-
Move to brighter light but avoid direct hot sunlight which can scorch leaves.
-
Water whenever the top 1-2 inches of soil become dry. Allow to partially dry between waterings.
-
Maintain warm temperatures around 70°F-80°F for active growth.
-
Feed monthly with diluted liquid fertilizer during the growing season.
-
Repot each spring into container one size larger. Divide when overcrowded.
Troubleshooting Propagation Problems
Propagating Alocasia Polly is usually straightforward but occasionally issues arise:
-
Rotting tubers likely mean too much moisture. Allow more time between waterings.
-
Weak growth can indicate not enough light. Slowly move plant to brighter area.
-
Drooping leaves or loss of color may signal low humidity. Mist more frequently.
-
Failure to root could be due to taking divisions when dormant. Propagate in spring or summer.
-
Lack of new growth may indicate transplant shock. Ensure proper care and give more time to establish.
The Satisfaction of Propagating Your Own Plants
Increasing your Alocasia Polly collection through division is tremendously rewarding. In no time, you can turn a single plant into multiple pots overflowing with these incredible arrowhead leaves.
Propagating your own also saves money compared to buying new plants. Share divisions with other houseplant fans and swap for different Alocasia varieties.
How to Rejuvinate an Alocasia Polly Dividing and taking Cuttings
FAQ
Can you grow Alocasia from a cutting?
Can Alocasia be rooted in water?
How to propagate Alocasia in elephant ears?
How do you propagate Alocasia Polly?
Here’s how to propagate your Alocasia Polly: Step One: Thoroughly water your plant the day before, which will help the soil release from your plant’s roots without damaging them. Step Two: Remove your Alocasia Polly from its container. Step Three: Loosen the soil with your hands. Step Four: Take time to inspect your plant’s root system.
Can You repot Alocasia Polly?
If you can repot a plant, you can divide it. Here’s how to propagate your Alocasia Polly: Step One: Thoroughly water your plant the day before, which will help the soil release from your plant’s roots without damaging them. Step Two: Remove your Alocasia Polly from its container. Step Three: Loosen the soil with your hands.
Can Alocasia be propagated?
That being said, propagating them is actually super easy! Typically, propagating almost any plant should be done just before the dormant Winter months. This rings especially true to rhizomatous plants like alocasia. During the cold months, the plant is focused more on root growth and bulb division than on growing more foliage.
Can Alocasia Polly grow indoors?
While alocasia Polly rarely blooms while kept indoors, it’s a good idea to prune back any spent flower heads to help promote leaf growth. If your healthy alocasia Polly is growing from at least two bulbs with two leaves, you can propagate the plant by division.
- The Ultimate Guide to Growing Strawberries in Raised Beds - August 8, 2025
- No-Dig Garden Beds: The Easiest Way to Grow a Beautiful Garden - August 6, 2025
- How to Protect and Preserve Wood for Raised Garden Beds - August 6, 2025

