
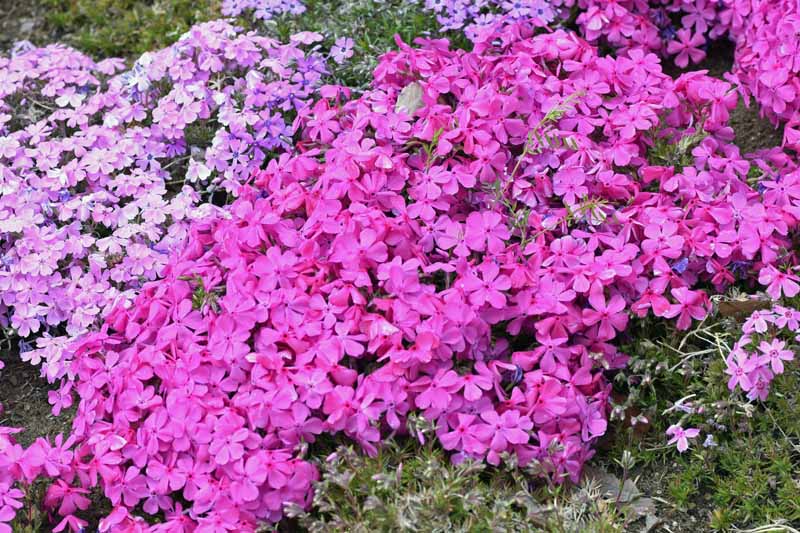
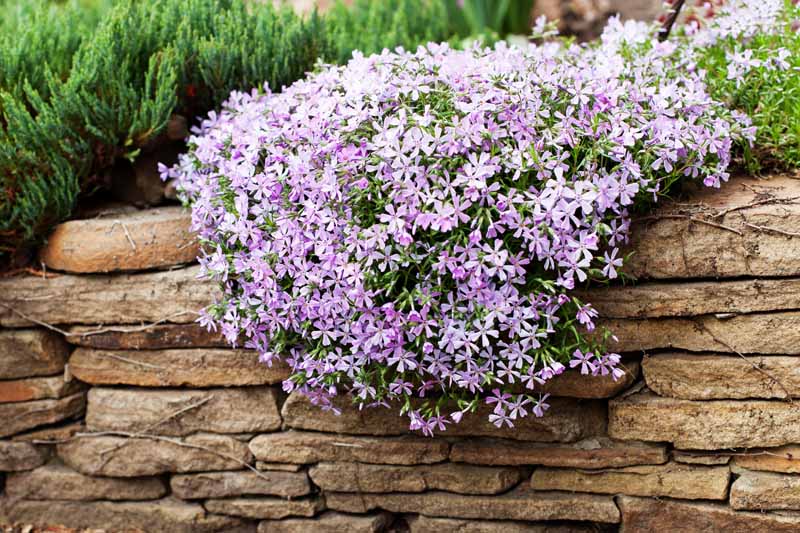
Creeping phlox (Phlox subulata) is a popular low-growing species prized for its masses of brightly colored flowers in spring. With its carpeting growth habit, creeping phlox makes an excellent ground cover and can also be used in rock gardens or cascading out of hanging baskets. Luckily propagating creeping phlox is an easy process that will allow you to expand your groundcover or share this gorgeous plant with gardening friends.
Why Propagate Creeping Phlox?
Creeping phlox is one of those plants that looks stunning when allowed to spread and fill in an area. A single plant can quickly turn into a lush, flower-covered mat in just a couple seasons. Propagating creeping phlox enables you to grow new plants for groundcover or as companion plants to anchor spaces and complement other flowers.
Since creeping phlox spreads readily, propagation also allows you to share extras with other gardeners The process is simple enough that you can grow batches of new starts to give as gifts Propagating your own creeping phlox is more economical than buying plants and ensures you’ll have fresh genetics for improved hardiness.
When to Take Cuttings for Propagation
For the best results, take cuttings from creeping phlox in spring or early summer when plants are actively growing. This gives the cuttings time to root before cold weather arrives in fall. Early spring is ideal in most climates since cool temperatures and frequent rain provide favorable rooting conditions.
Select young, healthy shoots that do not yet have flowers. Older, woodier stems are less likely to root well. Look for shoots around 4-6 inches long for the best cuttings.
How to Propagate Creeping Phlox from Cuttings
Propagating creeping phlox from cuttings is simple and requires no special equipment. Follow these steps for success:
Gather Supplies
- Sharp, sterile pruners or scissors
- Small pots or trays
- Fast-draining potting mix
- Clear plastic bags (optional)
Take Cuttings
- Use pruners or scissors to cut a 4-6 inch shoot just below a node.
- Strip off the bottom leaves so you have a stem section about 3 inches long.
- Optional: Dip the cut end in rooting hormone powder/gel to encourage root growth. Tap off excess.
Plant the Cuttings
- Fill pots or trays with moist potting mix.
- Use a pencil to poke holes. Insert cuttings so the bottom 2 nodes are buried.
- Gently firm soil around stems.
- Water well until soil is moist but not saturated.
Provide Ideal Conditions
- Place pots or trays in bright, indirect light out of direct sun. A porch or shaded cold frame is perfect.
- Cover with plastic bags or cloches to boost humidity around the cuttings.
- Keep the soil consistently damp but not muddy.
Transplant Rooted Cuttings
- Check for root development in 4-6 weeks. Gently tug on cuttings to test for resistance.
- Once rooted, acclimate plants to outdoor conditions for a few days before transplanting into the garden.
How to Propagate from Rooted Stems
In addition to taking stem cuttings, you can also easily propagate creeping phlox by dividing rooted sections of stems in spring or fall.
Look for sections where the creeping stems have rooted themselves in the soil. Use a shovel or garden fork to carefully lift the rooted sections. Tease apart plants, retaining as much of the roots as possible. Replant divisions in prepared garden beds.
Water new divisions well and keep them consistently damp the first few weeks until the broken root structures recover and plants become established. This is an extremely easy propagation method that takes advantage of creeping phlox’s natural spreading habit.
Tips for Propagating Creeping Phlox
Follow these tips to ensure the best results from propagating creeping phlox:
- Take cuttings in the morning when plants are well-hydrated.
- Use sharp bypass pruners or scissors for clean cuts that won’t crush stems.
- Change the water in propagation trays every few days to prevent rot organisms.
- Maintain high humidity around cuttings until rooted by watering from below or using cloches/bags.
- Transplant into the garden in spring once danger of hard frost has passed.
- shear plants lightly after flowering to encourage bushy growth and more stems for taking cuttings.
Enjoy Your Propagated Creeping Phlox!
With a little practice, propagating creeping phlox from cuttings or divisions is an easy way to expand your groundcover. Stick with the simple steps outlined and you’ll soon have trays full of new plants rooting and ready to plant. Propagating your own creeping phlox ensures you always have an abundant source of this popular flowering groundcover to enhance your garden.
How to Ensure an Influx of Phlox
It’s easy to grow P. stolonifera and P. subulata from seed, cuttings, and transplants.
When starting plants from seeds, it’s important to use potting soil that drains well. A mixture of perlite and coarse sand granules works best. It’s best to seed them about 2 months before the last frost date. As soon as the plants come up, they need to be in the sun for about 12 hours a day.
However, it is probably easier to grow from cuttings or transplants than it is from seeds. This plant is easy to find in nurseries, or a friend might be willing to give you some cuttings.
Because of its easygoing nature, this plant will happily take to the soil in both spring and autumn.
The planting distance is the most important thing to remember. Leave about 15 to 18 inches between each plant.
Creeping phlox, as the name suggests, creeps along the ground and spreads with long, leggy runners. Plant in rows that are spaced out so that each plant has enough room to grow in the space around it.
Planting isn’t hard or complicated. Just make sure the top of the root ball is level with the ground and give each plant a good soak to get used to its new home.
P. stolonifera and P. . subulata are flexible and adaptable plants that will do well with just a little care if they are put in the right spot and get enough sun.
There are, however, a few things you can do to help these flowers along.
Both P. stolonifera and P. Subulata plants do well when fed a slow release fertilizer or organic plant food in late winter or early spring. This helps them grow strong and healthy.
Don’t forget: it doesn’t like soggy soil, so generally speaking, it’s best to keep watering to a minimum.
Actually, phlox does better with extra watering even after it’s established. This is especially true in places that get less than an inch of rain a week or when it’s really hot.
Although not strictly necessary, a bit of trimming from time to time does this plant some good.
You can cut back the stems a few times a year: once after the flowering period to encourage a second bloom, and once or twice in the winter to keep the plant happy, healthy, and ready to go for the next spring.
This way of cutting back the stems also makes their naturally long growth shorter and more woody, which makes the flowers more dense.
Creeping phlox is easy to propagate through division, stem cuttings, or rooted stems.
If you do it right, cuttings are one of the easiest ways to grow plants because they root quickly after a few months.
Just cut off a piece about 6 inches long, either from a stem with roots or a side shoot close to the tip. Make sure there’s at least one leaf and no flowers on the cutting. Always make cuttings with a clean, sharp tool to prevent infection.
Creeping phlox roots so well that it doesn’t even need rooting hormone. However, if you want to be sure of success, this product will help speed up the process. You can use perlite and/or coarse sand to make a potting mix that drains well and put the cuttings in that.
One thing to bear in mind is timing, which is everything with this plant. It’s best to take cuttings in the spring or fall, but after it blooms in the fall, they seem to take root especially well.
You can also propagate P. stolonifera and P. subulata easily through division. It is best to divide in early fall when temperatures are cool. When this plant doesn’t seem to be blooming as much as usual, it’s best to divide it every few years to keep it healthy.
Root cuttings should be taken just before the arrival of new spring shoots. Root cuttings of around 1. 5 inches should be enough, and they should be fully buried in firm compost. Make sure the end that is farthest from the root tip faces up.
If you want to make sure you don’t mix up the ends of the root cuttings you are taking, cut a hole in the top of each one.
Phlox stolonifera vs. Phlox subulata
When I first looked into this plant, I wasn’t sure which species of phlox was the “real” creeping phlox. I found that, technically speaking, P. stolonifera is a “creeping phlox” and P. subulata is a “moss phlox. But because the two species look and act so much alike, the two common names are often used instead of each other.
Both are semi-evergreen ground cover plants that bloom with beautiful flowers in spring. That being said, there are a few notable differences between the two.
For instance, P. subulata only reaches a height of around 6 inches, whereas P. stolonifera can grow to around double that.
P. subulata also has much more needle-like leaves, wheres P. stolonifera has more of a mixed foliage.
However, the main difference between the two is that, whilst P. stolonifera tolerates partial shade, P. subulata is very much a sun-seeker (I can empathize with this), and so only thrives in full sunlight.
Both are such similar plants that they are often confused. If I really had to choose between the two, I’d say P. because it’s shorter and blooms more densely, subulata might just edge out as a ground cover. But both options can bring beauty to the garden, when planted under the right conditions.
About Creeping Phlox & How To Propagate It Through Hardwood Cuttings
FAQ
Is creeping phlox easy to propagate?
Can you root phlox cuttings in water?
How do you encourage creeping phlox to spread?
How do you propagate creeping phlox?
Propagation of this plant is through division, stem cuttings, or rooted stems. Creeping phlox cuttings root after a few months, readily providing new plants almost effortlessly. Timing is everything when taking creeping phlox cuttings. Learn how to take cuttings from creeping phlox and when to do it for maximum success.
Can you grow Creeping Phlox from cuttings?
Cuttings You can use either stem or root cuttings to propagate your creeping phlox. The best time to take root cuttings from a creeping phlox plant is during middle fall through winter. For stem cuttings, the ideal time is late summer to early fall.
When should I take root cuttings from a creeping phlox plant?
The best time to take root cuttings from a creeping phlox plant is during middle fall through winter. For stem cuttings, the ideal time is late summer to early fall. Make sure to choose a healthy plant that has not flowered yet and aim for a section of approximately four inches in length below a leaf.
How do you replant a creeping phlox plant?
After you’ve cut through the creeping phlox plant, replant each division in its own hole. You may have to create more planting sections depending on the size of the individual divisions. Again, make sure that the roots are not too deep in the soil and that there’s enough space for the plants to grow.
- How to Grow Gorgeous Climbing Roses on a Wooden Fence - March 24, 2026
- Avoid These Plants When Companion Planting with Oregano - March 24, 2026
- 15 Great Trees to Plant Near Your House - March 24, 2026