How to grow camellias is one thing; how to propagate them is another. Propagation of camellias is usually accomplished through seeds, cuttings or layering, and grafting. This is the easiest and most popular way to grow camellias, but many people are still interested in how to grow them from seeds.
Camellias usually grow best in partially shaded areas in well-drained soil. Although you can plant at any time, fall is the best time because the roots have more time to take hold.
Camellias require frequent watering once planted, eventually shortening to about once a week once plants are established. A generous layer of organic mulch will help retain moisture and keep down weeds. Pruning of camellia is usually not necessary but may be performed in spring for appearance.
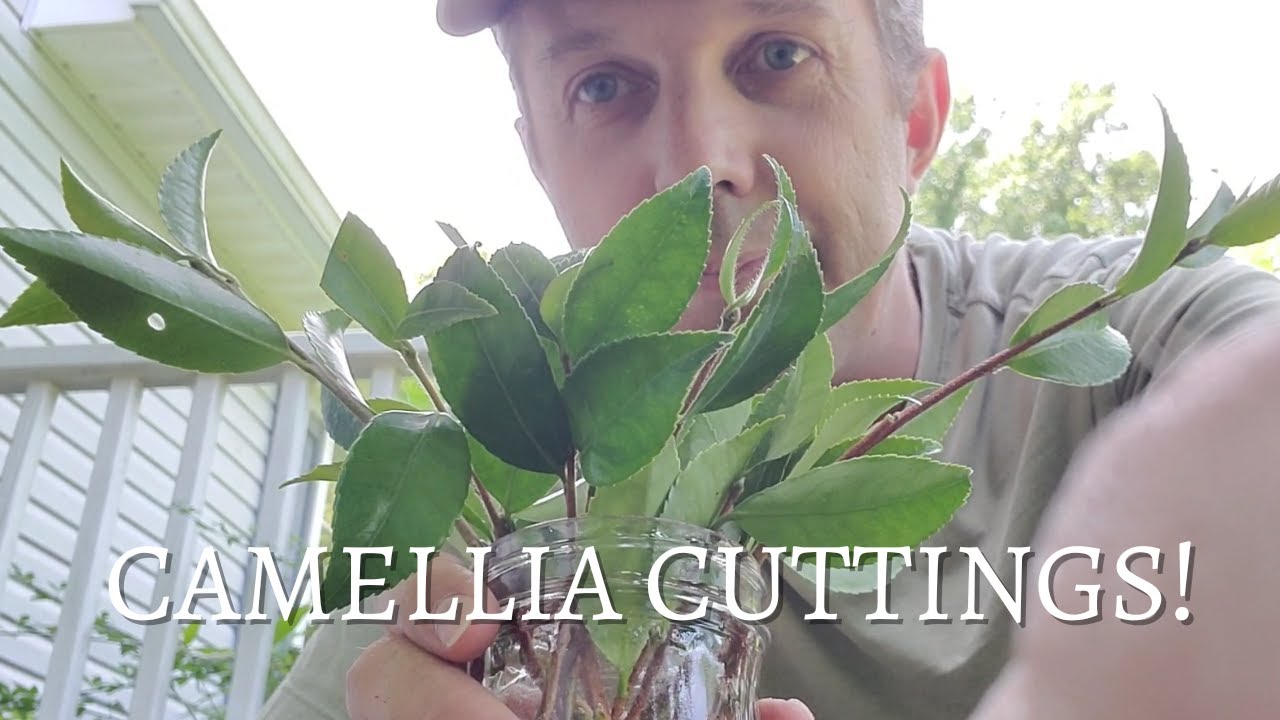
Camellias are gorgeous flowering shrubs that come in a wide array of colors, from white to pink to red. Their lush, glossy leaves and fabulous flowers make them a favorite for gardens in mild climates. While camellias are easy to propagate from cuttings, proper technique is important for the best rooting results. With a few simple steps, you can root fresh camellia cuttings and add more of these classic beauties to your garden landscape.
Selecting the Best Cuttings
The first step in rooting camellia cuttings is choosing the right material to take your cuttings from. Actively growing stems with new growth make the best cuttings. Look for stems that are supple not brittle. Avoid thin, weak stems or stems with flower buds on them as these will not root well. The best cuttings will come from the current season’s growth.
Take your cuttings in the morning on a cloudy day or place cut stems in water until you are ready to prepare them. This prevents excess wilting while you work. Always use a clean sharp knife or pruning shears when taking your cuttings. Make a smooth, diagonal cut just below a leaf node where a new stem and leaves will emerge later.
Proper Cutting Size Matters
In general, a cutting that is around 4 inches long is ideal for camellias. Cuttings can be shorter or longer depending on what you have available. The most important aspect is to have a section of stem with 2-3 leaf nodes on it. These nodes are where new growth and roots will develop later. Avoid extremely long or short single node cuttings if possible.
Helpful Hormones
Using a rooting hormone can speed up the rooting process and create more abundant roots on your camellia cuttings Look for a powder, liquid, or gel product that contains the rooting hormone auxin like indole-3-butyric acid (IBA) or napthaleneacetic acid (NAA) Dip the bottom 1-2 inches of your cuttings in the rooting hormone before sticking them.
The Medium Matters
Picking the right propagation medium will give your camellia cuttings the best chance at forming strong roots. Options include:
-
Perlite – Absorbs moisture while still allowing air circulation. Mix perlite 50/50 with peat moss.
-
Peat or sphagnum moss – Holds moisture well. Use moist, not soaked.
-
Sand & peat moss – Equal parts sand and peat create a loose mix.
-
Vermiculite – Absorbs water and nutrients. Mix with perlite.
-
Commercial potting mixes – Use light, seed starting mixes. Avoid heavy, dense soils.
Moisten your rooting medium before sticking in the cuttings so it is damp but not soggy wet. Good drainage is important to prevent rotting.
Proper Cutting Prep
Before placing your cuttings in the rooting medium, it helps to prepare the stem to promote better root formation. Here are two easy methods:
-
Slice the stem – Make a 1-2 inch diagonal slice on the bottom end of the stem, through the bark and outer stem tissue. This creates more surface area for roots to form.
-
Wound the stem – Use a knife to scrape a 1-2 inch section of bark off the bottom of the stem. The wound helps direct root growth.
Either method works well. Wounded or sliced stems root quicker than cuttings without preparation.
Use Bottom Heat
Providing gentle bottom heat will encourage faster rooting and stronger root development on camellia cuttings. Place your pots or trays of cuttings on heating mats set to 70-75 °F. You can also set pots on top of seedling heat mats or use a heatable propagation tray. Take care not to let cuttings overheat.
Stick Cuttings Carefully
Once you have prepared and treated your cuttings, stick them into the rooting medium. Make a hole with a pencil, stick, or dibber and gently insert the cutting. Firm the medium around the stem carefully. Avoid compacting it too tightly.
Place cuttings 1-2 inches apart if sticking several in one pot. Water in well after planting to moisten the entire root zone. As the cuttings root, avoid disturbing or tugging them to prevent damage to new root initials.
Providing the Proper Environment
Camellia cuttings need a warm, humid environment with gentle airflow and dappled light to root successfully. Here are a few options for providing the right conditions:
-
Propagation trays – Clear dome lids hold in moisture while allowing light to reach cuttings. Ventilate to prevent fungal diseases.
-
Terrariums – Mini greenhouses with ventilation that maintain high humidity for cuttings.
-
Plastic bags/cloches – Mist cuttings and cover pots with clear bags to create a greenhouse effect. Remove to water.
-
Shade houses – Provide filtered light and maintain moisture. Protect from wind and hot sun.
-
Greenhouses – Ideal for providing warm, humid conditions for cuttings. Maintain temperatures 70-80 ̊F.
The goal is to keep cuttings from drying out while allowing air flow to prevent problems. Maintain ambient temperatures around 70°F for best results.
Be Patient!
Rooting camellia cuttings requires patience. It can take 8-12 weeks for cuttings to form robust root systems depending on the time of year. Do not disturb cuttings for at least 6-8 weeks to allow young roots to establish. Test for rooting by gently tugging on cuttings after 8 weeks. If there is resistance, roots are forming.
Be diligent about keeping the rooting medium moist during the entire process. Let cutting medium partially dry out between waterings, then soak thoroughly. Fertilize sparingly with a balanced, dilute fertilizer once a month.
Once cuttings have rooted strongly, transition them to a potting mix meant for acid loving plants like camellias. Acclimate plants slowly to outdoor conditions before planting in the garden. With proper care, your new camellia plants will thrive for years to come!
Rooting Camellia Cuttings Step-By-Step
Follow these simple steps for the highest success rooting camellia cuttings:
-
Take 4-6 inch cuttings from new growth in the morning. Cut below leaf nodes.
-
Optional – Dip cuttings in rooting hormone (IBA or NAA) before sticking.
-
Prepare cuttings by slicing or wounding the stem base.
-
Moisten propagation medium before sticking cuttings 1-2 inches apart.
-
Place pot on bottom heat mat or heatable propagation tray.
-
Cover to create a humid environment with airflow.
-
Keep root zone evenly moist but not saturated.
-
Provide bright, indirect light.
-
Allow 6-12 weeks for cuttings to root before checking.
-
Once rooted, transition to pots with acidic potting mix.
-
Gradually acclimate plants to outdoor growing conditions.
-
Transplant established plants into garden beds. Enjoy your new camellias!
With the right techniques, rooting camellia cuttings is very achievable. Follow these guidelines and you will add beautiful new camellia plants to your garden in no time. Patience and proper care are the keys to success. The rewards will be an elegant, flowering shrub grown from your own propagation efforts.
How to Grow Camellias from Seed
Camellias grow much more slowly from seeds than from other sources, and they don’t bloom for many years, if ever. Camellia fruit or seeds ripen at various times depending on their location and variety. Most, however, are ready to harvest in fall. Mature camellia seedpods turn brown and crack open.
Once this is done, take the fully grown camellia seedpods and soak the seeds for about twelve hours before planting. Do not allow camellia fruit (seeds) to dry out. They should be planted as soon as possible. Putting seeds in a plastic bag and covering them with sphagnum moss that has been misted until it is damp will help them sprout faster.
They will usually germinate within a month or so, at which time you should notice small taproots. Prior to planting these in pots, snip off some of the taproots.
When you plant them, keep them moist and put the pots somewhere warm with bright, indirect light.
How To Grow Camellias From Cuttings | Camellia Plant Propagation From Cuttings
FAQ
Can camellias be rooted in water?
How to grow camellias from cuttings?
When should camellia cuttings be taken?
Do camellias like coffee grounds?
How do you root a camellia?
Remove any leaves or flowers from the bottom half of the cutting to prevent them from rotting in the water. Rooting hormone: Although not necessary, dipping the cut end of the camellia cutting in a rooting hormone powder can increase the chances of successful rooting.
How long does Camellia take to root?
Now comes the waiting game. Camellia cuttings typically take around 6-8 weeks to root. During this time, it is important to monitor the moisture levels and make sure the cuttings are not drying out. It is also recommended to mist the cuttings with water regularly to maintain optimum humidity.
Can you root Camellia cuttings in water?
Therefore, it is always a good idea to research the specific camellia variety you are working with and consult with local experts or nurseries for advice tailored to your specific needs. In conclusion, rooting camellia cuttings in water can be a rewarding and relatively easy way to propagate new plants.
How do you propagate Camellia cuttings?
gently remove cuttings and plant into individual 8″ pots; fertilize; do not transplant into garden until the pot is filled with roots (note that the bottom cutting did not make roots and has no tip bud) This is my step-by-step process of propagating camellia cuttings.
- How to Grow Gorgeous Climbing Roses on a Wooden Fence - March 24, 2026
- Avoid These Plants When Companion Planting with Oregano - March 24, 2026
- 15 Great Trees to Plant Near Your House - March 24, 2026