Nature has given us a lead-in in Kansas, with temperatures rising to 70 degrees for a short time.
Spring has always been a welcome sight, but I find now it is even more delightful and necessary.
Long before the cherry blossom, forsythia, or tulips grace the outdoors, I’m scurrying about refreshing the inside.
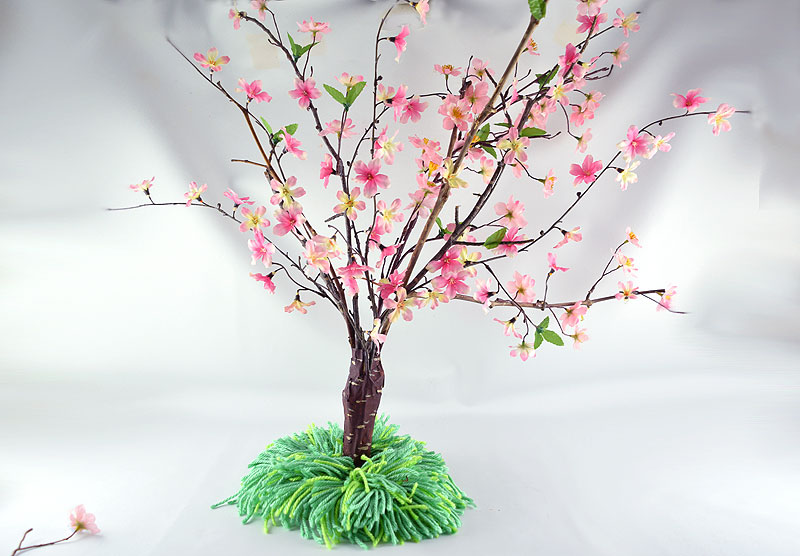
When spring rolls around, there’s nothing quite as beautiful as the sight of cherry blossoms blooming. Their delicate pink and white flowers are iconic symbols of the season. If you want to capture that magical feeling in your own home or garden, making your own cherry blossom tree is easier than you think!
In this simple, step-by-step guide, you’ll learn everything you need to craft a stunning cherry blossom tree that looks amazingly realistic
Supplies You’ll Need
Before starting your project gather these basic supplies
- Artificial cherry blossom stems or branches – available at craft stores or online retailers
- Floral wire
- Green floral tape
- Pruning shears or wire cutters
- Vase or other container for display
- Foam blocks (optional)
- Decorative moss (optional)
Selecting Artificial Flowers and Foliage
The key to a natural looking tree is using high-quality artificial blossoms and branches. Go for ones made with delicate, detailed petals in shades of white and pink. The stems should have small leaves for added realism. For a fuller look, choose blossoms attached to short branch stems you can cut apart.
Opt for plastic over silk flowers – they hold their shape better. Shop for deals online to save money. Five blossom stems cost $15-30.
Arrange Blossom Placement
Attach your individual stems and small branches to the bigger main branches using floral wire and wrapping with green tape. Play around with placement until you have full, even coverage. Focus blossoms toward branch tips and distribute leaves along the lengths.
Aim for a balanced and organic look, not too dense or sparse. Vary heights and directions. Group multiple stems together to form bursts of flowers.
Anchor in Your Vase or Container
Place your assembled branches in a tall vase or planter that complements the flowers. Use foam blocks to insert and secure the stems if needed. Fill in any gaps with moss or leaves for a polished look.
Position the thickest, tallest stems in the middle for support. Angle and curve thinner branches around them.
Display Your Masterpiece
Find a perfect spot to showcase your homemade cherry tree! Ideal places include entryways, living rooms, bedrooms, or even your garden.
Turn on fairy lights at night for extra magic. Refresh the blossoms once they accumulate dust. Now you can enjoy this beautiful sight of spring any time.
Extra Flair and Decorating Ideas
Take your cherry blossom tree to the next level with these easy add-ons:
-
Drape wispy tulle or ribbon around the base and branches for a dreamy effect.
-
Accent with real greenery like ferns or ivy.
-
Incorporate Easter eggs or paper cranes for some seasonal whimsy.
-
Use warm white string lights for a festive glow.
-
Display photos or small frames in the branches.
-
Add Easter grass or moss around the bottom.
-
Scatter faux flower petals around the base.
-
Craft paper or fabric cherry blossoms to tuck into the tree.
Frequently Asked Questions
What is the best type of container to use?
Tall glass vases, galvanized buckets, and ceramic pots work well. Make sure it’s big enough to securely hold all of the branches. Vintage, rustic, or sleek modern vessels are all pretty options.
Where’s the best place to buy supplies?
Craft stores like Michaels and dollar stores have all the materials you need at affordable prices. Order bulk stems online from Etsy or Alibaba to save.
How long will it last?
With proper care, an artificial cherry blossom tree can last for years. Keep it dust-free and sheltered from direct sun to maximize longevity.
Can I use real cherry blossoms?
Fresh cut cherry blossoms wilt quickly. Stick to faux flowers for a lasting bloom that you can enjoy season after season.
Bring the Beauty of Spring into Your Home
Crafting your own cherry blossom tree is an easy DIY that makes a gorgeous statement anywhere you display it. With a little creativity and imagination, you can have this iconic springtime symbol blossoming in your home.
Faux Cherry Blossom Branches Made Simple
Easy instructions to make faux cherry blossom tree. Once you’ve collected supplies, you should be able to complete this DIY in less than two hours.
Note: This project is best with a tall vase. My vintage vase is approximately 14 inches. The opening is around 4 inches. Here is a source for my ginger jars and a similar vase if you need one.
Turn on your JavaScript to view content
Step 2: Cut Branches to Desired Length and Arrange in Vase
To cut flowers for a vase, use your tallest branch, which is about 1.5 times the height of the vase. Vary the heights of the limbs for a balanced look. Be sure to do a trial run with the branches before cutting. Take note of the bend of the branches to create a pleasing arrangement.
I Made My Own Cherry Blossom Tree From Scratch [DIY] | MATOKA
- A Complete Guide to Caring for Yuki Cherry Blossom Shrub - January 23, 2025
- Identifying Red Hot Poker Seeds: What to Look For When Harvesting Torch Lily Pods - January 23, 2025
- A Complete Guide to Harvesting Evening Primrose Seeds - January 23, 2025


