Tete a Tete daffodils are one of the most popular miniature daffodil varieties grown around the world. Their compact size vibrant yellow blooms and early flowering habit make them a delight in gardens and containers. If you want to add a cheerful pop of color to your spring landscape, learning how to properly plant Tete a Tete daffodils is key. In this complete guide, we will cover everything you need to know about planting these petite beauties for optimal growth and enjoyment.
Selecting the Best Site
Choosing an optimal site is the first critical step for success when planting Tete a Tete daffodils. Here are the key factors to consider when selecting a planting location:
-
Sunlight Tete a Tete daffodils thrive in full sun Select a spot that receives at least 6-8 hours of direct sunlight daily, Areas with morning sun are ideal
-
Soil drainage: Excellent drainage is vital. Choose a site with sandy or loamy soil that drains well. Avoid planting in wet, boggy areas.
-
Air circulation: Good air flow around the blooms helps prevent fungal diseases. Pick an open site rather than a cramped, enclosed spot.
-
Fertility: Rich, organic matter encourages strong bulbs and blooms. Incorporate compost or well-rotted manure before planting.
-
pH: Tete a Tete daffodils tolerate a wide pH range from 5.5 to 8.0. Most neutral to slightly acidic soils are fine.
Positioning your Tete a Tete daffodils in an optimal growing site will give them the best start as they establish and prepare to bloom.
When to Plant
Timing is critical when planting Tete a Tete daffodil bulbs. Follow these planting guidelines for your region:
-
Northern zones 3-7: Plant in the fall, from late September to early November. This allows root growth before winter dormancy.
-
Southern zones 8-10: Plant in late December through February. Bulbs need a chilling period first.
-
Coastal climates: Plant November-December to prevent pre-mature sprouting.
Planting at the proper time prevents bulbs from sprouting too early or too late in the season for your climate. Pay close attention to recommended planting times.
Preparing the Soil
Prepping the soil well before planting is a key step. Here’s how to get your soil planting-ready:
-
Loosen the soil to a depth of at least 8-10 inches using a spade or rototiller. Break up any compacted areas.
-
Mix in 2-4 inches of aged compost or rotted manure. This provides nutrients and improves drainage.
-
The ideal soil pH for daffodils is between 6.0-7.0. Have your soil tested and amend if needed.
-
Rake the bed smooth, removing any rocks, clumps, or debris. Create a loose, crumbly texture.
Proper soil preparation creates the ideal environment for Tete a Tete bulb roots to establish and thrive. Invest time in this step for healthy daffodils.
Planting Depth and Spacing
Follow proper planting depths and spacing when installing your Tete a Tete daffodil bulbs:
-
Planting depth: Plant bulbs 6-8 inches deep. This is 2-3 times the height of the bulb itself.
-
Spacing: Space bulbs 3-6 inches apart depending on your design. Closer spacing creates a bolder effect.
-
Groups: Plant bulbs in loose clusters of at least 6-12 for best visual impact. Avoid straight rows.
-
Design: Integrate bulbs in combinations with perennials, ornamental grasses or groundcovers.
Adhering to the recommended planting depths and spacing ensures your bulbs settle in properly underground. Get creative designing fun patterns and combinations.
The Planting Process
Now let’s cover the actual planting process step-by-step:
-
Dig holes or trenches to the correct planting depth based on your bulb size.
-
Place a 2-4 inch layer of loose soil, compost or bone meal in the bottom of the holes for drainage and nutrients.
-
Arrange bulbs in the holes with tips facing up and flat bottoms down. Pack soil firmly around each bulb.
-
Water thoroughly after planting to settle soil. Top dress with mulch to conserve moisture.
-
Label your planted bulbs if desired so you remember where they are when they sprout in spring!
Follow these steps precisely for proper bulb placement. Take your time planting and don’t rush this important process.
Caring for Daffodils After Planting
Once your Tete a Tete daffodil bulbs are nestled into their new homes, follow these tips for care after planting:
-
Water bulbs weekly if rainfall is less than 1 inch per week. Avoid saturated soil.
-
Fertilize bulbs in early spring when they sprout using a balanced bulb fertilizer.
-
Remove faded blooms after flowering to redirect energy to the bulbs. Do not cut foliage until fully yellow.
-
Allow foliage to completely die back naturally after blooming. This feeds the bulb for next year.
-
Lift and divide congested clumps every 2-3 years after foliage dies back to rejuvenate.
-
Monitor for pests like narcissus bulb flies, aphids, slugs and snails. Control as needed.
Proper post-planting care ensures your Tete a Tete daffodils thrive and return reliably for seasons to come.
10 Tips for Successful Planting
Follow these top tips for getting your Tete a Tete daffodil planting off to the best start:
-
Select a site with full sun and excellent drainage.
-
Prepare soil thoroughly by loosening, amending with organic matter, and raking smooth.
-
Plant bulbs at the proper time based on your climate and region.
-
Plant bulbs at a depth 2-3 times their height with tips facing up.
-
Space bulbs appropriately for your design, allowing room to grow.
-
Group bulbs in attractive clusters for maximum visual impact.
-
Settle bulbs into soil firmly and water well after planting.
-
Label planted bulbs if desired so you remember their locations.
-
Provide regular water and fertilizer to support establishment.
-
Allow foliage to die back naturally before removing after blooming.
Following these top planting tips will set your Tete a Tete daffodils up for a successful first season and beyond.
FAQs About Planting Tete a Tete Daffodils
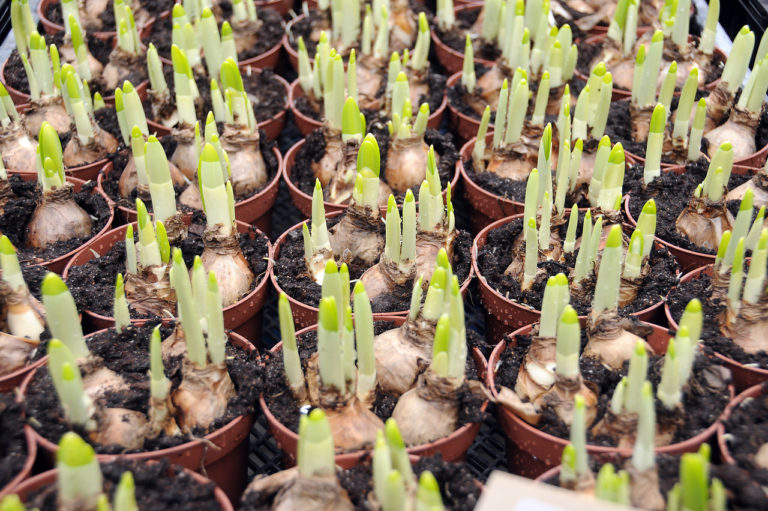
Q: Can I plant Tete a Tete daffodil bulbs in containers?
A: Yes, Tete a Tete daffodils do well in containers. Use a quality potting mix and allow for adequate drainage. Plant bulbs to a depth 2-3 times their height.
Q: Should I mulch around newly planted bulbs?
A: Applying 2-3 inches of organic mulch like wood chips or chopped leaves helps retain soil moisture and moderates soil temperatures. Leave a 1 inch space around bulb tips.
Q: How often do I need to divide and replant Tete a Tete daffodil bulbs?
A: Replant bulbs every 3-5 years to maintain vigor. Signs bulbs need dividing include reduced flowering, crowded clumps, and smaller blooms.
Q: Can Tete a Tete daffodils tolerate partial shade?
A: While they prefer full sun, they can tolerate up to half a day (4 hours) of morning or late afternoon shade. More shade will reduce flowering.
Q: How can I discourage squirrels and rodents from digging up my bulbs?
A: Try planting bulbs deeper, covering with wire mesh, or using chemical repellents. Avoid bone meal fertilizers which attract wildlife.
Learning the ins and outs of properly planting Tete a Tete daffodil bulbs will ensure you have beautiful, vibrant flowers blooming in your garden each spring. Follow these tips for optimal bulb growth and seasons of enjoyment observing your petite daffodils multiply over time. With the right site preparation, planting techniques, and aftercare, these bulbs will flourish and brighten your landscape for years to come.
Narcissus ‘Tête-à-tête’ and wildlife
Narcissus ‘Tête-à-tête’ has no particular known value to wildlife in the UK.
How to Plant Narcissi Tete-a-Tete: Spring Garden Guide
- How to Grow Gorgeous Climbing Roses on a Wooden Fence - March 24, 2026
- Avoid These Plants When Companion Planting with Oregano - March 24, 2026
- 15 Great Trees to Plant Near Your House - March 24, 2026