How to lay brick garden edging the easy way using leftover bricks, a lawn edger and paver sand .
I believe in making the most of what you have, so while I was fixing up our awful backyard, I found a place for a pile of old bricks that were just lying around.
There are a lot of trees on and around our property, which has made it hard for anything to grow, especially grass.
When I put together my raised garden beds last year, I chose to cover the whole yard, which at the time was just dirt and weeds.
When it comes to DIY projects, few materials bring more character and vintage appeal than old bricks. Those weathered, earthy bricks lend a sense of history and durability to anything you build. And one of the simplest ways to reuse salvaged bricks is by converting them into attractive garden edging.
Outlining planting beds and dividing sections of your yard with a brick border adds definition and structure. Brick edging also helps control weed growth and prevents mulch from spilling out. With a little planning and elbow grease, you can put those leftover bricks to use as long-lasting landscaping edging.
Benefits of Brick Garden Borders
Beyond just looks, brick edging offers many advantages over other types of garden borders:
-
Provides a crisp, clearly defined edge that keeps mulch and soil contained.
-
Helps block weeds and grass from infiltrating planting beds.
-
Lays flat to allow easy mowing and trimming right up to the border
-
Stays put year after year without rotting or shifting
-
The interlocking design resists frost heaving better than single materials like wood.
-
Brick’s earthy hues and aged patina complements nearly any garden style from traditional to modern.
-
Can be laid in straight lines or curved shapes for versatility.
-
Quick and easy installation without the need for mortar or special tools.
-
Provides a practical way to repurpose old bricks rather than sending them to a landfill.
Gather Supplies
For most small to medium-sized garden borders, you’ll need:
-
Old bricks – Estimate the number you’ll need by laying them end-to-end along your planned edging line. Add 10% extra.
-
Shovel and spade – Use to dig shallow trench for placing bricks.
-
Landscape edging tool – Optional for neatly cutting trench edge.
-
Sand or gravel – Fill in underneath bricks for leveling and drainage.
-
Mallet – Tamp bricks into place.
-
Level – Ensure bricks lay evenly.
-
Work gloves & eye protection – Keep hands and eyes safe while handling bricks and tools.
Prepping the Site
Proper planning prevents problems down the road. Before grabbing those bricks, think about these prep steps:
-
Study your garden layout and decide where brick edging would look best aesthetically and function practically. Outline the shape with a hose for an idea.
-
Examine the installation site. Determine if the ground is level enough for a trench, or if you need to level it first.
-
If installing around existing plants, carefully dig them up to set aside until the edging is in place.
-
Use spray paint to temporarily mark a guideline for your trench if desired.
-
Plan to lay full-size bricks around the outermost edges, using halved bricks elsewhere if needed.
With prep work done, it’s digging time!
Digging the Trench
-
Outline the trench location with spray paint or by scraping ground with a hoe.
-
Dig the trench 4-6 inches deep and 4 inches wide using a shovel or edging tool.
-
Clear any debris from the trench. Level the base and sides so bricks will lay flat and even.
-
Test fit a few bricks in the trench to ensure your dimensions are accurate. Adjust as needed.
-
Lay down a 1-inch layer of sand or gravel for drainage and to prevent settling.
Now it’s finally time to lay those beautiful vintage bricks!
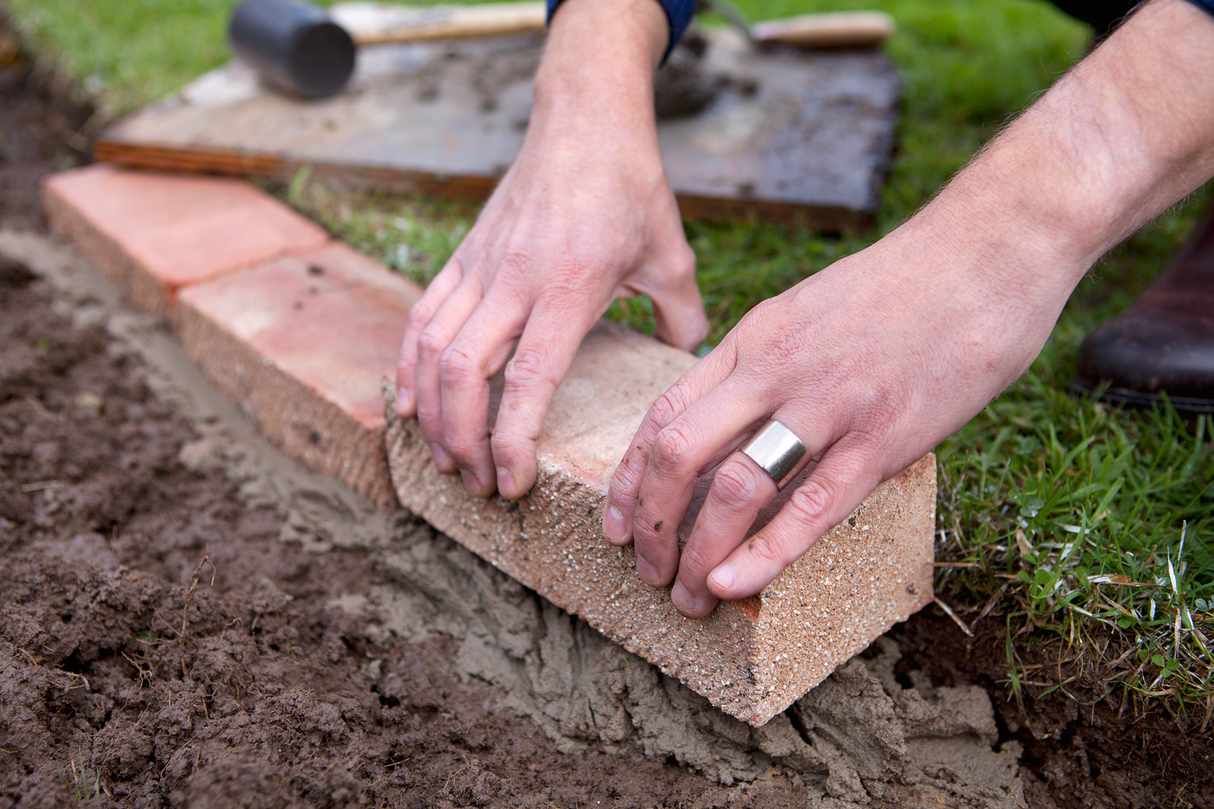
Setting the Bricks
-
Begin at a corner, laying full bricks end-to-end tightly against each other along the length of the trench.
-
Make sure bricks sit level and maintain consistent height as you add each one. Use a mallet to tap them flush.
-
To fill in gaps around curves and corners, cut bricks in half or at angles as needed using a chisel.
-
Check your work with a level frequently to keep bricks even. Add or remove sand to make minor adjustments.
-
Once all bricks are laid, spread soil or mulch up to their edges to fill the surrounding space.
And with that, you have a completed and classy DIY brick garden edge ready to enjoy for years to come!
Tips for Ongoing Care
Brick should be nearly maintenance-free, but here are some tips to keep your edging looking its best:
-
If bricks settle or shift over time, remove and relay them as needed to keep the border neat.
-
Use a steel broom or brush attachment on a string trimmer to clear grass and weeds from the brick perimeter.
-
Avoid digging or tilling close to the edging, which can displace bricks.
-
Consider sealing bricks periodically with an outdoor sealer to retain their vintage patina.
-
In very cold climates, wait to install brick edging until late spring after the ground has thawed.
Getting Creative With Brick Borders
Looking to venture beyond basic straight lines? Here are some fun variations for putting salvaged brick edging to stylish use:
-
Lay bricks diagonally, herringbone-style for a change of direction.
-
Alternate bricks vertically and horizontally to showcase distressed textures.
-
Form graceful curves or geometric patterns like octagons.
-
Combine regular bricks with unique specialty bricks of different sizes, colors, or shapes.
-
Incorporate brick into three-dimensional edging with pillars or loose stacking.
-
Outline steps, patios, trees, and other hardscape elements in addition to planting beds.
However you choose to utilize them, recycled bricks make for enduring and eco-friendly landscape edging. Each brick keeps pounds of usable material out of the waste stream. So put your old bricks to work enhancing your garden beds or pathways with vintage character and charm. Get creative with shapes and patterns that complement your yard’s style. Then sit back and admire the lasting fruits of your green handiwork.
How do you lay a brick border in a garden?
Actually it was quite easy and just took about an hour to complete. I didn’t have to use any power tools or mortar.
- lawn edger
- rubber mallet
- bricks
- paver sand
- level
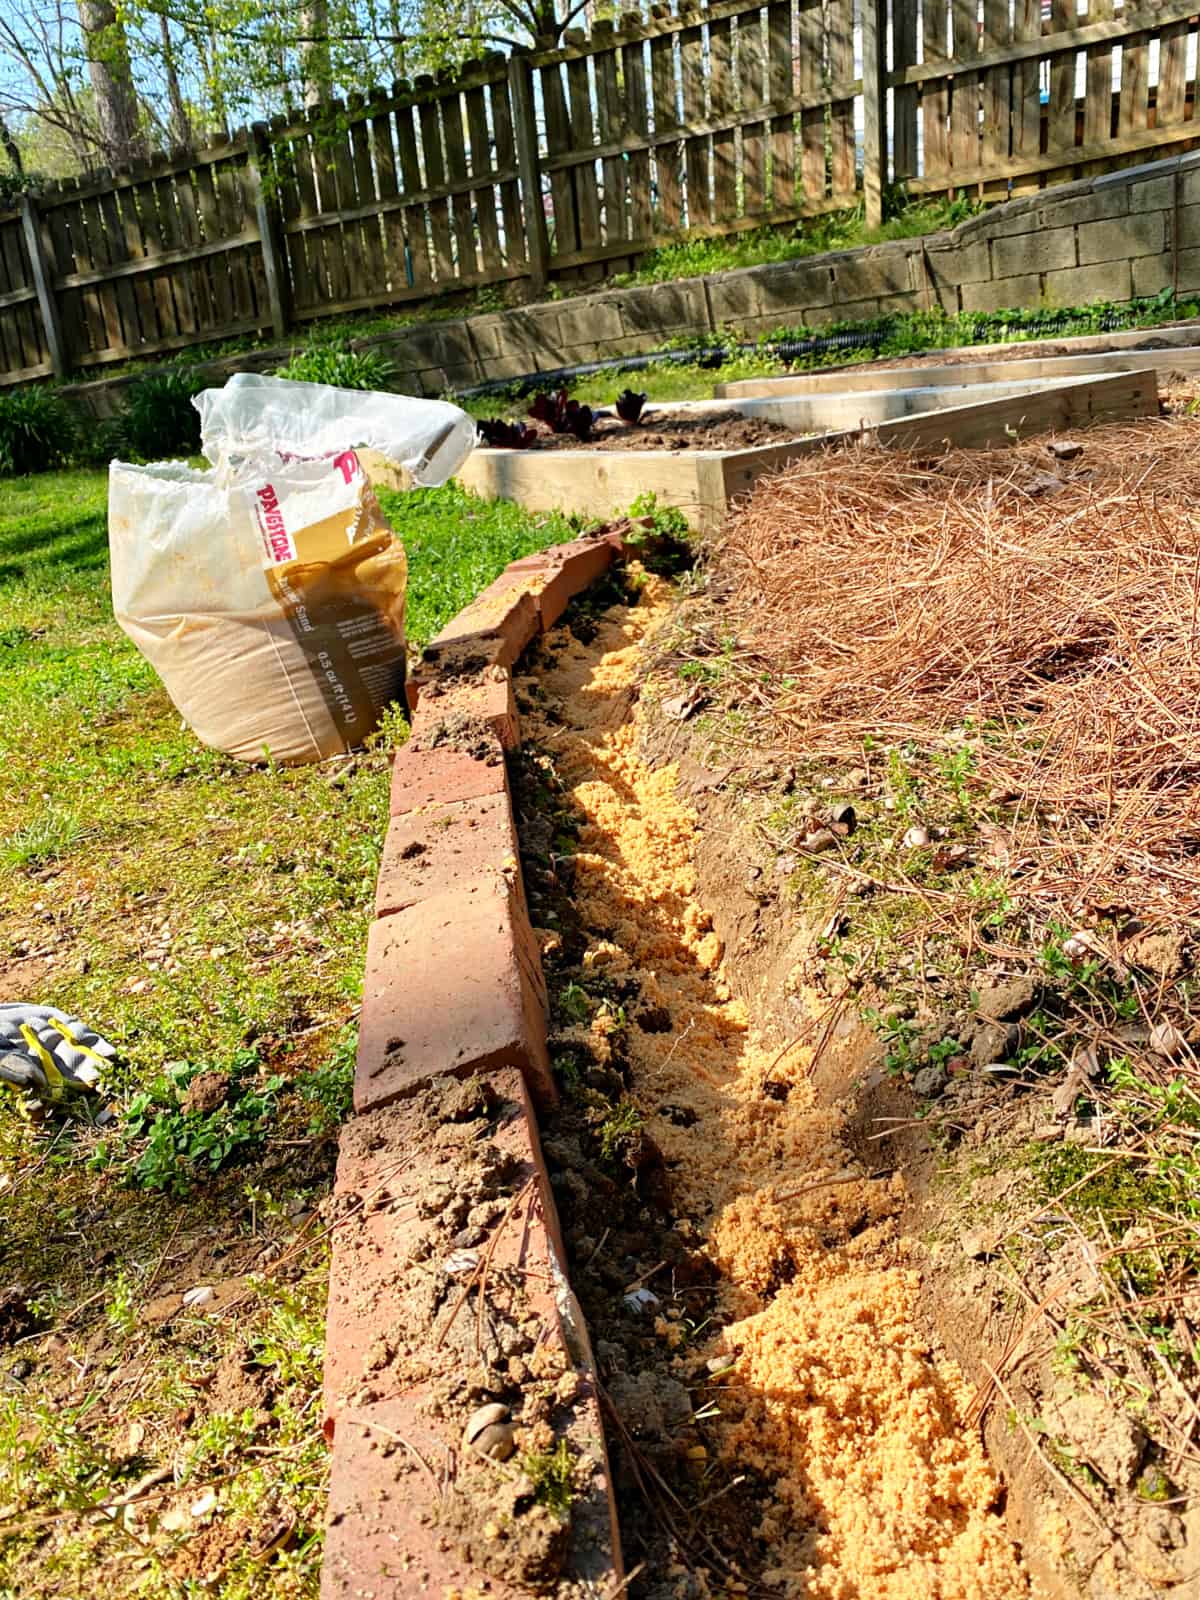
The first thing that I did was to lay the bricks out along the edge of the garden.
This was done to get a feel for the edge’s shape and to make sure I had enough bricks to finish the job.
You could also make the shape of your garden border with a hose or a rope.
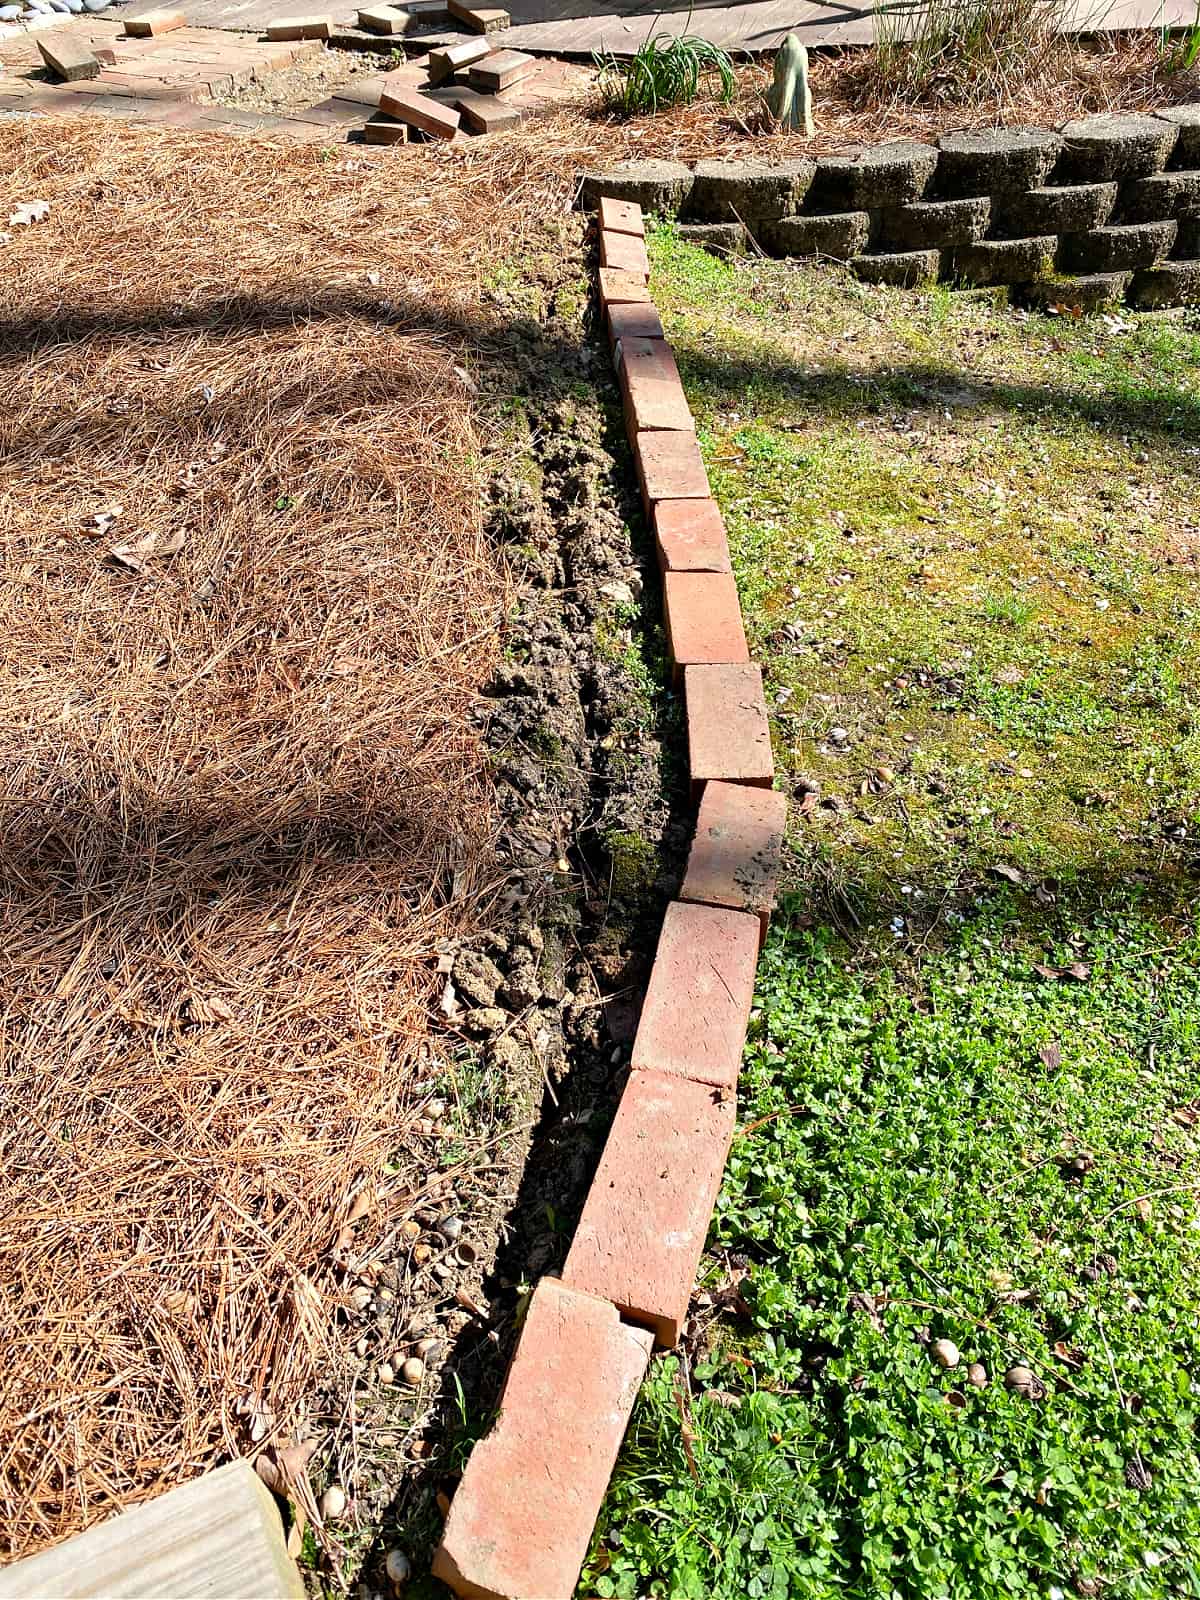
Once I was happy with where everything was, I moved each brick back a few inches and used the lawn edger to make a hole for the bricks.
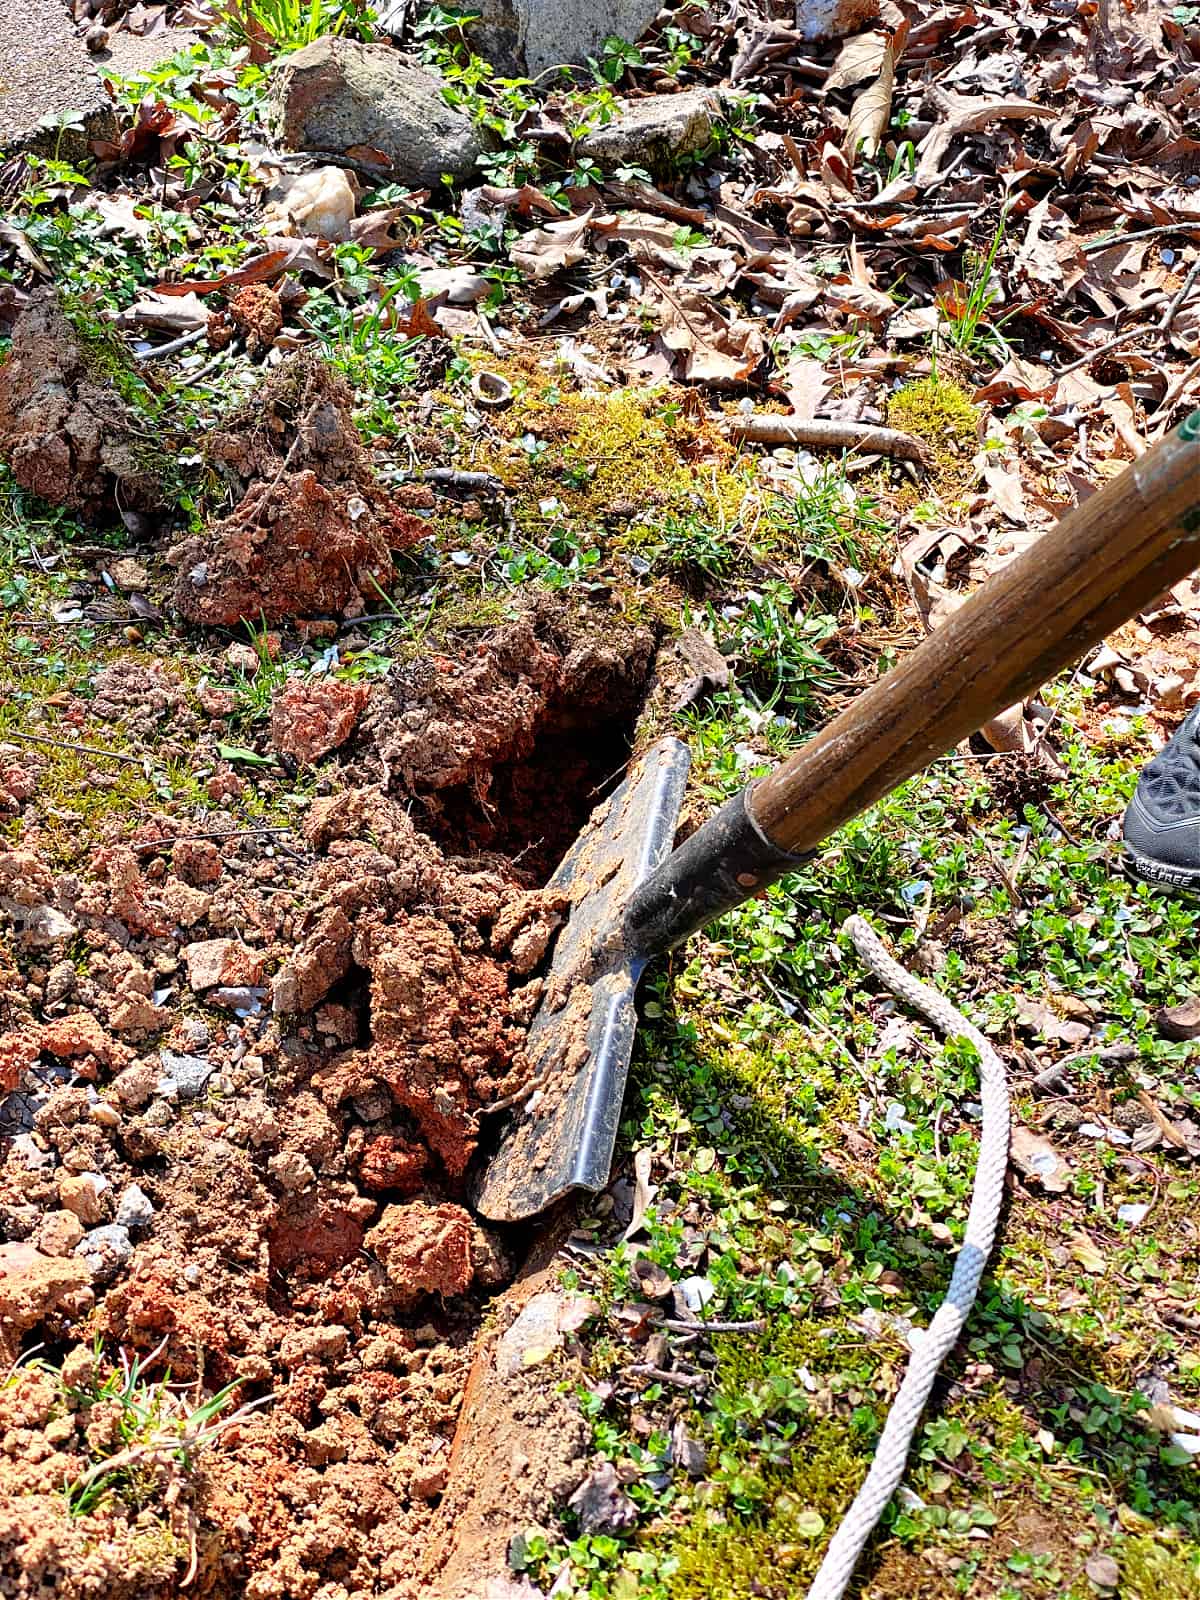
I didn’t move a lot of dirt, just enough so that the bricks would be halfway underground.
You could, of course, raise them higher or lower depending on the look and feel you want.
I would put a brick in my edge every few feet to make sure it was wide and deep enough.
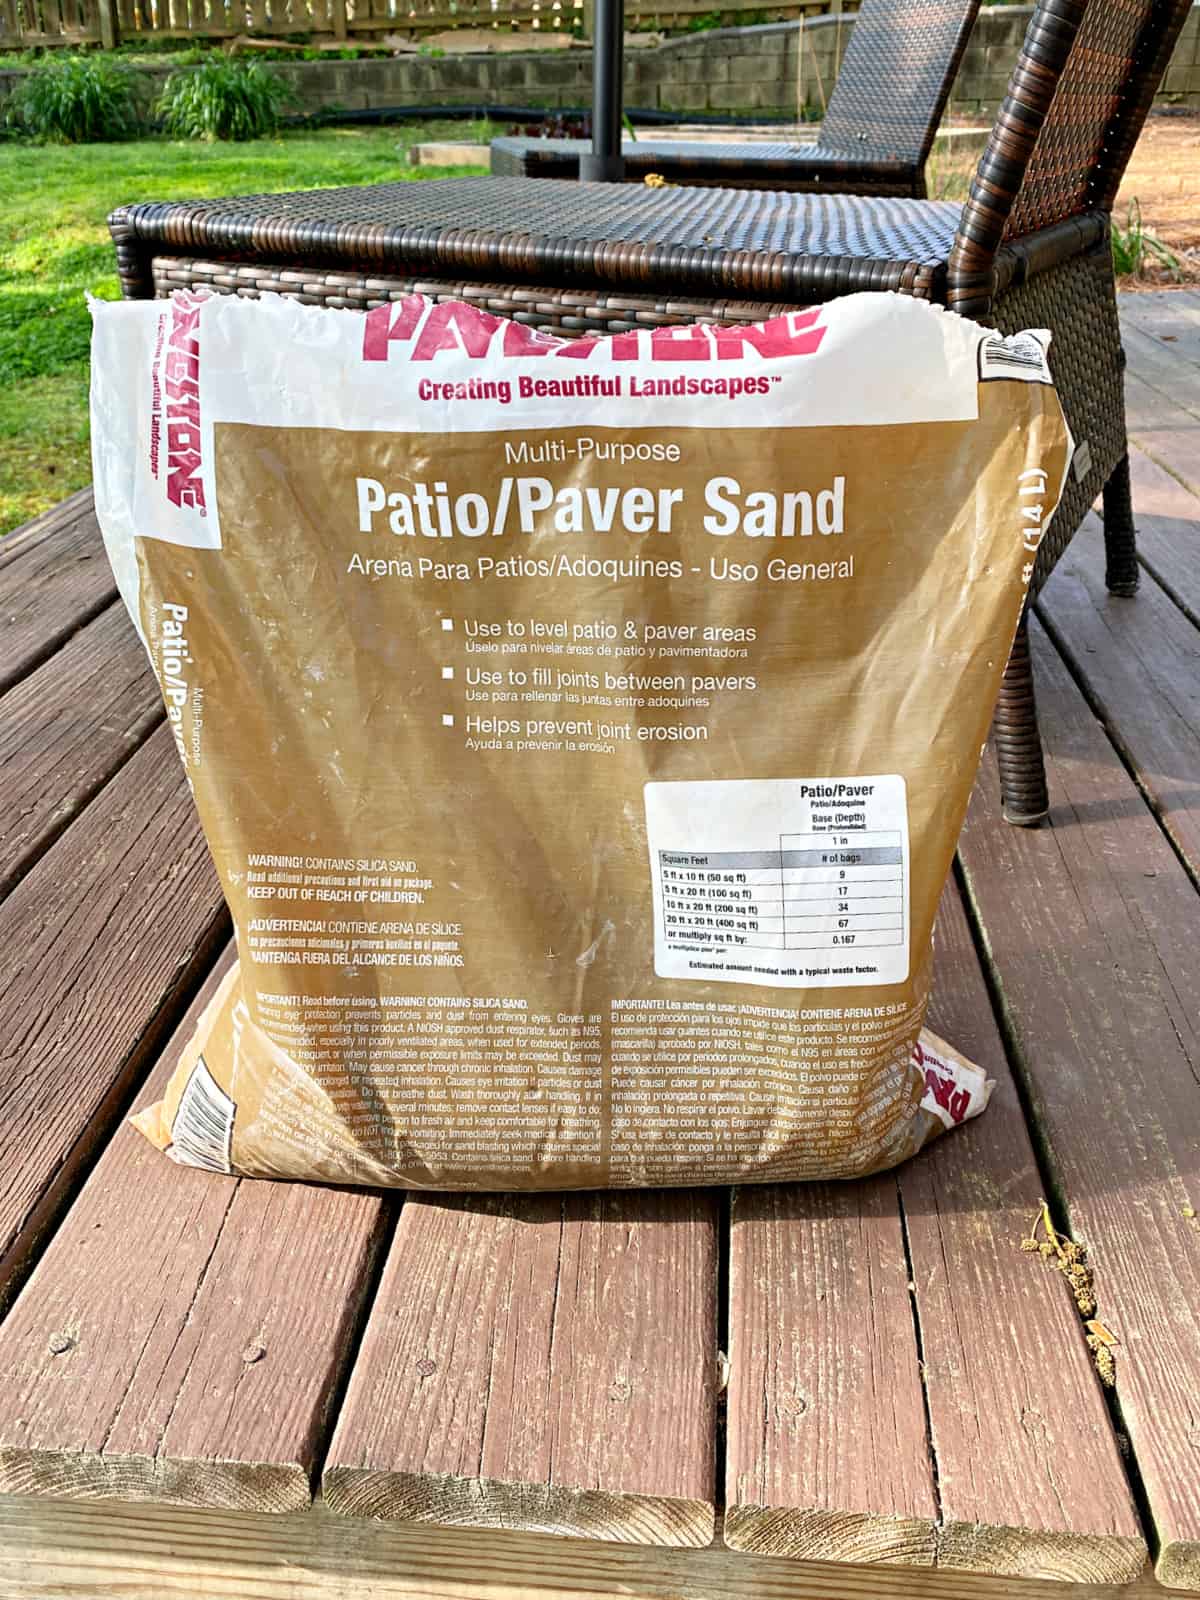
What do you put under brick garden edging?
Once the edge was completely dug I spread some paver sand along the length of the border.
I didn’t need to do this step before I started laying the bricks, but I will talk more about that in a bit.
You could also use crushed stone for this step. I already had the sand so that’s what I used.
Now I was ready to start laying my brick.
How to Edge a Garden Bed With Brick | This Old House
FAQ
Can you use old bricks to build a wall?
Can you use bricks for landscape edging?
What kind of brick is used for edging?
Should you use bricks as edging?
If you’re looking for a simple and cost-effective way to add some visual interest to your garden, consider using bricks as edging. Not only do they provide a clean and classic look, but they also help to define garden beds and prevent grass and weeds from encroaching on your plants. Here’s how to do it right.
How do you edging a brick garden?
Arguably the most straightforward approach to brick garden edging is using new bricks. New bricks look clean and crisp, and they will most definitely make your garden stand out. As an added bonus, brand new bricks will be tougher and longer-lasting than bricks that have been repurposed.
Are repurposed bricks good for garden edging?
Repurposed bricks are a great choice for garden edging if you want to incorporate a rustic vibe into your garden. This flower bed demonstrates the aesthetic value that repurposed bricks add. No brick is too old to be used in a garden. In fact, the older a brick is, the more character it adds!
How do you use old bricks in a garden bed?
Add character and structure to your garden with a beautiful brick border around the edge of your garden bed. This is a great project to use up the pile of old bricks behind your garage! Tap each brick in place with a rubber mallet. Lay the brick so it is slightly sloping away from the garden bed, allowing water to run off the edging.
- How to Grow Gorgeous Climbing Roses on a Wooden Fence - March 24, 2026
- Avoid These Plants When Companion Planting with Oregano - March 24, 2026
- 15 Great Trees to Plant Near Your House - March 24, 2026