Planning and designing a beautiful, productive garden bed takes some thought and preparation. But with the right steps, you can create a gorgeous garden oasis right in your own backyard. In this comprehensive guide, we’ll walk through the complete process of how to plan and design a stellar garden bed from start to finish.
Choose the Garden Bed Location
The first step in planning your garden bed is deciding on the location, Choose a spot that gets at least 6 hours of direct sunlight daily Vegetables and flowering plants need lots of sun to thrive
Try to pick a fairly level area of your yard Slopes can lead to soil erosion and make watering more difficult If you must use a sloped area, you may need to build a terraced garden bed.
Make sure your garden bed is near an outdoor water source. That makes watering and maintenance much easier. Positioning it close to your house is also convenient for quick trips to grab gardening tools or harvest vegetables.
Select the Size and Shape
Once you’ve settled on a location, it’s time to decide on the size and shape of your garden bed. The dimensions depend on the space you have available and what you want to plant. Some considerations:
-
Narrow beds 3-4 feet wide are ideal. You can reach the center for planting, weeding, and harvesting without stepping on the soil.
-
Rectangular and square shapes are common, but you can also do circles, Kidney bean shapes, or creative free-form designs.
-
For beginners, a small 4×8 foot garden is a good start. Experienced gardeners can tackle larger sizes.
Keep in mind the mature size of the plants you’ll be growing when planning the garden layout and spacing.
Choose a Garden Bed Style
There are several options when it comes to garden bed styles:
In-Ground Garden Beds
For in-ground beds, you simply outline the shape in your yard using stakes and string. No construction necessary. This is the quickest and easiest approach. However, because they lack borders, maintaining clear edges can be tricky as plants spread or grass encroaches. Weed fabric or mulch around the perimeter can help.
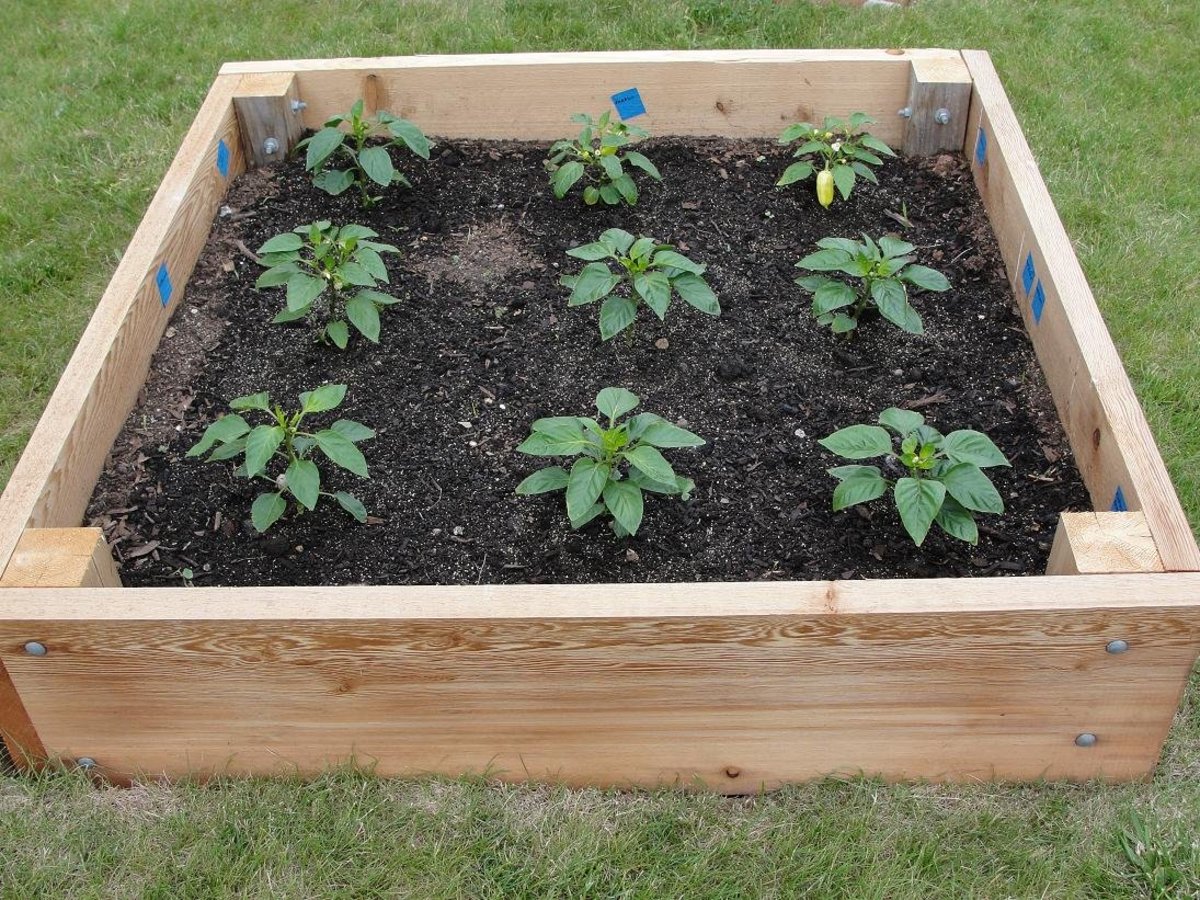
Raised Garden Beds
Raised garden beds are contained within a frame or box constructed above ground. The frame keeps the garden soil separate from the native soil.
Benefits include:
- Better drainage
- Warmer soil
- Keeps plants tidy inside the borders
- Deters pests
- Easier on your back without bending down
You can purchase pre-fab raised beds, or make DIY versions from materials like cedar, redwood, synthetic lumber, bricks, stones, or concrete blocks.
Raised Rows
Raised rows are mounded beds with sloped sides. They allow you to grow plants at a higher level without constructing a frame. Simply mound up the soil into rows about 6-12 inches high.
Add Interest with Theme Gardens
Consider a fun theme for your garden bed based on what you want to grow:
-
Vegetable garden – Tomatoes, peppers, greens, beans, carrots, etc.
-
Herb garden – Basil, parsley, oregano, thyme, sage, rosemary, etc.
-
Pollinator garden – Native flowers to attract bees, butterflies and hummingbirds.
-
English flower garden – Cottage style flowers like hollyhocks, roses, lavender, foxgloves, delphiniums.
-
Rock garden – Succulents, sedums, dwarf conifers, alpines, creeping phlox.
-
Asian-inspired garden – Ornamental grasses, bamboo, Japanese maples, azaleas.
-
Mediterranean garden – Drought tolerant plants like rosemary, sages, sedums, yarrow, agave.
Choose Plants for Your Garden Bed
Select plants suited for your gardening zone, site conditions, and design theme. Some tips for choosing plants:
-
Include a mix of heights and textures. Combine tall accent plants, mid-size filler plants, and low-growing groundcovers. Vary leaf shapes and plant forms.
-
Pay attention to sun requirements. Note if plants need full sun, part sun, or shade. Place accordingly within your garden bed.
-
Consider colors and season of bloom. For continuous color, include plants that bloom early, mid and late season. Mix flower colors together attractively.
-
Match watering needs. Group plants with similar water requirements together. For example, thirsty vegetables in one bed and drought tolerant flowers in another.
-
Know mature plant sizes. Allow enough room for plants to reach full growth. Overcrowding leads to poor health.
-
Include pollinator plants. Choose several pollinator-friendly perennials, herbs, and annuals to attract beneficial insects.
Add Design Touches
Here are some optional design elements to elevate your garden bed:
-
Add vertical interest with obelisks, trellises, or plant supports for climbing vines and tall flowers.
-
Include decorative touches like gazing balls, bird baths, sundials, benches, fountains, wind chimes, garden art.
-
Edge the bed with bricks, stones, or metal borders between the plants and lawn.
-
Frame the bed with trellised panels or short decorative fencing.
-
Include paths between beds, allowing easy access. Materials like mulch, gravel, bricks, stone, or wood chips work nicely.
-
For geometric beds, trim edges with pruning shears to keep lines crisp.
Sketch Your Garden Bed Layout
Now it’s time to draw up a plan for your garden bed. Sketch out the shape and dimensions on grid paper. Add planting boxes showing the locations of the various plants you’ve chosen. This allows you to visualize the layout and ensure proper spacing. Adjust the design on paper until you’re satisfied.
Prepare the Garden Bed Site
With your plan in hand, head to the garden and get the bed ready for planting. Here are the basic steps:
-
Mark the outline with stakes and string following your measurements.
-
Remove any grass or weeds inside the bed area. Dig down about 6-12 inches deep. Discard roots, rocks and debris.
-
Mix 2-3 inches of compost or other organic matter into the soil to enrich it. High-quality soil helps plants thrive.
-
For raised beds, set the frame in place and fill with a prepared soil mix.
-
Level and smooth out the soil surface. Shape any mounded rows.
-
Water thoroughly before planting. Moist soil helps young roots establish and grow.
Add Plants According to Your Plan
It’s finally time to put plants in the ground! Follow your garden sketch, arranging the plants in their designated spots within the bed.
-
Set larger plants like shrubs and vegetables first, then fill in around them.
-
Check proper spacing and depth for each plant. Follow label directions.
-
Water each new plant well. Continue watering daily for the first week.
-
Consider adding mulch around plants to conserve moisture and reduce weeds.
-
Stake up tall flowers or add plant supports as needed.
Step back and admire your garden bed when finished! With good preparation and planning, you’ll have a successful, thriving garden to enjoy all season.
Step 4: Decide Which Vegetables to Grow Vertically
Move on to crops that need trellis supports to grow. Remember tall crops should grow on the north side of your beds, so they don’t shade other plants.
Figure out where you will grow your peas, pole beans, indeterminate tomatoes, cucumbers, and other plants that do better with supports.
Things to consider when planning the garden beds
It’s helpful to make a garden map before you plant a single seed. This way, you’ll know how many seedlings you need, where to plant them, and how to make sure that each bed produces all season.
Don’t be tempted to overcrowd your garden. Each plant requires a certain amount of space to grow healthy and produce an abundant harvest. Plants that are too close together will compete for nutrients, moisture, and airflow.
Overcrowded plants will actually produce less and become more susceptible to pests and diseases. Follow the recommended plant spacing specified on the seed packages.
It is beneficial to rotate plant families from one garden bed to another each growing season. Vegetables in the same family need the same nutrients and can get the same bugs and illnesses. Planting different types of crops every year keeps the soil from running out and keeps pests and diseases that are specific to that crop from spreading from one season to the next. In my garden, I focus on five vegetable plant families for rotation planning purposes:
- Allium Family: chive, garlic, leeks, onions, and shallots.
- Solanaceae Family: eggplant, peppers, potatoes, tomatillo and tomatoes.
- Broccoli, cabbage, cauliflower, collards, kale, kohlrabi, mustard greens, radish, rutabaga, spinach, and turnips are all in the brassica family.
- Cucurbit Family: cucumbers, gourds, melons, pumpkin, and squash.
- Legume Family: beans and peas.
I put plants from the same family together in the same beds so it will be easy to move them to a different bed the next year. When there is room, I plant other vegetables like lettuce, corn, carrots, and herbs. I try not to plant them in the same places two years in a row.
- Learn More: Benefits of Crop Rotation for Your Vegetable Garden
Plants with tall supports, like peas, pole beans, and indeterminate tomatoes, can only grow at the north end of the garden beds. This way, they don’t shade other plants.
- Learn More: 9 Creative DIY Trellis Ideas
Even in my Maine Zone 5 garden, I can grow three different plants at the same time if I plan ahead. Quick growing crops such as spinach, lettuce, and other various greens can be planted in spring. Once the warmer weather arrives, spring greens usually turn bitter and bolt. These can be removed, fed to the chickens, and the space used to grow bush beans. Sow spinach, lettuce, and other cool-season crops in the fall after the bush beans are done producing.
- Learn More: 3 Succession Planting Tips to Maximize Your Harvest
The number of plants in the plan is also based on an inventory of the garden produce that was saved from the previous year. I don’t weigh my crops, but I do keep track of how many plants I grow each year. At the end of winter, I take stock of what I still have stored and decide if I need to grow more or fewer plants to make sure we have enough food stored until the next year’s garden starts to produce.
- Learn More: 9 Crops to Grow for Winter Food Storage
Using SQUARE FOOT Gardening Easily DOUBLED the Harvests
FAQ
How do you design a garden bed layout?
What is the best way to arrange garden beds?
Is it cheaper to build your own garden beds?

Follow me on YouTube
- Pictures of Petunias in Containers: A Guide to Growing Gorgeous Flowers - April 9, 2026
- Is Spinach a Brassica Vegetable? - October 9, 2024
- 10 Vibrant Yellow Dahlia Varieties to Brighten Your Garden - October 9, 2024