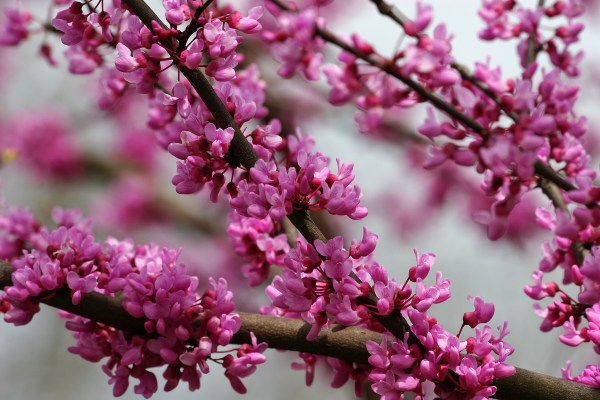
Gorgeous redbud trees put on an impressive floral display in early spring before most trees have even leafed out. Their abundant blooms range from bright pink to lavender to even white, ripening into heart-shaped leaves that provide greenery through fall. It’s no wonder redbud trees are so popular in home landscapes.
Though redbuds are often purchased from nurseries as saplings, it is possible to propagate your own from cuttings for free However, rooting redbud cuttings can be tricky compared to starting new trees from seed With patience and proper methods, you can multiply your redbud collection using stem cuttings.
Why Redbud Cuttings Are Challenging
Most plants are relatively simple to start from cuttings Herbaceous plants like coleus and pothos root quite easily. Even woody shrubs such as hydrangeas or roses root without too much fuss
Redbud trees fall into a more difficult category. As spring-blooming trees, redbuds form their new growth early in the season. By mid-summer when it’s time to take cuttings, the current season’s wood has hardened off and can be reluctant to form new roots.
Additionally, some redbud species root much better than others from cuttings. The Eastern and Oklahoma redbud varieties tend to have the most success. Redbuds grafted onto rootstock, like Rising Sun or Forest Pansy cultivars, are generally poor candidates for cuttings.
While it’s not impossible to root redbud cuttings, success rates are typically low. However, with proper timing, technique, and aftercare, you can beat the odds and multiply your redbud tree collection for free
Tips for Taking Redbud Cuttings
Follow these guidelines when collecting and preparing redbud cuttings for the best chance of success:
-
Collect cuttings in early summer when wood is semi-hardened but still flexible. Older wood is difficult to root.
-
Take cuttings from vigorous, healthy trees that are free of disease.
-
Select new growth that is pencil-thickness – around 1/4 to 1/2 inches diameter.
-
Cut stem specimens to 4-6 inches long. Remove leaves from the lower half.
-
Make a fresh 45° angle cut just below a node. Disinfect pruning tools before each cut.
-
Wound stems by scraping off 1-2 inches of outer bark near the base.
-
Dip the wounded end in rooting hormone powder/gel to encourage root growth.
Providing the Proper Rooting Environment
Caring for redbud cuttings is vital for creating the ideal conditions for new root formation. Follow these tips after sticking cuttings:
-
Use a sterile, well-draining propagation medium like perlite, vermiculite, or sand.
-
Place pots on heat mats or in a heated propagation tray to maintain 70-75°F soil temperature.
-
Water sparingly, keeping the rooting medium slightly moist but not saturated.
-
Enclose cuttings in a plastic tent or bag to increase humidity around the stems.
-
Provide bright, indirect light from a sunny window or fluorescent grow lights.
-
Mist cuttings daily to keep high humidity levels.
-
Allow 6-12 weeks for roots to hopefully develop before checking cuttings.
Have Realistic Expectations
Even if all the proper steps are followed, redbud cuttings can still be stubborn to root. Some specimens may fail while others from the same batch succeed.
-
Rooting rates are often 25% or less. Don’t expect all cuttings to make it. Taking more cuttings boosts your odds.
-
It takes significant time. Be prepared to pamper cuttings for 12 weeks until roots may form. Many people don’t have the patience to wait this long.
-
Some varieties are near impossible. Grafted cultivars like Rising Sun redbud have very low success rates from cuttings. Stick with species types.
-
Root initials are fragile. Care must be taken when transplanting to avoid damaging tiny new roots. Acclimate seedlings gradually.
Don’t be discouraged if your first attempts are unsuccessful. Persistence and repeating the process over several seasons can lead to better results.
Step-By-Step Guide to Rooting Redbud Cuttings
Follow this simple step-by-step process for the best chance of rooting redbud cuttings:
1. Take Cuttings
-
Use a bypass pruner to take 4-6 inch redbud cuttings in early summer.
-
Remove leaves from the lower half of each cutting.
-
Make a 45° angle cut just below a leaf node.
2. Wound and Treat Stems
-
Wound stems by scraping off 1-2 inches of outer bark near the base.
-
Dip the wounded end in rooting hormone powder or gel.
3. Stick in Propagation Medium
-
Stick treated cuttings in perlite, vermiculite or a sand/peat mix.
-
Gently firm the medium around the stems.
4. Provide Warmth and Humidity
-
Place pots on heating mats to maintain 70-75°F soil temperature.
-
Enclose in plastic tents or bags to increase humidity around the cuttings.
5. Allow Time for Rooting
-
Provide bright, indirect light and moisture.
-
Wait 12 weeks before checking for rooting. Gently tug cuttings to test for resistance.
6. Transplant and Acclimate
-
Carefully transplant rooted cuttings into pots using potting mix.
-
Gradually acclimate young trees to outdoor conditions.
-
Plant in garden beds once well established.
Alternatives to Starting Redbuds from Cuttings
Since rooting redbud cuttings can be challenging, here are a couple of alternatives for propagating more trees:
Start Redbuds from Seed
-
Collect ripe seed pods in fall. Remove and scarify seeds.
-
Cold stratify seeds for 12-16 weeks.
-
Sow stratified seeds outdoors in late winter or indoors 6-8 weeks before last frost.
-
Grow seedlings for 2-3 years before transplanting outdoors.
Propagate by Air Layering
-
Wound a low branch and coat with rooting hormone. Wrap in sphagnum moss.
-
Cover moss with plastic wrap and wire/tape in place.
-
Keep moss moist until fall when roots should have formed inside the moss.
-
Cut off the new plant and transplant.
While rooted cuttings should be viewed as bonus trees, seeds and air layers offer higher success propagating redbuds. Still, with proper timing and care, it’s possible to multiply your redbud collection using cuttings. Just be patient and keep trying!
Frequently Asked Questions About Growing Redbuds from Cuttings
What time of year is best for taking redbud cuttings?
Take cuttings in early to mid summer after flowering ends but when new growth is still semi-hardened. Older wood is difficult to root.
What is the best rooting medium to use?
Use a loose, sterile medium like perlite, vermiculite or a sand/peat mixture that drains well. Avoid heavy potting soil.
How long does it take for redbud cuttings to root?
It can take 8-12 weeks for roots to form. Check cuttings after 10-12 weeks by gently tugging on them. If there’s resistance, roots have developed.
What can I do to boost rooting success?
Wounding stems, using rooting hormone, providing bottom heat, and maintaining very high humidity around cuttings will improve results.
Why do most of my redbud cuttings fail?
The biggest reasons for failure are collecting branches too late in summer from hardened wood, not providing high humidity, allowing soil to dry out, and impatience.
Should I take redbud cuttings from new or old wood?
Select new growth that is semi-hardened, usually shoots from the current spring. Old wood that is hardened off is difficult to root.
What are signs that a redbud cutting is rooting well?
Look for new stem and leaf growth as an indicator roots have formed. Resistance when gently tugged means roots are developing to anchor the cutting.
Enjoy More Redbuds Through Propagation
Reproducing redbud trees through cuttings takes diligence, but it’s a cost-free way to expand your landscape specimen tree collection. Use the tips in this article to start new redbuds from stem cuttings. With proper care and realistic expectations, you can beat the odds and multiply this gorgeous spring bloomer.
How to Make Cuttings From a Redbud Tree
- Mediterranean Pink Heath in Summer – Tips for Care and Maximizing Bloom - April 9, 2026
- How to Grow Gorgeous Climbing Roses on a Wooden Fence - March 24, 2026
- Avoid These Plants When Companion Planting with Oregano - March 24, 2026