I’ve propagated many plants over the years and one of my favorite plants to propagate is Russian sage. I was able to move some Russian sage cuttings (Perovskia atriplicifolia) into pots yesterday so they can grow for a little while before I plant them in the garden. In this post I’ll describe how I propagate Russian sage from cuttings.
In recent years, plant taxonomists have changed the name of Russian sage to Salvia yangii. This name may be easier to say than Perovskia atriplicifolia, but it will take this gardener a while to get used to it.
With its airy purple-blue flower spikes and silvery foliage, Russian sage (Perovskia atriplicifolia) is a star in many gardens. This tough, drought-tolerant perennial thrives in full sun and dry conditions. It adds texture and fragrance to beds and borders. If you already grow Russian sage, you may be wondering if you can propagate it to get more of these beautiful plants. The good news is propagating Russian sage is totally doable!
In this complete guide, we will cover everything you need to know about propagating Russian sage successfully. We’ll look at taking cuttings, dividing the roots, growing from seed, and caring for new plants. Read on to learn how to multiply your Russian sage!
Overview of Russian Sage
Let’s start with a quick refresher on some key facts about this fabulous perennial
-
Russian sage is a woody-based perennial that can reach 3-5 feet tall and wide.
-
It features wand-like spikes of small, tubular violet-blue flowers from midsummer into fall.
-
The lacy silvery foliage has a lovely fragrant scent when brushed
-
Thrives in full sun and dry, well-drained soil. Drought and heat tolerant.
-
Spreads slowly by self-seeding. Regular division helps control spread.
-
Attracts bees, butterflies, and other pollinators. Excellent for cut flowers.
Propagating Russian Sage by Division
Dividing established Russian sage plants is one of the easiest ways to get more of these beauties. Here’s how to do it:
-
Divide in early spring before new growth begins or in fall after flowering finishes.
-
Use a spade to dig up the entire plant. Shake off excess soil from roots.
-
Gently pull apart the root mass into smaller sections with your hands.
-
Each new division should have plenty of healthy roots and some top growth.
-
Replant divisions right away into amended soil, water well and mulch.
-
Divisions may take a season to reach full size but will establish quickly.
-
Division every 2-3 years prevents overcrowding and rejuvenates the plant.
Propagating from Stem Cuttings
Taking stem cuttings from Russian sage in spring or summer is another simple way to get more plants:
-
Use a clean, sharp knife or pruners to take 3-4 inch cuttings.
-
Cut just below a leaf node. Remove flowers and lower leaves.
-
Dip the cut end in rooting hormone powder to encourage root growth.
-
Stick cuttings into a sterile potting mix like perlite or vermiculite.
-
Keep evenly moist, not soggy. Rooting takes 2-4 weeks.
-
Once rooted, transplant into pots with potting soil to grow larger before planting in garden.
Growing Russian Sage from Seeds
Russian sage often self-seeds in the garden. You can also start it from seed indoors:
-
Collect dry seed pods in fall and remove seeds. Or sow seeds fresh.
-
Start indoors 6-8 weeks before last frost. Sow seeds just below soil surface.
-
Keep moist and warm (70°F) until germination, which takes 10-20 days.
-
Transplant seedlings into larger containers once true leaves appear. Harden off.
-
Plant seedlings into garden after all chance of frost has passed.
-
Flowers will appear in second season. Plants grown from seed are variable.
Caring for New Russian Sage Plants
Here are some tips for caring for new Russian sage propagated by division, cuttings or grown from seed:
-
Choose a site with full sun and very well-drained soil. Avoid wet feet.
-
Water consistently the first year until deep roots establish.
-
Stake tall divisions or leggy young plants if needed.
-
Pinch back tips to encourage bushy growth habit.
-
Apply a balanced fertilizer or compost in early spring to stimulate growth.
-
Protect from hot afternoon sun the first summer until established.
-
Mulch around base in fall to insulate roots from cold temperatures.
-
Cut backany dead stems in late winter or early spring each year.
Troubleshooting Propagation Problems
If you have issues getting your Russian sage cuttings or divisions established, here are some common problems and solutions:
Problem: Cuttings fail to root or rot.
Solution: Too much moisture; improve drainage. Take cuttings in spring/summer.
Problem: Transplants are stunted or struggle.
Solution: Root damage during propagation. Avoid dividing in heat.
Problem: Leggy, lanky growth.
Solution: Needs more sun. Move to full sun location.
Problem: Few flowers or dieback.
Solution: Shock from transplanting. Allow more time to establish.
Key Takeaways
To recap, key tips for propagating Russian sage successfully:
-
Divide established plants in spring or fall for quick results.
-
Take 3-4 inch stem cuttings in spring/summer and root in perlite/vermiculite.
-
Start seeds indoors 6-8 weeks before last frost.
-
Plant in well-drained soil in full sun. Avoid excessive moisture.
-
Allow divisions/cuttings/seedlings a full season to establish before flowering.
-
Troubleshoot issues to get new plants thriving.
Rooting Russian Sage from Cuttings
A few weeks ago, I took nine about 4-inch-long cuttings of Russian sage and put them in sand after putting rooting hormone on the cut end. In less than two weeks there was significant rooting and all 9 cuttings successfully rooted.
See how this Russian sage cutting has roots in the picture below! How to grow Russian sage from cuttings An example of good root growth from a cutting.
Internode: The new roots grow from the sides of the stem, not just the cut end. This means that an internodal root will be formed.
Propagating Russian Sage with Cuttings
Here is summary of the steps to take for successful Russian sage propagation:
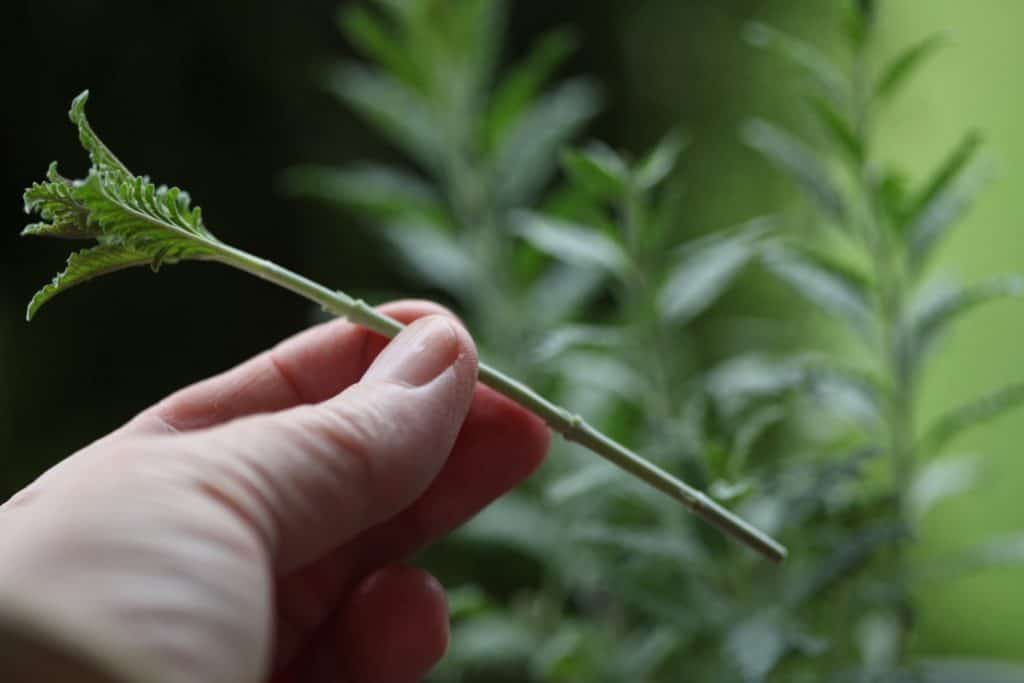
- With a clean pair of pruning shears or scissors, cut 3–4 node cuttings that are about 4 inches long.
- Rooting hormone should be put on the cut end of the Russian sage cutting, but it’s not necessary because the plant will root on its own.
- Place your cutting carefully in sand or other rooting medium. For the soft stems to stay together, make holes in the sand with a pencil. (It’s really frustrating when you damage a cutting!).
- Mist the cuttings or put a bag over them to keep them moist. The main reason most cuttings don’t work is that they lose water through transpiration. I did really well, but I lost some cuttings. At some point, you will also lose some cuttings.
- After about two weeks, give the cuttings a light tug to see if they are still alive. If there is resistance carefully check for roots.
- You can move the new plants into pots with good potting soil if the cuttings have roots. If the cuttings are still healthy and there are no roots, put them back in the medium and wait another week.
Leaf and branch tips on a plant grow from nodes, and the space between the nodes is called the internode. Many plants will only grow roots at that node, so if you want to take cuttings from those plants, you need to cut them just below the node. For Russian sage, you don’t need to cut below the node because roots will grow all along the stem. The cutting in the above picture has about 4 nodes along the stem. If you cut Russian sage, I suggest making a cut like the one in the picture, with three to four nodes.

How to Propagate Russian Sage through Cuttings
FAQ
Can you root Russian sage cuttings in water?
Will Russian sage spread?
Can you divide Russian sage?
How do you propagate Russian sage?
To propagate Russian sage from cuttings, choose a healthy, mature plant and take several cuttings that are each about four inches long, using a clean pair of pruning shears. Make your cuts just above a leaf node. Strip off all of the leaves except for a few at the tip of each cutting. Remove any buds or flowers.
Can Russian sage grow from cuttings?
Rooting Russian sage from cuttings. An example of good root growth from a cutting. Internode: The new roots come out from the sides of the stem and not just the cut end which means it will produce internodal root. Here is summary of the steps to take for successful Russian sage propagation:
How do you root a Russian sage cutting?
Treat the cut end of the Russian sage cutting in rooting hormone (not absolutely necessary as Russian sage will root without additional rooting hormone). Place your cutting carefully in sand or other rooting medium. Use a pencil to dib holes in the sand to help prevent breakage of the soft stems. (It’s really frustrating when you damage a cutting!)
When can I Plant Russian sage seeds?
You may sow Russian sage seed at any time of the year, as long as you opt to do it indoors. Starting seeds at least six to eight weeks before the last predicted frost in your area is recommended, if you hope to plant them out the following season.
- Mediterranean Pink Heath in Summer – Tips for Care and Maximizing Bloom - April 9, 2026
- How to Grow Gorgeous Climbing Roses on a Wooden Fence - March 24, 2026
- Avoid These Plants When Companion Planting with Oregano - March 24, 2026