
Outdoor spaces can be dramatically transformed by incorporating fake rocks and boulders. These faux rocks provide a natural, rugged look while being much more affordable and lightweight compared to real stone. With some simple materials and techniques, you can craft realistic-looking fake rocks to enhance your landscaping on a budget.
This guide will walk through the entire process of making and installing fake rocks using common household items. You’ll learn how to:
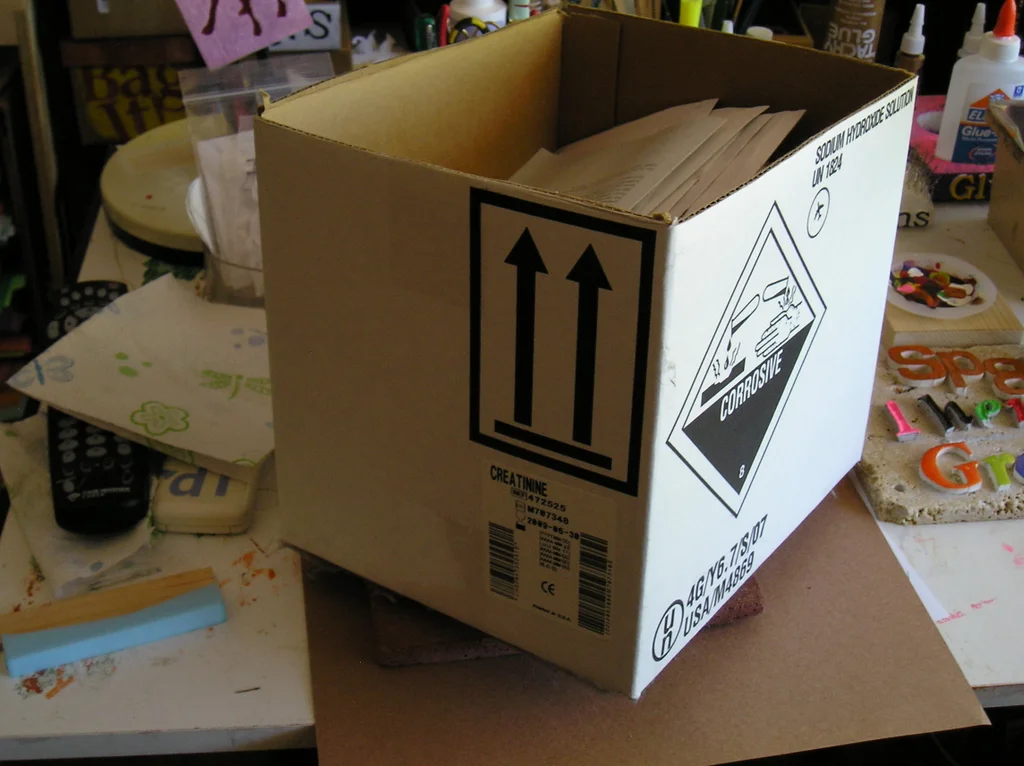
- Choose the right base materials like cardboard or styrofoam to shape your rocks
- Build a sturdy supporting frame out of wire mesh
- Mix up a durable mortar coating with sand and concrete
- Sculpt realistic textures like cracks and indentations
- Paint and finish your faux boulders for an authentic look
- Move and securely place your rocks in your yard
With some creativity and elbow grease, you can customize faux rocks in any size and shape. Groupings of different sized rocks can make a dramatic statement in your garden or around a water feature. This guide will provide all the tips you need to blend your DIY creations into your landscape for a natural feel. By the end, you’ll be able to craft realistic fake rocks to decorate your outdoor space on a budget!
Choosing the Right Materials
The best part about crafting faux rocks is that you can make them out of common items you probably have lying around the house already! Let’s go through the key materials you’ll need to shape, texture, and reinforce your DIY boulders.
Selecting a Base Frame
The base frame acts as the inner supportive structure for your rock, so it needs to be sturdy. Here are some options:
- Cardboard – Sturdy shipping boxes or appliance boxes work great. You can cut and stack pieces to create cool shapes.
- Styrofoam – Those big blocks for packaging work perfectly. Bonus – they’re super easy to carve and shape!
- Crumpled newspaper – Just wad up pages into balls. It’s a free option if you’re on a budget!
- Plywood – For a really solid base, use 1/2 to 1 inch plywood. Make sure to waterproof it first.
Pro Tip: Mix and match materials for the base if you want! Maybe combine cardboard with styrofoam or wood pieces for extra stability. Get creative with shapes and textures!
Outer Layer Options
Once your base frame is built, you’ll need a durable outer shell. What are our choices here?
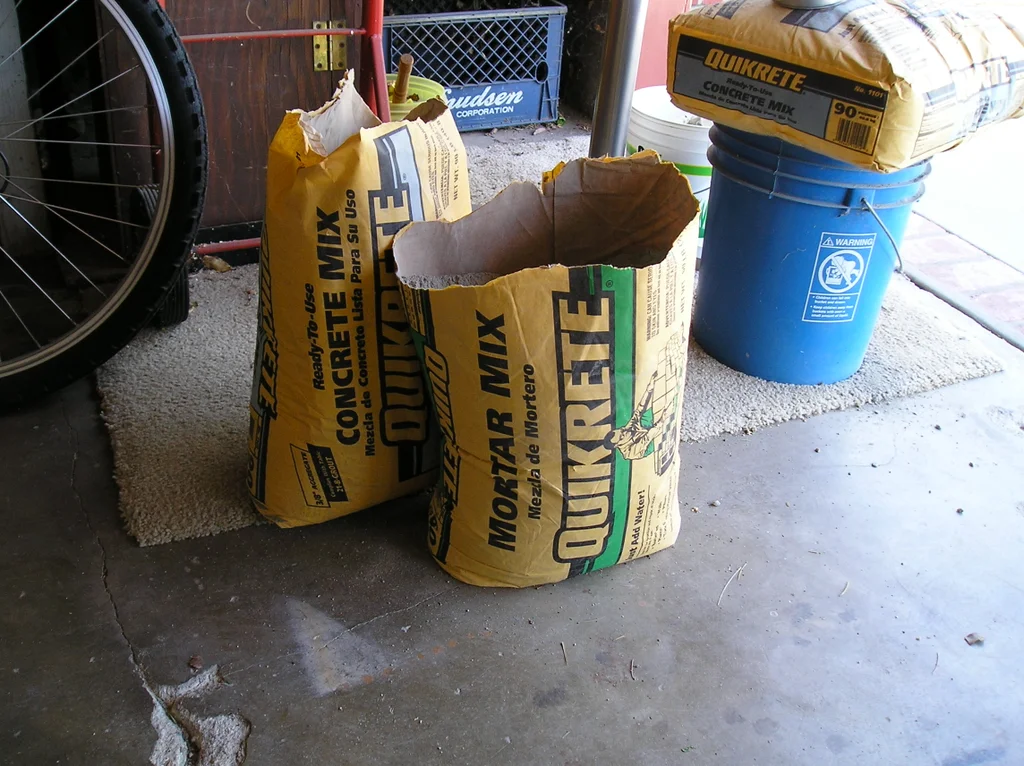
- Concrete – This makes the strongest and most realistic finish. You can find concrete mix at any hardware store.
- Paper mache – For lightweight indoor rocks, use paper mache over cardboard. Just flour and water!
- Plaster – Another good choice for indoor use. Mix plaster of Paris and water.
Mesh Reinforcement
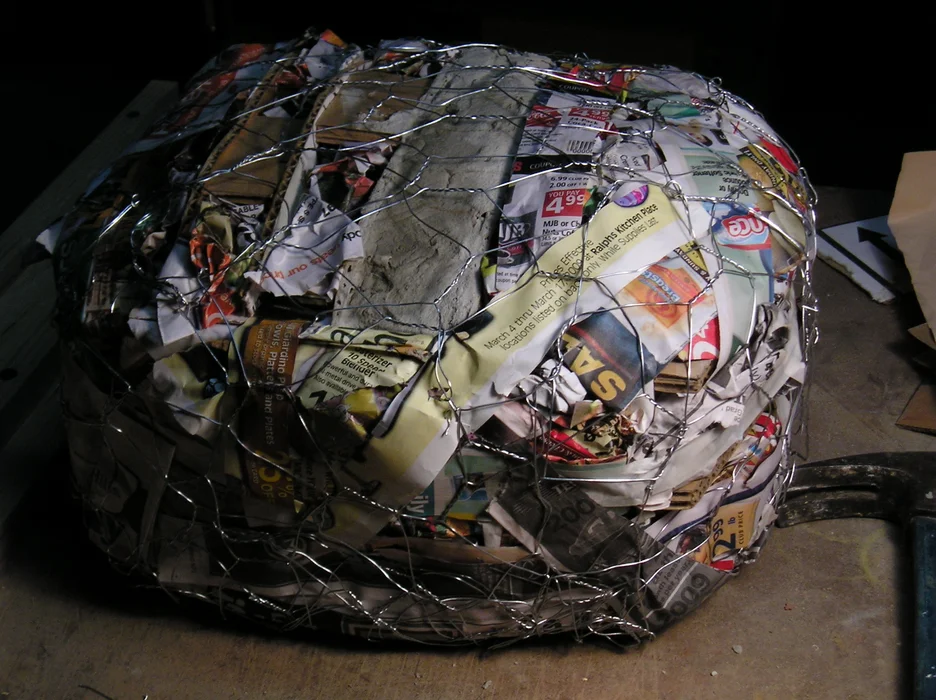
Now to give our rocks some strength and structure. Wrap your base with:
- Chicken wire – Sturdy yet flexible. The small grid pattern adheres well.
- Hardware cloth – A rigid, welded wire mesh. Also called wire lath.
Use twist ties to really secure the mesh to your base before applying the outer layer.
Mortar Ingredients
If using concrete, you’ll need to mix up a mortar blend:
- Sand – Go for coarse builder’s sand without fine particles.
- Cement – Portland cement provides durability. Mix 3 parts sand to 1 part cement.
- Peat moss – Optional. Replaces some sand for a more porous rock texture.
That covers the essential materials! Ready to start building? Let’s shape up some realistic looking faux rocks.
Building the Frame and Base
Now for the fun part – shaping our faux boulders! Let’s construct a sturdy base and frame to build upon.
Picking a Base Material
What will you use at the core? Depending on the size and weight you want, choose:
- Cardboard – Best for small to medium rocks. Sturdy shipping boxes work great.
- Styrofoam – Super lightweight. Carve with a hot knife for smooth curves.
- Crumpled newspaper – Crinkle up sheets into balls to form free shapes.
- Plywood – Provides the most support. 1/2 to 1 inch thickness is ideal.
Pro Tip: Recycle materials when you can – it’s better for the planet and your wallet!
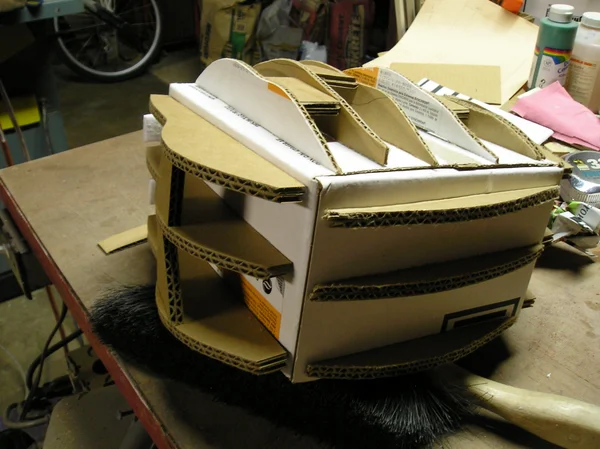
Shaping the Base
Time to cut our base into an organic rock form. A few tips:
- Use a serrated knife on foam, a handsaw on wood.
- Stack layered cardboard pieces for height.
- Don’t worry about perfection – rocks have uneven lumps and angles.
- Glue pieces together if needed for stability.
Creating Natural Indentations
Now to refine our shape. Make it more rock-like by:
- Bending the edges to smooth sharp corners.
- Pushing in areas to form crevices and dips.
- Gently punching the surface to create pockmarks and holes.
- Pressing small rocks into the base to leave imprints.
Adding Wire Mesh
Lastly, reinforce your form with a metal mesh layer. This strengthens the rock and gives the outer layer something to adhere to.
- Chicken wire is flexible to form around curves.
- Hardware cloth is rigid for a super sturdy rock.
Secure with twist ties or wire. Our foundational structure is complete! Ready for the finishing touches?
Creating Realistic Texture and Finish
Now for the fun part – adding realistic textures and finishing touches to bring our faux rocks to life! Let’s get creative with materials to give our DIY creations an authentic, natural look.
Mixing Mortar or Mache
First, whip up a durable outer coating mixture:
- For concrete, blend sand, cement, and water into a thick mortar.
- For lightweight paper mache, mix flour and water into a sticky paste.
Pro Tip: Add acrylic bonding agent or peat moss to the concrete for extra strength and porous texture!
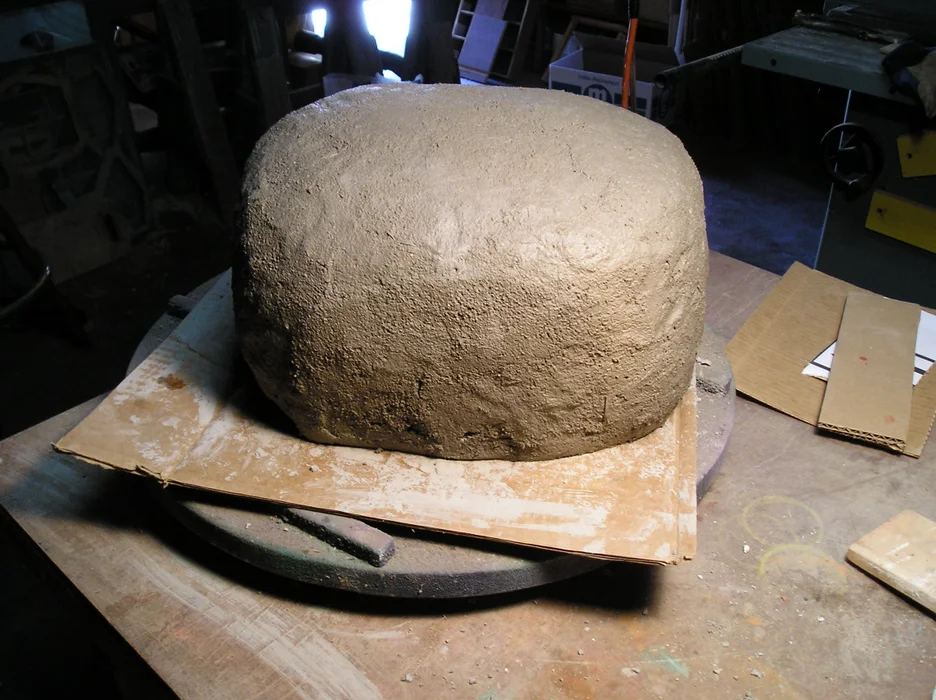
Applying the Outer Layer
Time to get messy! Use a trowel to spread on your outer coating of mortar or mache.
- Apply 1-2 inches thick all over the rock’s frame.
- Start at the base and work upwards to avoid drips.
- Cover the bottom too if the rock will be freestanding.
Sculpting the Texture
Here’s the fun part – sculpting cracks, ridges and indentations for a natural look:
- Use a trowel to etch lines and crevices.
- Press in seashells, sticks, or other objects to leave imprints.
- Stipple on texture with crumpled foil, sponges, or scour pads.
- Wrap plastic bags around your hands to create smoother parts.
Paints and Finishes
Lastly, finish it off with some paint for extra realism:
- Spray paint coats of gray, brown, black, and green work well.
- Dry brush tan paint over ridges and edges.
- Use watered down black or brown acrylic in crevices for depth.
- Seal outdoor rocks with clear waterproofing spray.
Customizing Your Faux Rocks
The fun doesn’t have to stop once your basic faux rock is created! There are endless ways to make your rocks unique with custom touches.
Incorporating Found Objects
For one-of-a-kind rocks, press items into the wet concrete:
- Seashells, glass, beads, or pebbles create an imprint.
- Ferns, leaves, or sticks make lovely organic textures.
- Wax paper or burlap give a patterned finish when removed.
Casting Textures
To recreate natural rock textures:
- Press actual rocks into the concrete to clone their finish.
- Use rubber molds for detailed imprints.
- Try broken tile, tree bark, corrugated metal, etc.
Colorizing Techniques
Get creative with stains and paints:
- Mix concrete tints into the mortar for natural rock hues.
- Dry-brush lighter paint over edges and ridges.
- Sponge on mottled paint effects with darker and lighter shades.
- Mist with spray bottles for a mica-flecked effect.
Carving and Engraving
Add graphics after the concrete fully cures:
- Use a rotary tool or chisel to carve shallow designs.
- Stencil and paint on patterns like fossils or leaves.
- Incise names, dates, or art into the surface.
The possibilities are endless when crafting custom faux rocks – let your creativity run wild!
Installing Faux Rocks for Maximum Impact
Our DIY faux boulders are ready to enhance our landscapes! Let’s strategically place them for a beautiful, natural look.
Moving and Transporting
Unlike real stone, these rocks are portable! Some tips:
- Recruit helpers for large rocks – they’re awkwardly shaped.
- Bring along wood planks to slide them over soil or grass.
- Use furniture sliders under smaller rocks to move them yourself.
- Set rocks on a tarp or old blanket to drag without scratching.
Digging Holes for Stability
Bury part of your rock for stability and a seamless look:
- Tip rock on side and trace the bottom edge with a stick.
- Dig along the line about 2 inches deep.
- Make any base adjustments needed to improve contact.
Blending With the Landscape
To blend your faux boulders into the surroundings:
- Partially sink edges into soil or mulch.
- Tuck small real rocks around the base.
- Overlap grouped rocks slightly for a cohesive look.
- Add moss or plants in crevices for an aged appearance.
Creative Applications
Beyond garden accents, how else can you use faux rocks?
- Hide pool equipment or utility boxes.
- Make a mini rock wall or retaining wall.
- Accent a pathway, waterfall, or flower bed.
- Cast stepped stones for an oriental zen garden.
- Create an artificial rock cave or shelter for kids.
Let your imagination run wild! The possibilities are endless when you craft customizable faux rocks.
Making Fake Rocks with Concrete
Gather the Materials
You’ll need a sturdy base material like styrofoam, cardboard or crumpled newspaper, chicken wire or hardware cloth, zip ties, sand, Portland cement, water, rubber gloves, a mixing tool like a trowel or concrete mixer, texture tools like a brush, sponge, or trowel.
Choose a Base and Shape the Rock
Cut styrofoam, cardboard, or crumpled newspaper into the desired rock shape using a serrated knife or wire cutters. Stack and glue layers for large rocks. Refine the shape by sanding rough edges. The base only needs to be an approximate shape, as you’ll add texture and refine the details later.
Add Structure with Chicken Wire
Wrap chicken wire or hardware cloth around the base shape to provide support for the cement layer. Use zip ties to secure it tightly to the base. Bend and shape the wire to create natural looking crevices and indentations. The wire frame underneath will strengthen the final rock.
Mix the Concrete
Combine 3 parts sand to 1 part Portland cement. Add water while mixing until a thick, moldable consistency is achieved, similar to cookie dough. For larger amounts, use a concrete mixer. Mix thoroughly so clumps don’t weaken the rock. The ideal concrete texture clings easily to the wire frame without being runny.
Apply Concrete to the Wire Frame
Wearing gloves, use a trowel to press 2-3 inches of concrete mix along the frame, starting at the top and pushing down the sides. Ensure all wire is thoroughly covered to prevent weak points. Leave the bottom uncovered if the rock will sit directly on the ground.
Texture the Wet Concrete
Add contours and patterns to mimic real rock textures. Press crumpled plastic wrap into the wet concrete to make wrinkled indentations. Use a real rock to make imprints in the concrete before it sets. Drag trowels through it to create grooves. Scrub with a stiff brush in a circular motion.
Let the Concrete Cure
Allow the concrete to cure for 2-3 days. Mist occasionally with water to slow drying. Avoid direct sunlight, which can cause cracking. The rock will lighten as it cures.
Paint and Finish the Rock
Once cured, use gray and brown acrylic paints to add natural color variations. Dry brushing and sponging techniques work well. Painting is optional, but helps make large rocks look more realistic. Disguise the bottom edge by digging a hole and partially burying in the ground. Surround with plants and smaller rocks to blend with the landscaping.
Creating Lightweight Paper Mache Rocks
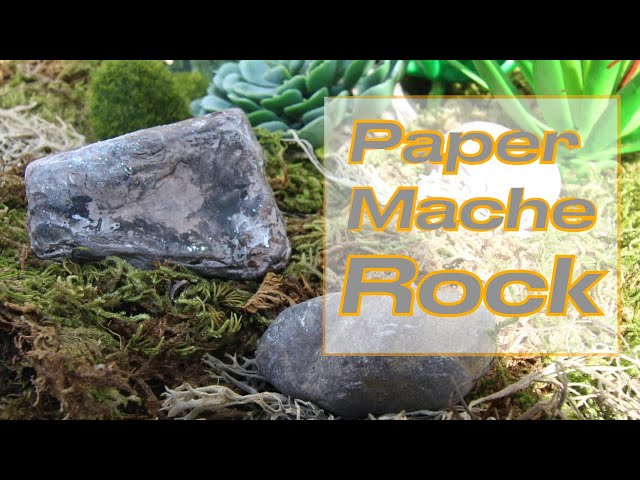
Choose a Lightweight Base
Inflated balloons or plastic containers like empty milk jugs can act as a lightweight base to sculpt paper mache over. Foam blocks and crushed cardboard also work well. Wrap with plastic sheeting first if using cardboard.
Create the Paper Mache Paste
Make paper mache paste by whisking together 1 part flour, 1 part water, and a tablespoon of salt in a saucepan. Heat on medium, whisking constantly until thickened to a glue-like texture. Allow to cool fully before using. For extra strength, substitute white glue for half the water. Adding a tablespoon of oil helps keep the paste from drying out between layers.
Apply Paper Strips to the Form
Tear newspaper, paper towels, or brown wrapping paper into 1 inch wide strips. Dip the strips into the paste, removing any excess. Apply the wet strips to the base form, smoothing out wrinkles and air bubbles. Wrap entire form with 2-3 layers of paper strips. Apply subsequent layers in alternating directions for added strength.
Shape the Rock
Once the paper mache has fully dried, use scissors and sandpaper to shape your rock, refining curves and cracks as needed. Remove the base form through a hole cut in the bottom or by peeling layers away.
Strengthen and Seal the Paper Mache
Puncture holes throughout the interior to reduce weight. Spray foam sealant into holes and cracks for added durability. Apply a thin layer of concrete bonding agent, found at hardware stores, to harden and weatherproof the exterior. Allow to dry fully. The bonding agent soaks in and leaves a stonelike finish. Apply another coat if needed.
Paint the Rocks
Once sealing is complete, paint your faux boulders with acrylic paints. Use various gray and brown shades to mimic real rock colors and textures. Dry brushing adds depth and definition.
Creating Fake Rocks with Styrofoam
Choose Appropriately Shaped Foam
Examine landscape gravel bags for oddly shaped pieces of rigid foam filler that can be upcycled into fake rocks. Alternatively, cut shapes out of foam blocks using a serrated knife or hot wire cutter. Stack and glue layers as needed.
Shape and Texture the Foam
Refine the shape by sculpting with a knife or sanding. Cut deep grooves and indentations for a natural look. Rocks often have rough, uneven textures. Create dents by pressing randomly with tools or actual rocks. Drag tools like screwdrivers and forks across the foam to imitate ridges.
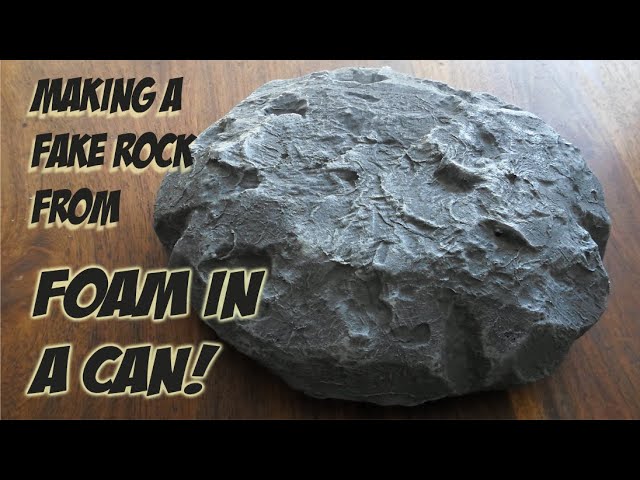
Seal the Surface
Apply watered-down white glue over the foam surface. This helps seal and strengthen it while adding subtle texture. Allow to fully dry.
Add Color
Paint the foam rocks with acrylic craft paint in earthy tones like gray, brown, tan, rust and black. Dry brushing adds depth and shadow effects. Using various colors creates realism. Mix in touches of green and blue for Lichen and mineral deposits. Spray with sealant so they’re safe for outdoor use.
Add Finishing Touches
Glue pebbles, moss or mulch across the surface for additional texture and realism. Apply patches of craft sand for sandy desert rocks. Dab with craft glue and sprinkle on coffee grounds or dirt before drying for a weathered look. Use hot glue to affix details like smaller rocks or twigs. Plastic plants around the base help integrate foam rocks into the garden landscape. Partially burying them makes them look naturally embedded.
Molding Hollow Fake Rocks from Concrete
Build a Disposable Cardboard Mold
Create molds for hollow fake rocks using cardboard boxes, tubes and containers in desired shapes. Cut and tape cardboard pieces into curved freeform shapes. Crisscrossing corrugated cardboard scraps or rolled newspaper help create stone textures. Wax coated cardboard prevents moisture damage when casting concrete. Seal seams with glue or duct tape.
Insert a PVC Pipe for Structural Support
Insert a PVC pipe into the mold before casting concrete to add internal structural support while keeping the rock lightweight. Cap the ends so concrete doesn’t flow inside the pipe.
Cast the Concrete
Grease the inside of the cardboard mold with cooking oil or silicone spray. Mix concrete to a pourable consistency and pour slowly into the mold. Tap lightly to release air bubbles. Insert rebar, rods or mesh if needed for large rocks. Allow the concrete to fully cure for 1-2 weeks before removing the mold.
Remove the Disposable Mold
Once cured, use scissors or utility knives to cut away the cardboard mold from the cured concrete rock. Scrape off any remaining cardboard.
Finish the Concrete Rock
Allow concrete to cure fully before painting or sealing, which can trap moisture inside. Use a wire brush to smooth rough edges and create weathered character. Apply various gray, brown and black acrylic paints. Dry brush on highlights and textures. Moss, lichen and vines glued into crevices adds realism. Use exterior acrylic sealant to protect the finish. Bury edges in soil and surround with plants.
DIY Landscape Boulders | How to make fake rocks
FAQ
What materials can I use to make realistic fake rocks?
Concrete, foam, resin, and paper mache are all great materials for crafting fake rocks that look convincingly real. Concrete rocks offer durability for outdoor use but are very heavy. Lightweight foam and paper mache are easier to work with and create large rocks without excessive weight. Resin makes detailed hollow castings, but is more expensive.
What can I use as a base for shaping faux rocks?
The base shape underneath provides the form that supports the outer rock layers. Sturdy materials like styrofoam, cardboard, plastic bottles, or aluminum foil work well for shaping convincing rock contours. Avoid weak materials like paper or thin sheets of plastic that won’t properly support heavy coverings.
How long does it take for concrete or resin to cure when making fake rocks?
Curing times vary based on temperature, humidity, the specific formula, and thickness. In general, allow concrete rocks 1-2 weeks to fully cure before painting or moving them. Resin cures more quickly, but leave cast resin rocks overnight for a thorough cure before removing molds. Check manufacturer instructions for recommended cure times.
What can I use to add natural-looking texture and colors to fake rocks?
Add textures like ridges, cracks and pores with irregular dabbing motions using sponges, crumpled paper, or other tools while concrete or resin is still wet. Use gray, brown, black, and green acrylic paints to mimic natural rock colors. Dry brushing creates streaks and highlights. Dirt or sand sprinkled on wet paint also helps. Add moss, lichen or vines for realistic details.
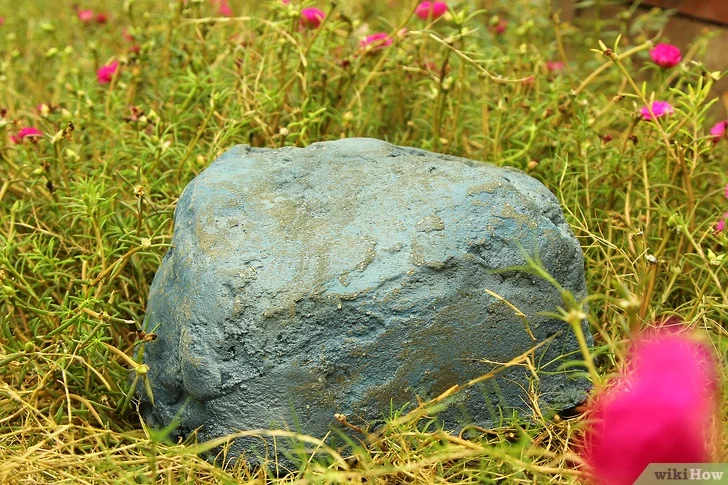
How can I make fake rocks look real when placing them in my yard?
Bury part of the edges in the ground so rocks appear partially embedded, instead of just sitting on top of the grass. Position rocks of varying sizes and shapes together in organic-looking, asymmetrical groupings. Use small gravel, mulch, or plants around the base to blend with surroundings. Partial shade helps disguise any color mismatch. Spotlight them with landscape lighting at night for added wow factor.
Troubleshooting Common Issues
Even experienced faux rock crafters run into problems sometimes. Here are solutions to some of the most common issues when making fake rocks:
Preventing Cracking
If your concrete rock develops cracks as it cures:
- Add more acrylic bonding agent to the concrete mix.
- Make sure to keep the rock damp while curing, but not soaking wet.
- Avoid sudden temperature changes which can cause cracks.
Achieving Stability
If your rock feels too lightweight or wobbly:
- Opt for a plywood or wood base for maximum sturdiness.
- Use thicker 1/2″ hardware cloth instead of chicken wire.
- Partially bury the rock to anchor it into the ground.
Stopping Base Materials From Showing
If you can see the styrofoam or cardboard base peeking through:
- Ensure you’ve applied 2-3 inches of mortar all over.
- Add extra mache strips over thin spots to build it up.
- Use touch up paint in those areas.
Repairing Damage
For fixing chips, cracks, and worn spots:
- Clean and dampen the area, then patch with fresh mortar.
- Use cement grout, Bondo, or spackle for quick repairs.
- Spray paint and touch up paint to blend patches.
Take your time crafting the rocks, and they’ll give you years of enjoyment! Let me know if any other issues come up.
- How Fast Does Boston Ivy Grow? A Complete Growth Guide - June 9, 2026
- Gravel for Garden Beds: A Functional and Beautiful Option - June 9, 2026
- The Best Mulch for Raised Garden Beds – Pros, Cons, and Tips - June 9, 2026