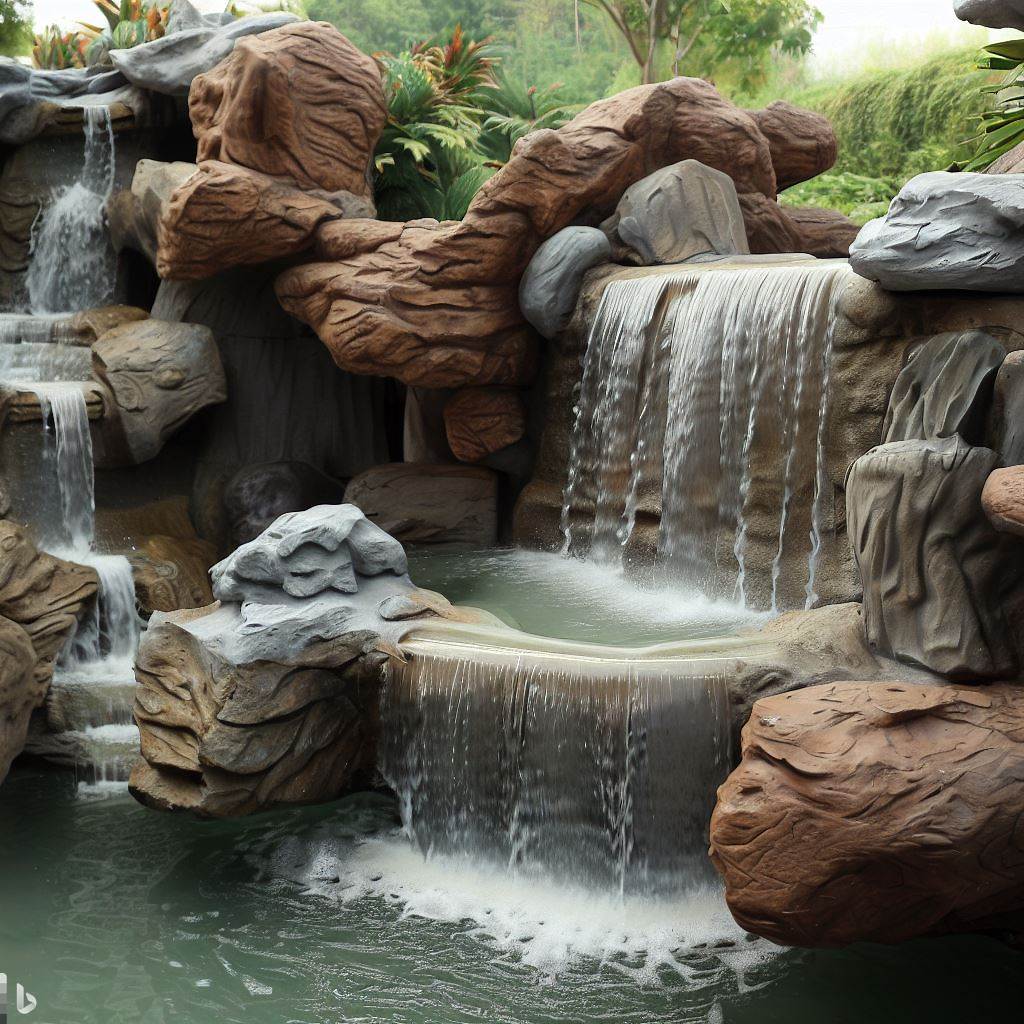
Waterfalls are a beautiful addition to any garden or backyard, but they can be expensive to install. One way to save money and get creative is to make your own artificial rocks for waterfalls. In this article, we will walk you through the steps to create stunning artificial rocks that will enhance the look of your waterfall.

Materials You Will Need
Before we start, let’s gather the materials you will need to create your own artificial rocks for waterfalls.
- Concrete mix
- Sand
- Water
- Gloves
- Trowel
- Paintbrush
- Acrylic paint (optional)
- Water-based clear sealer (optional)
- Rebar
- Wire mesh
- Chicken wire
- Plastic sheeting
- Shovel
- Level
- Tape measure
- Hammer
- Nails
Steps to Make Artificial Rocks for Waterfalls
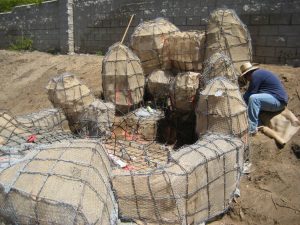
- Build a form for your rocks. You can use wood, plastic, or metal to build a form for your rocks. The form should be the desired shape and size of your rocks.
- Mix the concrete. Follow the instructions on the concrete mix package.
- Add sand to the concrete. The amount of sand you add will depend on the desired texture of your rocks. For a more porous rock, add more sand. For a smoother rock, add less sand.
- Add water to the concrete mixture. The amount of water you add will dependon the desired consistency of your concrete. The concrete should be thick enough to hold its shape, but not so thick that it is difficult to work with.
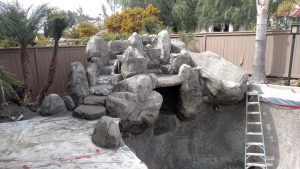
- Pour the concrete into the form. Use a trowel to smooth out the top of the concrete.
- Let the concrete dry completely. This may take several days.
- Remove the rocks from the form. Use a hammer and nails to break the form apart.
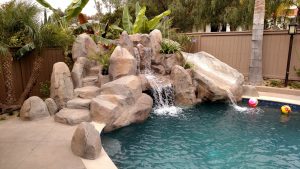
- Paint your rocks if desired. You can use acrylic paint to add color and texture to your rocks.
- Seal your rocks with a water-based clear sealer. This will help protect your rocks from the elements.
- Install your rocks in your waterfall. Use rebar, wire mesh, chicken wire, and plastic sheeting to secure your rocks in place.
- Add water to your waterfall. Turn on your pump and enjoy your new waterfall!
Additional Tips for Making Artificial Rocks for Waterfalls
- For a more realistic look, use different colors of concrete to create your rocks.
- You can also add small rocks, pebbles, or sand to the concrete mixture to create a more textured surface.
- If you want your rocks to look old and weathered, you can use a wire brush to scuff up the surface after the concrete has dried.
- You can also use a variety of different techniques to create different textures on your rocks. For example, you can use a sponge to create a bumpy texture, or use atrowel to create ridges.
- Make sure your rocks are the correct size and shape for your waterfall. You don’t want them to be too big or too small, and you don’t want them to be the wrong shape.
- Secure your rocks in place with rebar, wire mesh, chicken wire, and plastic sheeting. This will help prevent them from moving around or falling out of place.
- Add water to your waterfall and enjoy!
How to build an artificial stone waterfall from scratch
Conclusion
Creating your own artificial rocks for waterfalls can be a fun and creative DIY project that can save you money and add a unique touch to your garden or backyard. By following these steps and tips, you can create stunning and realistic rocks that will enhance the beauty of your waterfall. So, get your materials ready and start building your own artificial rocks for waterfalls today!
- How Fast Does Boston Ivy Grow? A Complete Growth Guide - June 9, 2026
- Gravel for Garden Beds: A Functional and Beautiful Option - June 9, 2026
- The Best Mulch for Raised Garden Beds – Pros, Cons, and Tips - June 9, 2026