For gardeners who love cooking with fresh herbs, homegrown sage is a must-have plant. Its aromatic, grayish-green leaves add wonderful flavor to dishes like stuffing, pork, chicken, and more. While you can certainly buy mature sage plants from a nursery, starting your own from seed is rewarding and cost-effective. However, sage seeds are known for taking a bit longer to germinate than some other common herbs. So exactly how long does sage seed germination take? Let’s find out.
Understanding Sage Seed Viability
The first key to achieving successful germination of sage seeds is ensuring you have viable fresh seeds to plant. Here are some tips
-
Purchase seeds from a reputable supplier to maximize freshness and germination rates.
-
Check the seed packet for a sell-by or expiration date and plant before that time.
-
Store leftover seeds properly in a cool, dark place in an airtight container.
-
Discard any seeds over 3 years old as germination rates decline with age
-
Conduct a simple home germination test by placing a few seeds between damp paper towels to check viability before planting.
Planting fresh, high-quality sage seeds gives you the best chance for prompt, uniform sprouting.
Understanding Optimal Soil Temperatures
Temperature plays a critical role in how quickly sage seeds germinate. Here’s what to know:
-
Minimum soil temperature 60°F
-
Optimal soil temperature: 68–77°F
-
Maximum soil temperature: 85°F
-
Germination inhibited below 50°F and stops below 40°F
The key takeaway is that sage seeds require warm soil to germinate well. Cool spring soil may delay or prevent germination. Use a soil thermometer to check your garden’s temperature before sowing.
Typical Germination Time Frames
Under ideal warm, moist conditions, here is the average sage seed germination time frame:
-
First sprouts appear: 14–21 days
-
50% germination rate: 21 days
-
90% germination rate: 28 days
-
100% germination rate: 35 days
However, factors like cold soil can lengthen the process. Be patient for up to 6 weeks before giving up on late sprouters.
Speeding Up Germination
If your sage seeds are a bit slow to get going, here are some tricks to accelerate germination:
-
Start seeds indoors at 70–75°F and transplant out after sprouting.
-
Use a heating mat or grow lights to warm the soil to 65–70°F.
-
Cover seeded flats with plastic wrap or domes to retain moisture and heat.
-
Use bottom heat below seeded flats to warm roots.
-
Gently press seeds into soil for better contact.
-
Mist seeds daily with warm water to maintain optimal moisture.
-
If sprouts are sparse, resow new seeds in gaps 2 weeks after initial planting.
Modifying conditions gives sluggish seeds the boost they need to sprout promptly.
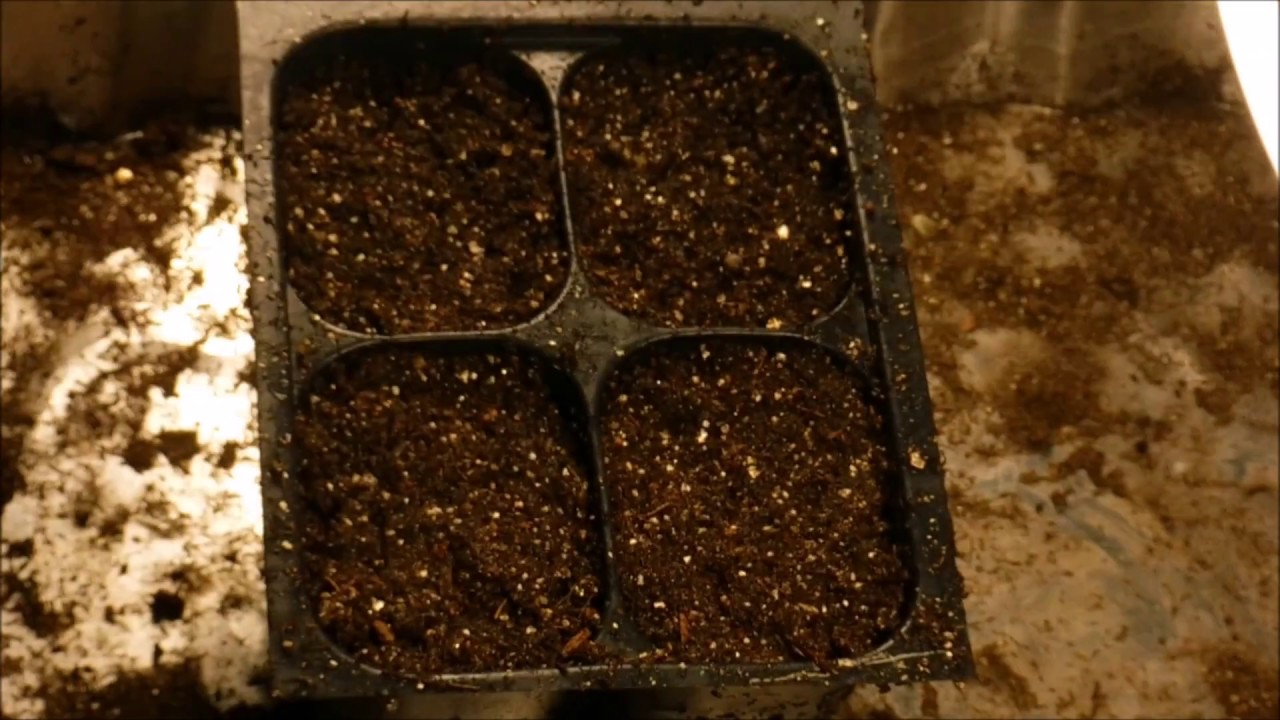
Step-By-Step Guide to Planting
Follow this straightforward process for planting sage seeds:
-
Fill starter flats or pots with seed starting mix. Moisten well and let drain.
-
Optionally, amend soil with a balanced organic fertilizer.
-
Sow seeds 1⁄4” deep in rows or cells, spacing 1–2” apart.
-
Gently press seeds into soil contact.
-
Mist soil surface and cover containers with plastic or domes.
-
Place in warm (65–75°F) spot with bright, indirect light.
-
Keep moist, not soaked, until sprouts emerge.
-
Uncover, thin, and transplant seedlings when 2–3 sets of true leaves appear.
With attentive care, your sage seedlings should be ready to move to the garden in 4–6 weeks!
Caring for Sage Seedlings
Once those first sprouts emerge, proper care is key:
-
Water frequently to keep soil consistently moist 1⁄2” down. Don’t oversaturate.
-
Apply a dilute, water-soluble fertilizer every 2–3 weeks.
-
Provide 14–16 hours of sunlight or bright grow lights daily.
-
Maintain temperatures between 65–75°F for optimal growth.
-
Gently brush leaves or use a fan to prevent fungal diseases.
-
Transplant to larger containers as roots fill pots. Harden off before going outside.
Meeting young sage plants’ needs ensures they grow into thriving, productive herbs.
Transplanting Outdoors
Here are some tips for a successful transition to the garden:
-
Harden off seedlings for 7–10 days by gradually increasing outdoor time.
-
Select a site with full sun (at least 6 hours daily) and fertile, well-drained soil.
-
Work compost or fertilizer into beds 2–3 weeks before transplanting.
-
Space plants 12–18” apart in rows or groups of 3–5.
-
Dig holes the width of the root ball and plant at the same depth as indoors.
-
Water transplants daily for the first week to help establish roots.
With proper hardening off and planting techniques, your sage will flourish.
Troubleshooting Slow or Spotty Germination
If your sage seeds are stubborn, here are some likely culprits and solutions:
-
Cold soil: Use warming techniques to maintain optimal temperatures.
-
Poor seed-soil contact: Repress lightly into soil after watering.
-
Lack of moisture: Mist soil daily and cover to retain humidity.
-
Too much moisture: Allow pots to dry out slightly between waterings.
-
Insufficient light: Move to the brightest spot or use grow lights to supplement.
-
Old seeds: Plant fresh seeds and store properly to maximize viability.
-
Diseases or pests: Remove affected seedlings immediately and treat organically.
Adjusting your approach can get lackluster seeds off to a vigorous start. With some patience and attentive care, your sage patch will be ready to season culinary creations in no time.
HarvestingFlavorful Homegrown Sage
Once established, sage is incredibly easy to harvest:
-
Pick leaves or stems as needed once plants are at least 6 inches tall.
-
Cut back by pruning stems above leaf sets to encourage bushy growth.
-
For the best flavor, harvest in the morning after dew dries but before the heat of midday.
-
Rinse briefly and pat dry with paper towels or a salad spinner.
-
Preserve harvested sage by drying, freezing, or storing in olive oil.
With its lovely aroma and robust flavor, homegrown sage adds taste and beauty to many recipes. Learning proper seed starting techniques helps ensure a bountiful harvest of this essential culinary herb.
Relishing the Rewards of Flavorful Homegrown Sage
Part of sage’s appeal is the wait and watch of monitoring those seeds until the first signs of life emerge. Then tending those sprouts until plump green leaves can season your homemade stuffing or chicken dish. With time, care and patience through the germination process, you’ll reap delightful benefits.
The next time your recipe calls for sage, bypass the produce aisle and head for your garden. Running your fingers through the silvery, fragrant foliage before plucking a few leaves infuses your food with so much more meaning and connection. Soon that wait for germination will become a distant memory, replaced by pride in growing and savoring your own fresh sage.
How to Use Climate Zones
First, find your climate zone using the map or descriptions below. The next step is to look at our sowing chart. It shows when to plant our most popular seeds in each climate zone.
Even though knowing your climate zone can help you plan your garden, there are many other things that could affect how your plants grow, such as weather that isn’t typical for the area, the microclimate of your garden, and how you take care of your plants. You know your garden better than we do, so if you think a different climate zone would work better for it, feel free to use that as a guide.
Our climate zones cover a lot of land in Australia, so gardeners should think about what and when to plant in their own area as well. One example is that gardeners in cool coastal areas have longer growing seasons than gardeners in alpine areas, even though both are in our “Cool Temperate” climate zone. People who live in cool places should look at the “days to maturity” information for each variety and pick ones that will be ready in a short growing season (6–12 weeks).
- Includes: Darwin, Cairns, Townsville, Exmouth
- It rains most of the year in the summer, and the winters are dry and warm. Ranges across northern Australia from Exmouth (WA) to south of Townsville (Qld).
- Set as my climate My climate
- Includes: Alice Springs, Mildura, Albury-Wodonga, Shepparton, Wagga Wagga, Dubbo
- Summers are hot and dry, and winters can be warm or cool, depending on where you live. From the coast of Western Australia to Charleville (Qld), Tamworth (NSW), and Albury-Wodonga (NSW/Vic), this area is very big.
- Set as my climate My climate
- Brisbane, Bundaberg, Coffs Harbour, Hervey Bay, Mackay, Rockhampton, and the Sunshine Coast are all included.
- Warm humid summers with high summer rainfall and mild winters. Along the coast of Queensland and northern New South Wales, from north of Mackay to just south of Coffs Harbour
- Set as my climate My climate
- It includes Sydney, Perth, Adelaide, Newcastle, Toowoomba, Wollongong, Bunbury, and the Central Coast of NSW.
- Moderate humidity and reliable rainfall, with four distinct seasons. Covers the coast of NSW from north of Port Macquarie to south of Woollongong, as well as the coast of SA and the southeast coast of WA.
- Set as my climate My climate
- Includes: Melbourne, Canberra, Hobart, Launceston, Ballarat, Bendigo, Geelong, Mt Gambier
- It’s hot and dry in the summer and cold and dry in the winter, and there’s not much humidity. Some regions will experience frosts and snow. Australia’s southeast coast and the mountains in Victoria, New South Wales, and Tasmania are all part of this area.
- Set as my climate My climate
What if I can’t find my climate zone? If you can’t find your zone by looking at the map or the descriptions on this page, think of a place with a climate that is similar to yours and use that place’s zone as a guide.
But what if I live on the edge of two zones? If you live on the edge of two zones, you should read about both of them and choose the one that best describes your climate. If your garden has its own microclimate, you might be able to grow more plants for longer than people in your zone can. Lucky you!.
What is a microclimate? A microclimate is a small area where the weather is different from the rest of the area in terms of temperature or humidity. For instance, if you live in an area where frosts are common but your garden is protected by walls or big trees, it might not freeze. Also, if you live in a warm temperate zone but your garden is high up, your microclimate may be more like that of a cool temperate zone. Use this to help you figure out which zone applies to you.
Can I grow types that aren’t listed for my climate zone? Our climate zones and sowing chart will help you figure out what you can plant in your garden, but they’re just suggestions. We suggest that you begin by planting seeds that are native to your climate zone. After a few successful attempts, you can try varieties that grow in nearby zones and see how they do. After all, gardening is all about trying new things!
Grow Guide #2315 Family: Lamiaceae Binomial name: Salvia officinalis Life Cycle: Perennial
If you want to grow Sage (Salvia officinalis) at home, this How to Grow guide tells you everything you need to know.
Some species of sage, such as Clary sage (Salvia sclarea), are different species botanically to common sage. This guide is still relevant as these plants are grown in the same way as sage.
When to Sow Sage Seeds
Sage is a perennial plant that grows year round in most climates. Use the table below to identify the best time of year to sow sage seeds in your climate.
| JAN | FEB | MAR | APR | MAY | JUN | JUL | AUG | SEP | OCT | NOV | DEC |
|---|---|---|---|---|---|---|---|---|---|---|---|
| Cool | |||||||||||
| Temperate | |||||||||||
| Sub-Tropical | |||||||||||
| Tropical | |||||||||||
| Arid |
- Includes: Alice Springs, Mildura, Albury-Wodonga, Shepparton, Wagga Wagga, Dubbo
- Summers are hot and dry, and winters can be warm or cool, depending on where you live. From the coast of Western Australia to Charleville (Qld), Tamworth (NSW), and Albury-Wodonga (NSW/Vic), this area is very big.
- Includes: Darwin, Cairns, Townsville, Exmouth
- It rains most of the year in the summer, and the winters are dry and warm. Ranges across northern Australia from Exmouth (WA) to south of Townsville (Qld).
- Cities like Brisbane, Bundaberg, Coffs Harbour, Hervey Bay, Mackay, Rockhampton, and the Sunshine Coast are included.
- Warm humid summers with high summer rainfall and mild winters. Along the coast of Queensland and northern New South Wales, from north of Mackay to just south of Coffs Harbour
- It includes Sydney, Perth, Adelaide, Newcastle, Toowoomba, Wollongong, Bunbury, and the Central Coast of NSW.
- Moderate humidity and reliable rainfall, with four distinct seasons. Covers the coast of NSW from north of Port Macquarie to south of Woollongong, as well as the coast of SA and the southeast coast of WA.
- Includes: Melbourne, Canberra, Hobart, Launceston, Ballarat, Bendigo, Geelong, Mt Gambier
- It’s hot and dry in the summer and cold and dry in the winter, and there’s not much humidity. Some regions will experience frosts and snow. Australia’s southeast coast and the mountains in Victoria, New South Wales, and Tasmania are all part of this area.
Sage plants are perennial, meaning they live for several years. Choose a permanent position where plants can grow undisturbed by regular digging.
Sage plants are best grown in full sun. Choose a location that will receive at least 6 hours of full sun each day.
Sage plants need a very well drained soil. In most cases there is no need to enrich soil with manure or other fertilisers. Prepare soil by weeding it thoroughly and digging it over to loosen it. Keep the area free of weeds until planting. Learn more about preparing soil for planting here.
Sage plants can be grown in containers. If possible choose a variety that’s recommended for container growing. Make sure you use good potting mix and that the pot is big enough for the plants to grow into; for sage, you should have at least 10 liters. During the growing season, remember that plants that are grown in containers might need extra fertilizer to grow well.
Three Minute Garden Tips: Growing Sage Indoors from Seeds to Transplants: The Rusted Garden 2013
FAQ
Is sage hard to germinate?
How long does sage take to sprout from seed?
Does sage need heat to germinate?
Is sage easy to start from seed?
How long does it take a sage plant to germinate?
If you choose to start from seed, start them indoors 6 to 8 weeks before the last frost under a plant light. Sage seeds will germinate in about 3 weeks, after which you can transplant seedlings to your prepared soil. New plants can also be propagated from other cuttings or by layering.
How do you propagate sage from seed?
If starting sage from seed feels a bit overwhelming, you can easily propagate sage in either water or soil with a cutting. Snip a 4”-6” long cutting from a healthy, well-established sage plant. Remove all the leaves that will be below the water or soil and put the cutting in a jar of water or at least 2” deep into a damp seed-starting mix.
How do you grow a sage plant from a cutting?
Snip a 4”-6” long cutting from a healthy, well-established sage plant. Remove all the leaves that will be below the water or soil and put the cutting in a jar of water or at least 2” deep into a damp seed-starting mix. You may or may not want to dip the cutting in a rooting hormone first to help stimulate new root growth.
How do you harvest a sage plant?
To harvest your sage plant, snip sections of the stem 4-6 inches long, cutting off no more than one-third of the plant at a time. It’s important to leave plenty of healthy growth behind to feed the sage plant.
Can you grow sage from seed?
Growing sage from seed is very easy but requires a little patience. That’s because you need to start your seeds about 2 months before you want to plant outside to get a healthy transplant. The reason to start sage from seed is to take advantage of the large number of sage varieties available.
When should you plant Sage?
Plant sage after the ground temperature reaches 65°F – about 1 – 2 weeks before you have the last frost of the year. Should you grow from seeds? If you decide to grow your sage from seed, take note that it will likely take a couple years to fully mature.

Follow me on YouTube
- Pictures of Petunias in Containers: A Guide to Growing Gorgeous Flowers - April 9, 2026
- Is Spinach a Brassica Vegetable? - October 9, 2024
- 10 Vibrant Yellow Dahlia Varieties to Brighten Your Garden - October 9, 2024