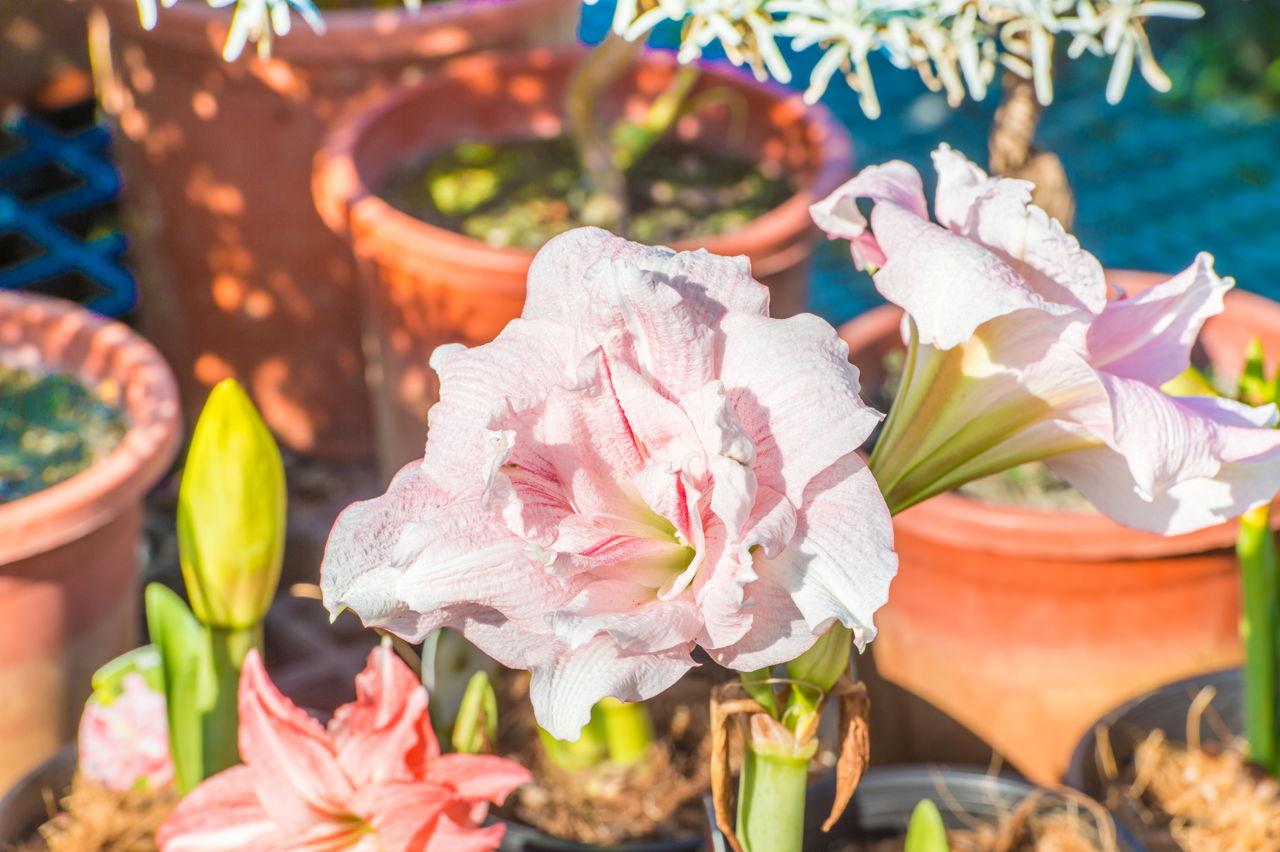
The pretty, lily-like amaryllis is a popular choice for a houseplant. It looks beautiful in a pot indoors and comes in a range of colors, such as white or pink, orange, salmon, red, and even two-toned. This bulb doesn’t need a very big pot, but you will have to move it to a bigger one when it gets bigger.
Amaryllis is a perennial bulb but isn’t very hardy. It will grow outdoors as a perennial only in zones 8 to 10. In cooler climates, this pretty flower is generally grown as a houseplant, with a forced winter blooming.
Think again if you thought your plant would only bloom once in the winter. Repotting amaryllis will give you many years of beautiful flowers.
The amaryllis is a popular bulb plant that produces large, showy flowers in an array of dazzling colors. Their long blooming stalks and enormous lily-like blooms make amaryllis ideal for providing winter interest indoors. With proper care, these bulbs can be grown as perennials and rebloom for many years. Learning how to transplant amaryllis bulbs to new containers will keep your plants healthy and flowering.
When to Repot Amaryllis Bulbs
The best time to repot amaryllis bulbs is after they have completed their annual growing cycle, This allows the plant to be moved while dormant, Follow this amaryllis transplant timeline
-
Plant bulbs in fall and allow flowering through winter.
-
In spring, allow the foliage to fully grow and produce energy for the bulb until it yellows.
-
Once all leaves have died back in late summer, the bulb is dormant and ready for repotting.
-
Repot bulbs in late summer or early fall just as new growth emerges
Transplanting amaryllis annually keeps bulbs actively growing and blooming year after year. Repotting in fall resets the plant to flower on schedule in winter.
Signs Your Amaryllis Needs Repotting
How do you know when to transplant an amaryllis bulb to a new container? Look for these signs it’s time to repot:
- Bulb is pushing up out of soil
- Roots are crowded and circling the pot
- Soil remains soggy between waterings
- Plant is blooming smaller or not at all
- Bulbs have multiplied, overcrowding the container
Providing amaryllis bulbs with the right size pot and fresh soil ensures excellent growth and flowering. Repotting in fall gives roots room to expand through winter dormancy.
Supplies Needed for Repotting Amaryllis
Transplanting amaryllis bulbs is a simple process. Have these supplies on hand before getting started:
- Amaryllis bulbs that are dormant
- Container slightly larger than the current pots
- Potting mix for bulbs and African violets
- Knife or spatula to loosen roots
- Tray for draining excess water
Choose containers with drainage holes that are 2-4 inches wider than the bulb. Use a well-draining potting soil formulated for bulbs.
Step-by-Step Amaryllis Repotting Process
Follow these steps to successfully transplant each amaryllis bulb:
-
Fill the new container about 1/3 full with fresh potting mix.
-
Use a knife to loosen soil and roots around the bulb’s edges.
-
Gently remove the amaryllis bulb from its old pot.
-
Shake or rinse off any old soil clinging to roots.
-
Trim away any dead or damaged roots with a knife or pruners.
-
Place the bulb in the new container, centering it on the soil.
-
Fill around the roots and bulb with more potting mix, leaving 1/3 above soil.
-
Water thoroughly until it drains from the container’s bottom.
-
Allow excess moisture to drain away from the freshly repotted bulb.
-
Return the amaryllis to its bright, warm growing area.
When repotting multiple amaryllis bulbs, repeat this process for each plant. Group 2-3 bulbs together in larger containers. Repotted bulbs may take a few weeks to resume active growth.
Caring for Amaryllis After Repotting
Give transplanted amaryllis bulbs special care immediately after repotting:
-
Allow bulbs to dry out slightly between waterings to prevent rot.
-
Keep potted bulbs in a warm area with temperatures around 70°F.
-
Don’t expose repotted bulbs to frost or freezing temperatures.
-
Apply a balanced fertilizer or bulb food every 2-3 weeks.
-
Cut off any flowering stalks that appear to direct energy into the bulb.
Proper transplanting techniques prevent shock and stimulate root regrowth. Adjusting your amaryllis care promotes rapid re-establishment for blooming.
Troubleshooting Issues After Repotting Amaryllis
Transplanting amaryllis bulbs is generally simple, but occasionally problems arise. Here are some common issues and solutions:
-
No new growth – Bulb may have insufficient roots to support leaves. Keep it warm and moist until roots form.
-
Slow leaf growth – Repotted bulb is still establishing roots. Reduce water and wait for growth.
-
Leaf tips browning – Plant is stressed. Improve light and humidity while avoiding overwatering.
-
Soft bulbs – Excess moisture is causing rot. Repot in dry soil and discard affected bulbs.
-
Pale stunted leaves – Plant lacks nutrients. Fertilize more often and increase sunlight exposure.
With careful transplanting and proper aftercare, your amaryllis bulbs will thrive and produce seasonal flowers. Repotting amaryllis annually provides fresh soil and room to grow.
Storing Dormant Bulbs After Flowering
Once amaryllis finishes flowering in spring and goes dormant, you can remove bulbs and store them dry:
-
Allow all foliage to die back naturally after blooming concludes.
-
Cut off the dead leaves about 2 inches above the bulb.
-
Carefully remove the dormant bulb from the pot.
-
Brush off any remaining soil and cut off dried roots.
-
Place bulbs in a cool, dry spot like a basement or closet.
Stored amaryllis bulbs don’t require any water or light. Keep them dormant for at least 2 months before repotting in late summer to bloom again.
Dividing Overgrown Amaryllis Clumps
Mature amaryllis bulbs multiply and form crowded clumps over time. You can divide them while repotting:
-
Carefully remove the entire clump from its pot.
-
Use your hands or a knife to gently pull bulbs apart.
-
Select bulbs that are large and healthy. Discard any that are small or rotted.
-
Repot the healthiest divided bulbs individually in their own containers.
Dividing amaryllis every 2-3 years maintains vigor. Discard unwanted bulbs or give extras to gardening friends!
Pairing Bulbs Together in One Pot
In addition to potting amaryllis bulbs singly, you can plant compatible varieties together:
-
Select 2-3 large bulbs that flower at the same time.
-
Choose a container 2-4 inches wider than each bulb.
-
Arrange bulbs with space between them before filling in soil.
-
Grow together as described for individual bulbs.
Creative pairings like red-white, orange-pink, or bicolor bulbs bloom beautifully when repotted jointly.
Creating Stunning Amaryllis Displays
With simple repotting, amaryllis bulbs can transform into living works of art:
-
Select a container like a bowl, urn, or basket for added flair.
-
Combine 3-5 coordinated bulbs for a robust display.
-
Arrange the planted bulbs attractively before filling in soil.
-
Keep watered in a visible spot indoors to enjoy their sculptural quality.
Groupings of amaryllis bulbs in decorative pots make stunning focal points when flowering in winter.
Preventing Problems When Repotting Amaryllis
Follow these tips to avoid issues when transplanting amaryllis bulbs:
-
Repot only when the plant is dormant, not when leaves are present.
-
Avoid overwatering newly potted bulbs, as wet soil causes rot.
-
Prevent bacterial or fungal infections by sterilizing tools with alcohol.
-
Throw out any bulbs or roots that appear damaged, rotten, or diseased.
-
Select a container that drains well and only pot in fresh soilless mix.
-
Don’t remove the papery outer shells from bulbs, as they protect from rot.
Carefully transplanting amaryllis at the right time reduces the chance of stresses or diseases.
Storing Unplanted Bulbs for Future Use
Have extra amaryllis bulbs you want to save for later? Here’s how to store them for months or years:
-
Allow unpotted bulbs to cure in a warm dry place for 2-3 weeks after arrival.
-
Remove any roots or debris but keep the protective skins intact.
-
Place cured bulbs in a paper bag filled with peat moss or vermiculite.
-
Store the bagged bulbs in a cool spot around 50°F away from sunlight and moisture.
-
Check monthly and discard any bulbs that are shriveled or show signs of rot.
-
Repot stored amaryllis bulbs whenever desired following the transplant process.
With proper care, amaryllis bulbs can be saved dormant for many seasons before being grown into flowering plants.
Repotting amaryllis bulbs annually or biannually ensures they expand gracefully. Carefully follow these steps for transplanting dormant bulbs into fresh containers. Proper aftercare will have your repotted amaryllis blooming again in no time.
How to Repot Amaryllis
When repotting amaryllis, consider the size carefully. This plant does best when its roots are crowded together, so only move it if the bulb is getting close to the edge of the pot. You can also have several bulbs in one container because they like to be root bound.
When to Repot an Amaryllis
Many people get an amaryllis in the winter, around the holidays, and sometimes as a gift. Unlike similar holiday plants, you don’t need to toss your amaryllis after it blooms. You can keep it and let it re-bloom next year. The post-bloom time may seem like the right time to repot it, but it’s not.
It will bloom next year if you keep it in the same pot and give it light water and fertilizer. The right time for amaryllis repotting is actually at the beginning of its growth cycle, in early fall.
Once the leaves have turned brown and crisp and new, green growth starts to show from the bulb, it’s time to move it to a new pot. Now you can move it to another pot if you need to.
HOW TO REPOT AMARYLLIS BULBS AT HOME EASILY. How to transplant Amaryllis bulb not damaging the roots
FAQ
When can you move amaryllis bulbs?
Can you save and replant an amaryllis bulb?
When should you separate amaryllis bulbs?
How do you transplant amaryllis bulbs?
Here are a few simple steps that will help when transplanting amaryllis. To transplant amaryllis bulbs, you need to define the area where you’re planting them first. Then, gently lift them from the ground using a garden fork or spade, making sure to shake the dirt off the bulbs. Gently rinse the bulbs and then replant them in the designated area.
Can I transplant Amaryllis from a pot?
Potted amaryllis needs to be treated the same way when preparing the bulbs for transplanting to a new pot. Once free of dirt, you can gently rinse the bulbs to see what you have. Now separate the clump into individual bulbs and remove any leaves or stalk that remains.
Can I replant Amaryllis?
Amaryllis thrives when root-bound, and you’ll need to transplant only in the event that the bulb is getting close to the edges of the existing container. If you’re confident it’s time for a replant, remove the bulb from the pot and trim the roots as needed to fit inside its new planter.
How do you put amaryllis bulbs in a pot?
Add Soil to the New Pot: Fill the bottom of the new pot with a few inches of your chosen potting mix. This will provide a foundation for the bulb. Position the Bulb: Place the amaryllis bulb in the center of the pot, making sure that it sits at the same depth as it was in the old pot.
- How Much Water Do Peonies Need? An Expert Guide to Proper Peony Irrigation - May 28, 2026
- How to Prepare Soil for Hydrangeas – A Comprehensive Guide - May 28, 2026
- How Often Should You Water Raised Garden Beds? - May 26, 2026