As a passionate gardener who’s always seeking ways to enhance my backyard oasis, painting my raised garden beds has been one of the most rewarding projects The burst of color completely transforms the beds while adding visual interest to the landscape.
In this guide, I’ll share my experiences and tips for painting raised beds to spruce up your garden. You’ll learn about planning the design choosing safe paints executing the painting process properly, and maintaining painted beds over time. Let’s dive in!
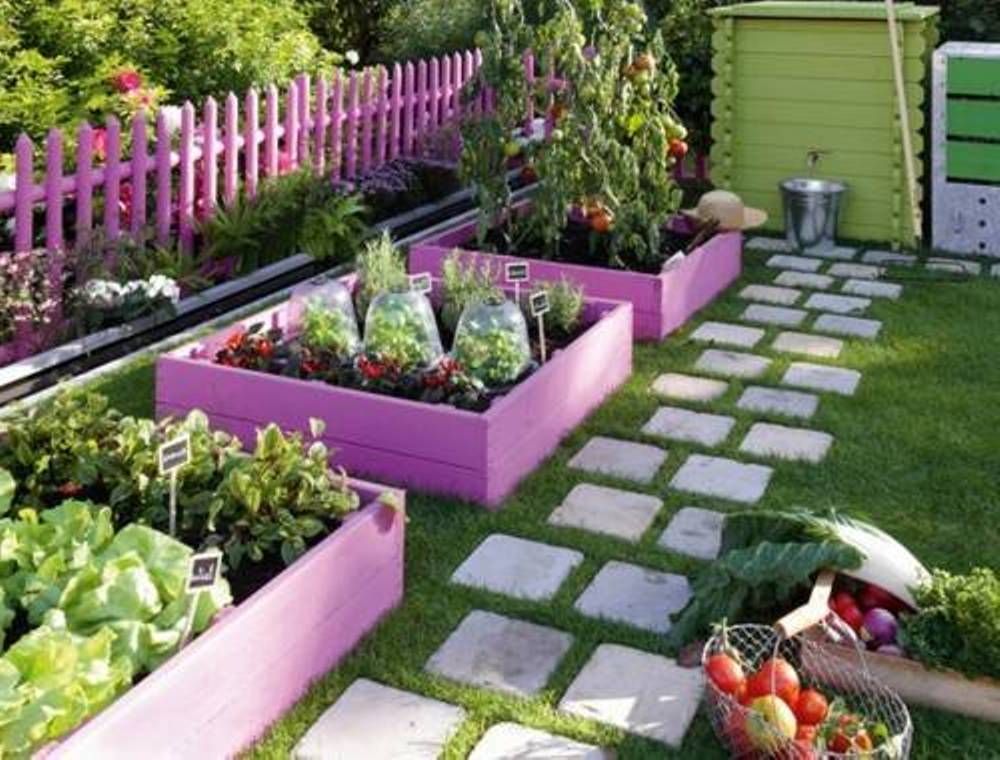
Benefits of Painting Raised Beds
Beyond just looking pretty, painting raised garden beds offers many advantages:
- Adds vibrant color that pops against plants and greenery
- Provides protection to wood, helping prevent rot and decay
- Allows for creativity and self-expression through different color schemes
- Helps raise soil temperature slightly, benefiting plants
- Elevates beds into intentional design elements versus just utilitarian growing boxes
- Extends life of wooden garden beds compared to leaving untreated
- Provides aesthetic appeal to beds year-round, even when empty in winter
- Serves as an enjoyable DIY weekend project for all skill levels
A coat of paint is truly transformative, It pulls together your whole garden palette
What Kind of Paint to Use on Raised Beds
What kind of paint you use on your raised beds is very important to keep the wood and plants safe:
- Use acrylic latex paint on the outside of your home that is made to last in the sun, rain, and humidity.
- Ensure any paint is non-toxic and lead-free to avoid contaminating your edible garden. Look for an ‘approved for gardening use’ seal.
- Opt for matte or satin finish rather than glossy. It will resist flaking and hold up better outdoors.
- Select mold and mildew-resistant paint to limit fungal or algal growth in damp garden conditions.
- Check that the paint is designed to adhere well to wood, concrete, or whichever material your beds are made from.
- Make sure paint is flexible to avoid cracking as materials expand and contract.
Investing in high-quality outdoor paint made for gardening is well worth it! Never use old paints of unknown origin.
Planning Your Raised Bed Paint Colors
The fun part is picking your color palette! Consider the following when planning:
- Existing elements – Choose colors to coordinate with or contrast your home, hardscapes, foliage, and flower colors.
- Focal points – Use bright colors on beds where you want to draw attention.
- Neutrals – For a calm look, stick to earth tones, whites, and grays.
- Complements – Pick a color scheme with opposite hues on the wheel, like blue and orange.
- Monochromatic – Vary shades of one color from soft to vivid.
- Tonal – Limit to a 2-3 adjacent cool or warm colors.
- Bold contrasts – Make beds pop with intense complementary colors.
- Multicolored – Paint each side a different bright color for fun cottagy look.
Take cues from the surroundings and existing garden to determine the best color scheme.
Preparing Raised Beds for Painting
Proper prep ensures your painted raised beds look great and stand the test of time:
- Clean surfaces thoroughly – Remove dirt, mildew, and loose flakes with brush, hose, and diluted bleach solution if needed.
- Lightly sand to rough up glossy plastic or metal beds so paint adheres better.
- Fill any cracks, holes, or damage with appropriate wood filler, caulk, or repair products.
- Remove hardware like trellises; tape over irrigation holes. Protect nearby plants and structures.
- If staining existing beds, use stripper to remove old finish first.
- Apply primer and let fully dry if painting over previously stained or painted beds.
Taking time to properly prep raised beds prevents the paint job from failing down the road.
How to Paint Raised Garden Beds
Follow these steps for a smooth painting process:
1. Outline Beds
Use masking tape to outline individual beds or bed sides if painting multiple colors.
2. Stir Paint
Thoroughly mix paint to evenly distribute pigment, especially at bottom of can.
3. Load Roller
Pour paint into roller pan. Dip roller into tray then roll against ridge to distribute evenly.
4. Cut In Edges
Use angled trim brush to cut in around edges and corners before rolling.
5. Roll On Paint
Apply in smooth, thin coats using overlapping “W” strokes, rolling same direction.
6. Inspect and Repeat
Let dry completely, then do second coat to cover any thin patches.
7. Remove Tape
Once fully dry, carefully remove all masking tape from edges.
8. Seal and Protect
Use clear sealer on painted beds annually to protect finish.
Take your time with each step for the most professional, long-lasting results.
Creative Painted Raised Garden Bed Ideas
If you need inspiration for painted garden beds, here are some fun concepts:
- Give each bed bold, contrasting colors for a cheerful mosaic effect.
- Paint the short and long bed sides different tones.
- Stencil or hand paint names, designs, or edging on beds.
- Color code beds to correspond to layout – red tomatoes, blue berries, yellow squash.
- Use pastels for a soft cottage garden look.
- Paint inside of beds and rim different colors.
- Alternate colored blocks on grid beds like an intricate quilt pattern.
- Use same color spectrum but graduating hues on beds – light to dark.
- Paint beds to match your home – white, brown, gray, blue, red and more.
Let your creativity run wild! Painted raised beds add so much visual appeal to any garden.
Maintaining Painted Raised Beds Over Time
Follow these tips to keep painted garden beds looking their best:
- Touch up any chips, scrapes or cracks as soon as you notice them to prevent moisture damage.
- Repaint beds every 2-3 years or whenever fading, cracking, peeling or mildew occurs.
- Remove hardware, soil, and mulch before repainting; tape irrigation, vents.
- Lightly sand raised beds before repainting to rough up surface for better adhesion.
- Use leaf blower to remove debris from beds before washing and repainting.
- Consider sealing painted beds annually to protect finish and limitations weathering damage.
Proper maintenance saves the work of completely redoing your paint job down the road. Be diligent!
Key Takeaways on Painting Raised Garden Beds
Painting raised beds in vibrant colors instantly elevates your garden while protecting the materials. Carefully choose non-toxic exterior paint in a color scheme that enhances your landscape. Prep beds thoroughly before applying two coats with proper technique for the best coverage. Maintain painted beds by touching up scrapes quickly, washing periodically, and repainting every few years. The effort pays off for beds that look fantastic year after year!
Staining/Painting My Raised Beds! What an Adventure!
FAQ
Should you paint a raised garden bed?
How to paint a metal raised garden bed?
What is the best color for a garden bed?
What to coat raised garden beds with?
- How Fast Does Boston Ivy Grow? A Complete Growth Guide - June 9, 2026
- Gravel for Garden Beds: A Functional and Beautiful Option - June 9, 2026
- The Best Mulch for Raised Garden Beds – Pros, Cons, and Tips - June 9, 2026