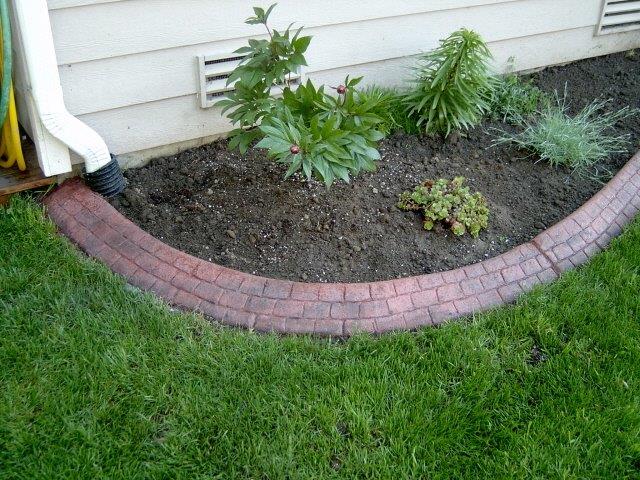
An artfully arranged band of bricks handsomely defines the boundary between grass and garden. If you put the bricks down flush with the ground, they can also be used as a mowing guide. You can run the wheels of a push mower right on top of the border edging and not have to use a string trimmer at all.
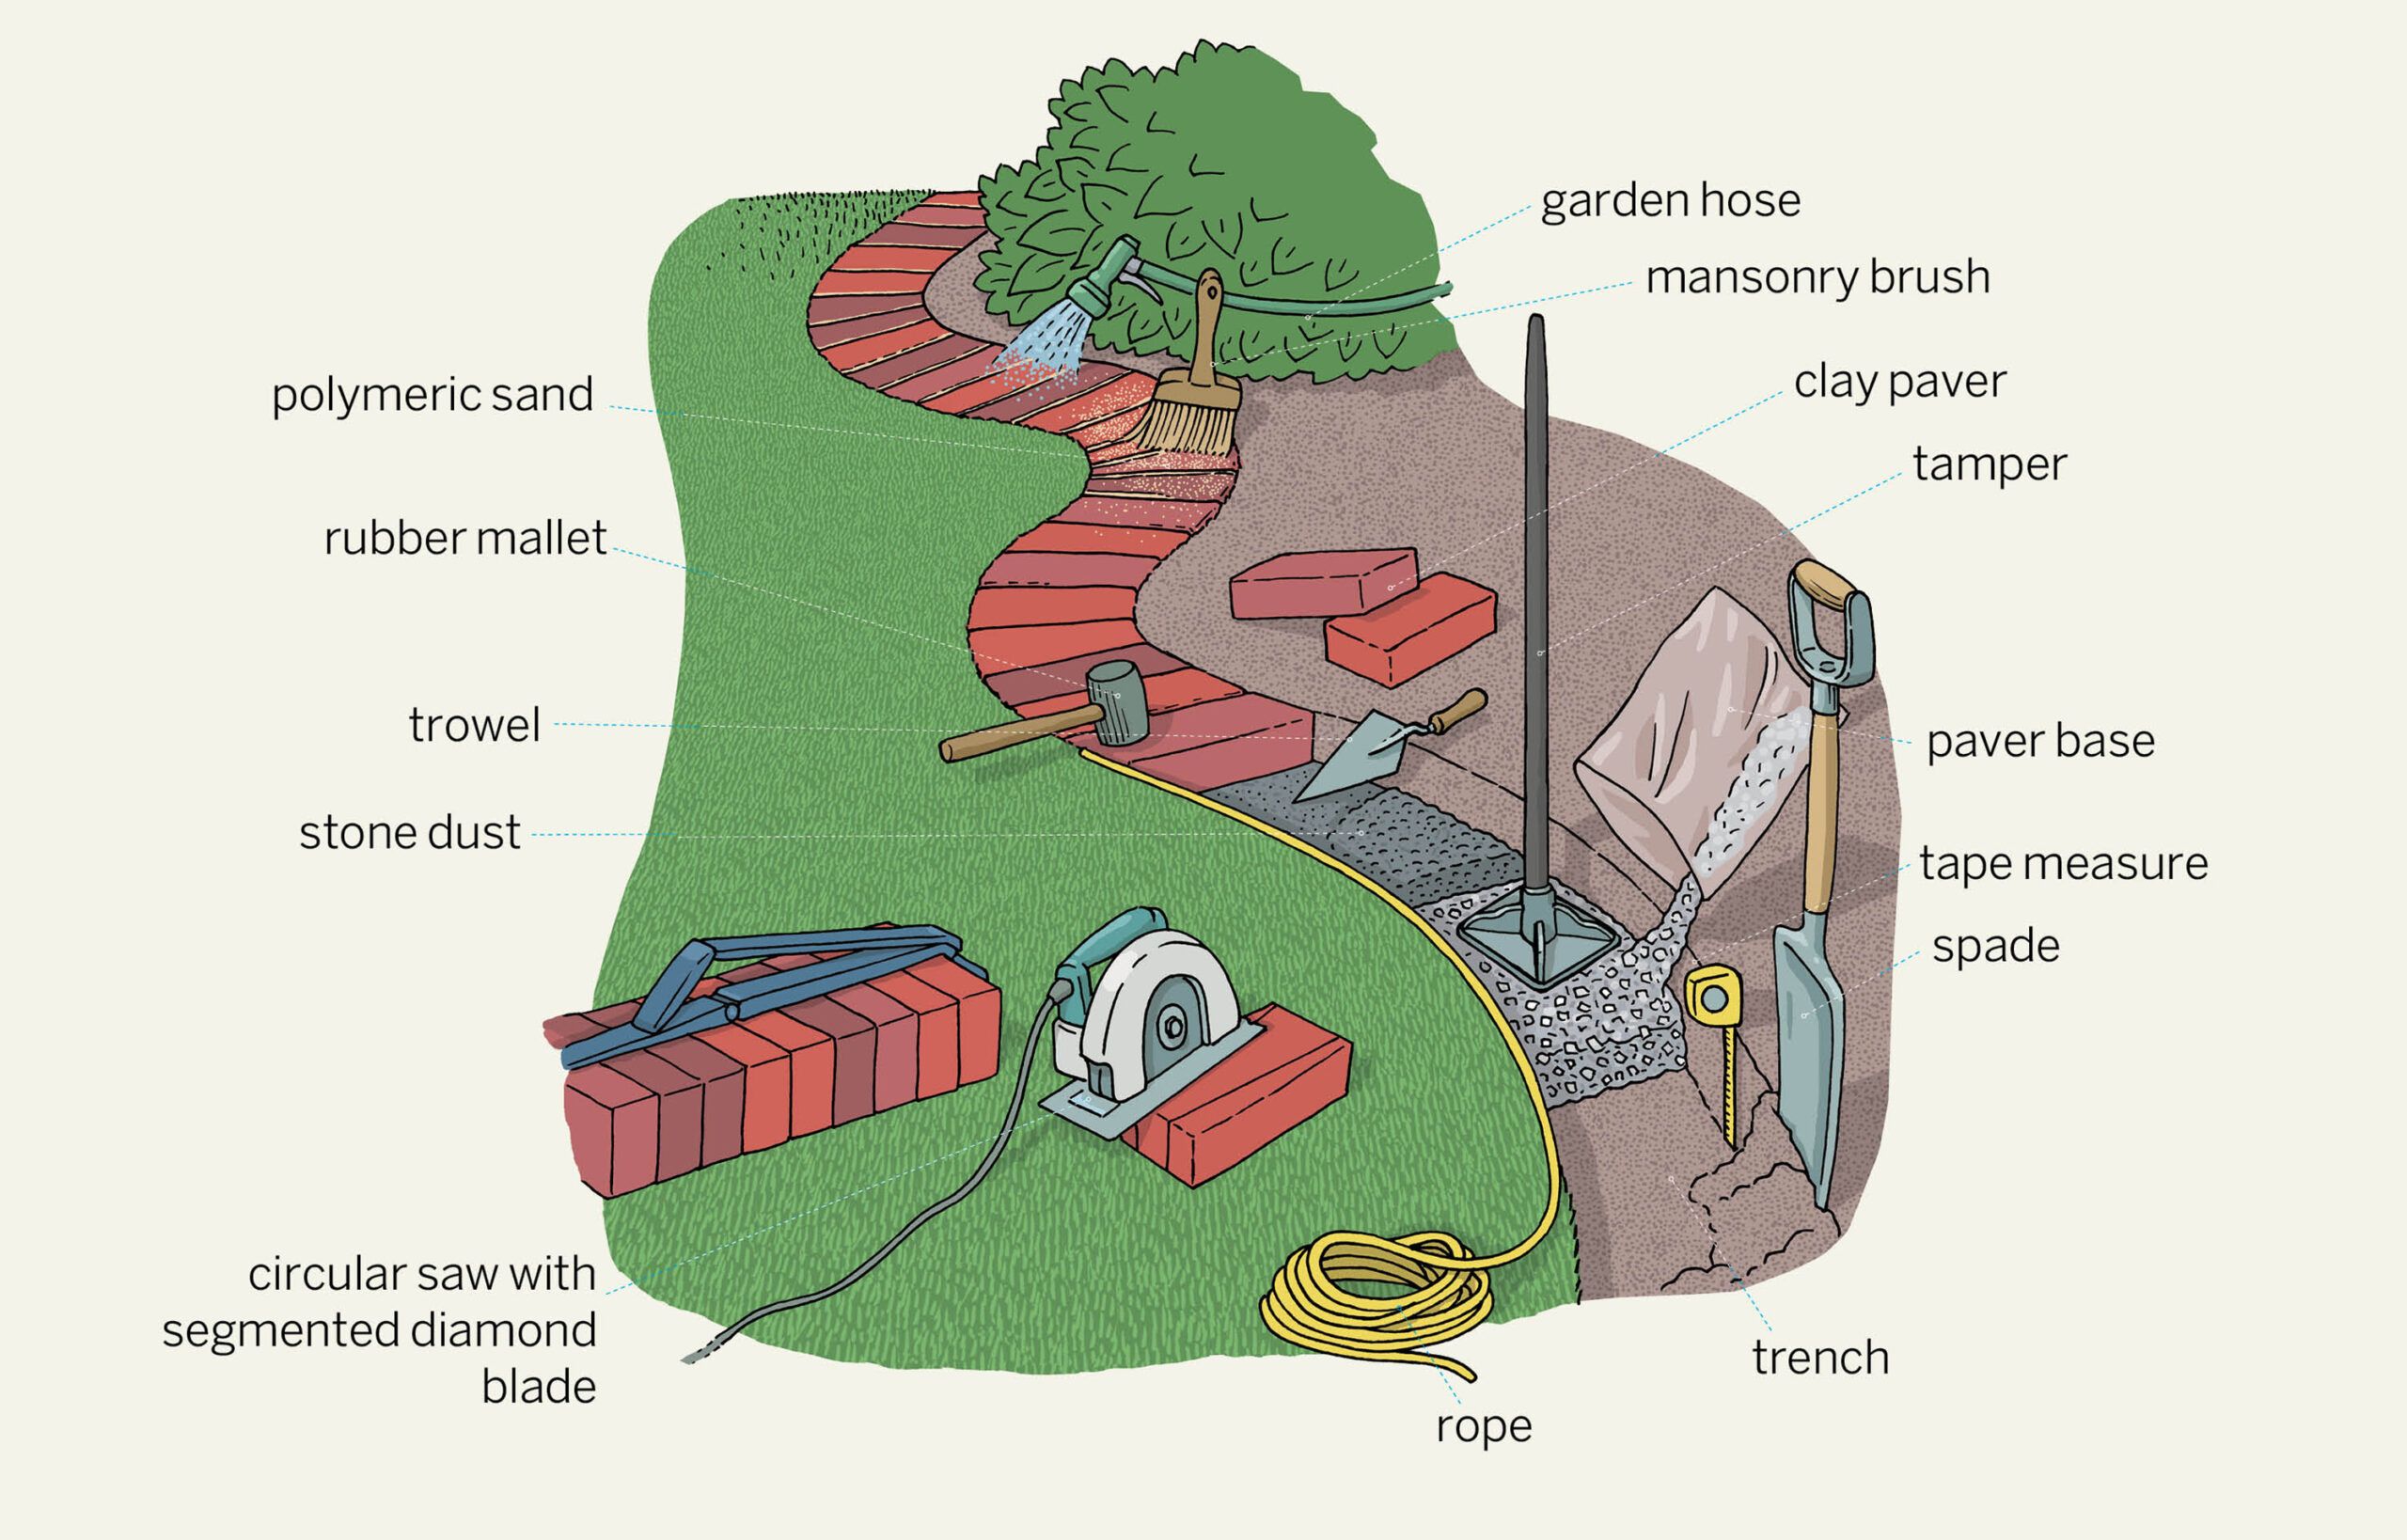
Some people set the pavers in concrete, but there’s no need if you make a proper dry bed. That means digging below the sandy topsoil so that frost heave doesn’t damage the bricks in the winter. Once you’ve done that, a bed of compacted paver base and stone dust gives the bricks a solid base, lets water drain away, and stops weeds or roots from growing up.
Mark Powers, senior technical editor for This Old House, will show you how to put this useful yard accent together.
Looking to give your flower beds and landscaping an instant facelift? One of the quickest and most dramatic ways is to install red brick edging. This traditional material brings eye-catching color and definition against the greenery. Plus, it looks sensational against a variety of home exterior styles, from modern to cottage. Keep reading to learn about the benefits of brick edging, tips for choosing the right style, and easy installation steps to follow. Your garden will have that polished, professionally designed look in no time!
Why Brick Makes Ideal Edging for Flower Beds
Brick edging might seem old-fashioned, but there’s good reason it’s stood the test of time as a go-to garden border. Here are some key advantages it offers:
- Timeless and classic curb appeal
- Available in diverse colors and patterns
- Complements various house styles
- More elegant than plastic edging
- Withstands weather better than other materials
- Helps delineate garden spaces clearly
- Keeps mulch and soil contained neatly
- Creates a clean edge for mowing and trimming
- Provides structure and stability for the bed’s perimeter
- Can be installed as a small DIY project
When shopping for edging, you’ll find many colors of brick available. But traditional red has remained popular for good reason. Let’s look at why it’s a top choice.
Why Red Brick Edging Adds Instant Curb Appeal
Red brick makes a dramatic statement that grabs attention and upgrades your whole landscape’s aesthetic. Here are some of the reasons it looks so sensational bordering flower beds:
- Pops against the green foliage as an eye-catching accent color
- Coordinates beautifully with popular red mulch
- Looks rich and upscale paired with darker evergreens
- Offers a classic and nostalgic feel
- Reminiscent of old-world English and European gardens
- Has a timeless look fitting any period home
- Contrasts wonderfully with light-colored houses
- Adds warm color for curb appeal in winter too
- Available easily and affordably at most home stores
Now that you know the charms of red brick edging, let’s explore the variety of options so you can choose the right look
Brick Edging Styles: Pick the Type That Matches Your Vision
Brick edging comes in a range of configurations for achieving different effects. Consider the overall look you’re going for, along with any existing hardscaping when deciding on a style
Single Row Stacked Bricks
The most common approach is stacking individual bricks in a single-width row, oriented lengthwise. This gives a classic tidy look and allows for gentle curves.
Double Row Stacked Bricks
For more substantial structure, a double row can be stacked, with each brick overlapping the one below. This style has a more formal aesthetic
Brick Edging Blocks
These preformed blocks have multiple bricks fused together in ready-made units. They create a thicker border and speed up installation compared to stacking individual bricks.
Scalloped/Zig-Zag Pattern Bricks
Laying out bricks in a scallop or staggered zig-zag design results in a gently undulating line. This adds whimsy and visual interest.
Soldier Course Bricks
Orienting the bricks vertically like soldiers standing in a row provides clean lines. Alternating colors can create a striking border pattern.
Herringbone Pattern Bricks
The diagonal herringbone layout has a timeless appeal. Mixing red and gray bricks turns up the elegance. This works great for straight runs.
Paver Style Bricks
Thicker paver bricks lay flatter for pathways and patios. Using them as edging lends a seamless integrated look if you have pavers in your hardscape design.
Once you’ve settled on the perfect brick style for your vision, it’s time to learn how to install it. The process is quite straightforward.
Installing Brick Edging: An Easy Step-by-Step Guide
Installing brick edging to border your flower beds or divide garden areas is a DIY-friendly project you can tackle in a weekend. Here are the key steps:
Gather Supplies
You’ll need bricks, shovel, level, rubber mallet, mason’s string, landscape fabric, and paver base gravel. Safety glasses and gloves are also a must.
Define the Border Layout
Use mason’s string to lay out the shape, curving or straightening as desired. Trim any overhanging grass or plants.
Excavate a Trench
Dig a 4-6″ deep trench along the layout. Slope the soil inward so the bottom is wider than the top opening.
Add Gravel Base
Fill the trench with 2-3″ of gravel paver base and pack it down. This creates a solid foundation.
Install Landscape Fabric
Line the trench with fabric, leaving several inches extra on each side. This blocks weeds from emerging.
Position the Bricks
Place the first row of bricks into the trench, leaving a 1/2″ gap between each. Use a level to ensure they sit evenly.
Backfill Around Bricks
Shovel soil behind the bricks up to ground level. Pack it in place using a scrap piece of wood.
Repeat Rows
For a double row, stack additional bricks offset from the first, backfilling as you go.
Finishing Touches
Fill any gaps between bricks with sand. Sweep off excess. Stand back and admire your curb appeal upgrade!
With these simple steps, you can install a striking and functional red brick edger that lends elegance to your landscape beds. Maintaining the border takes only occasional weed-pulling. Your pretty flower beds will stay neatly corralled and defined for years of admiration. Don’t be surprised when neighbors stop by to compliment your red brick edging makeover!
Lay the Bricks

- Cover the base of the paver with the stone-dust mixture using the trowel in long strokes that are several feet long.
- Put the bricks down one by one with the rubber mallet as you press them into place.
- Face each brick flush with the ground on both sides of the trench and with the brick that comes before it. Keep going, brick by brick, and place the cut keystones at curves while keeping the gap the same.
- Fill in the gaps between the bricks with any extra stone dust, then cover it with soil.
Overview of Brick Garden Edging
- SATURDAY: Form the trench (Steps 1–7).
- SUNDAY: Set the bricks (Steps 8–12).
How to Edge a Garden Bed With Brick | This Old House
FAQ
How much will 100 feet of edging cost?
|
Project Size
|
Typical Cost Range (materials and labor)
|
|
50 linear feet
|
$100 – $575
|
|
80 linear feet
|
$160 – $920
|
|
100 linear feet
|
$200 – $1,150
|
|
180 linear feet
|
$360 – $2,070
|
- The Ultimate Guide to Growing Strawberries in Raised Beds - August 8, 2025
- No-Dig Garden Beds: The Easiest Way to Grow a Beautiful Garden - August 6, 2025
- How to Protect and Preserve Wood for Raised Garden Beds - August 6, 2025