Gardening on a slope can present some unique challenges. But with the right techniques and design considerations, you can build beautiful and functional raised garden beds even on a sloped yard.
In this comprehensive guide, we’ll walk through the full process of constructing sturdy raised beds on an inclined site From planning and design to material sourcing and construction, we’ll cover key tips for building raised beds that can withstand a hillside garden
Benefits of Raised Beds on Slopes
Before diving into the how-to let’s first review why raised garden beds are a great solution for sloped yards
-
Level growing surface – Raised beds can create flat planting space by building up low areas or digging into high points.
-
Good drainage – Elevated soil drains better on slopes and avoids puddling.
-
Accessibility – Raised height makes gardening easier on steep inclines.
-
Controlling weeds and soil erosion—Contained beds keep soil from running off and stop the spread of weeds.
-
Defines space – Beds visually define the planting area for easier planning.
-
Extends season – Warmer soil in raised beds enables earlier spring planting.
With proper construction, raised beds enable successful vegetable and flower gardens even on the most challenging terrains.
Design Considerations for Sloped Sites
Here are some key design factors to consider for raised beds on slopes:
-
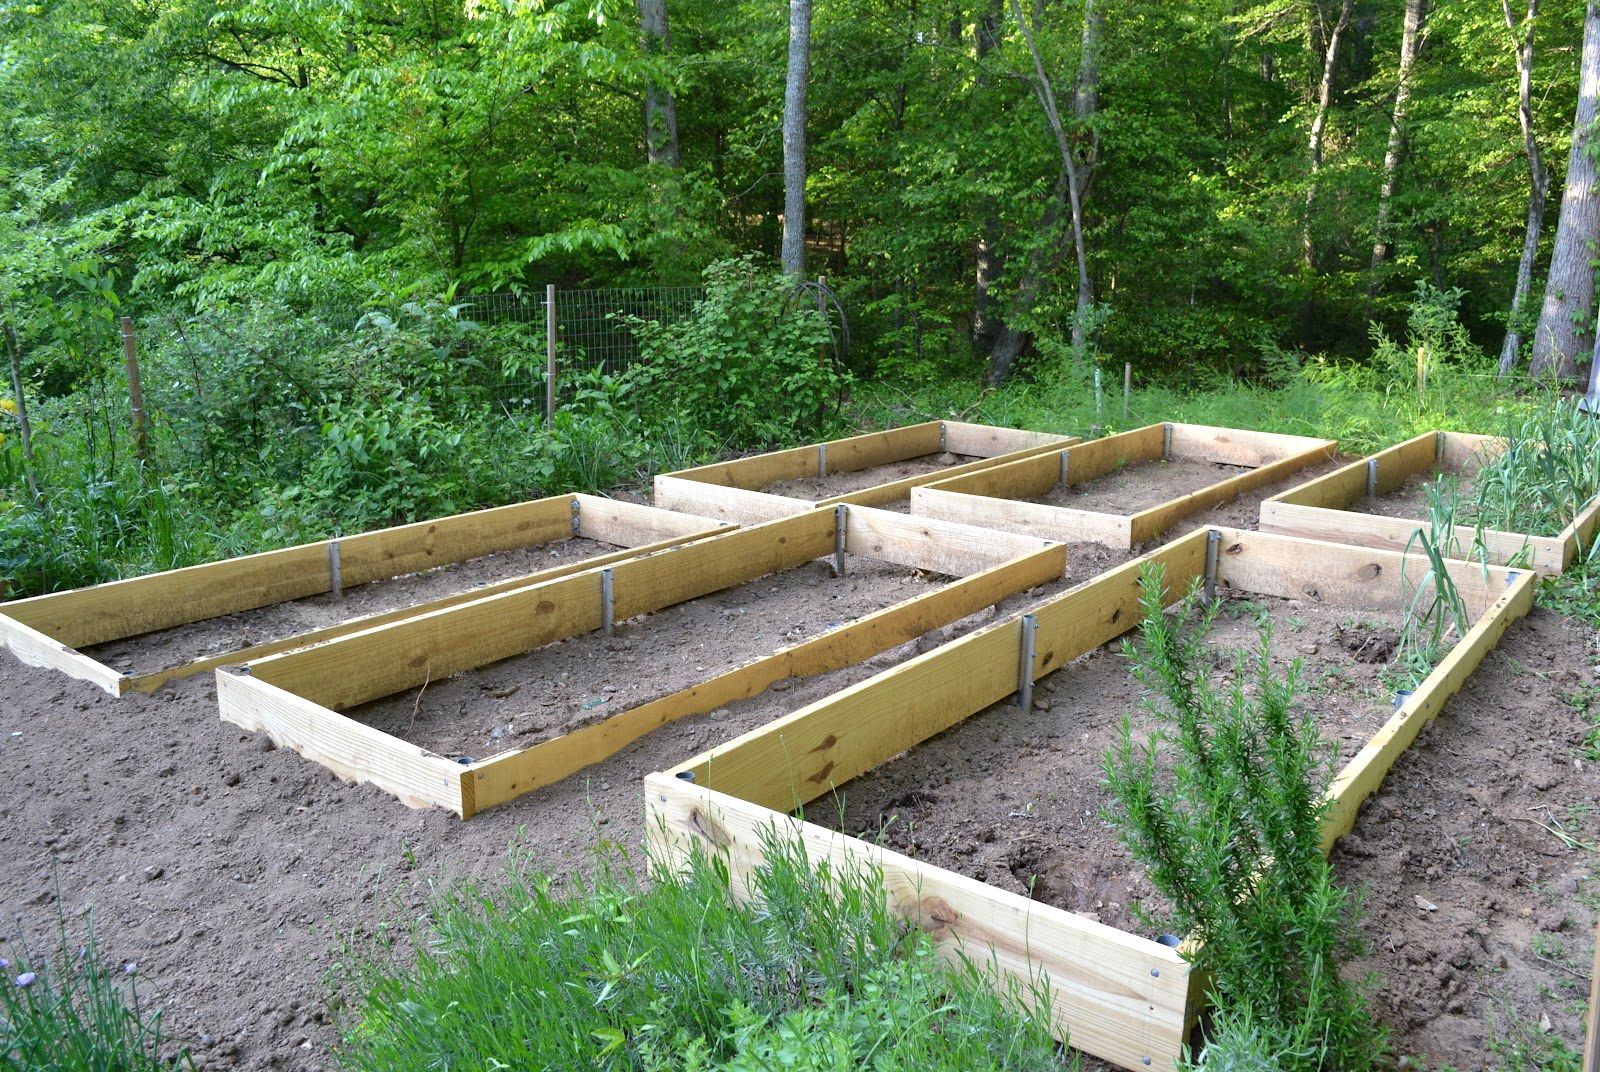
Alignment – Orient the length of the beds across the slope, not down the slope. This prevents erosion within the beds.
-
Level tops – Each individual bed should have a flat, level soil surface. Adapt bed heights as needed.
-
Stepped layout – “Terrace” beds by having higher beds at the top of the slope and lower beds toward the bottom.
-
Sturdy walls – Use thick, rot-resistant wood, masonry blocks, or poured concrete for super stable walls.
-
Reinforced corners – Brace inside corners with angled wood supports or metal rebar for added stability.
-
Deep footers – Dig footer trenches for embedding the bed walls deeper into the slope.
-
Overflow valves – Add valves near the base to drain excess water from beds.
-
Erosion control – Use rocks, gravel or vegetation around beds to prevent soil runoff.
How to Build Raised Beds on a Hillside: Step-By-Step
Now let’s walk through the full process for building tiered raised garden beds on a slope:
Select Site and Layout
-
Evaluate sunlight, drainage, access to water source, and bed accessibility.
-
Mark layout with string, lime, paint or sand based on sun patterns and access space needed between beds.
Measure Slope and Bed Dimensions
-
Use a 4′ level and measuring tape to find slope degree and determine bed heights needed.
-
Adjust individual bed lengths and widths as needed to create flat tops.
Dig Trenches and Add Gravel
-
Dig 6-12″ deep trenches where beds will be located.
-
Add 4-6″ gravel base and pack down with hand tamper.
Install Wall Boards
-
Place treated lumber or masonry blocks into trenches to desired heights.
-
Brace inside corners with triangles of wood or metal rebar.
-
Screw or bond all walls together snugly.
Backfill Beds
-
Backfill beds with good quality garden soil mix. Amend soil as needed.
-
Opt for drip irrigation inside beds rather than sprinklers to avoid erosion.
Level Soil Surface
-
Use a rake and level to smooth out soil, creating flat bed tops.
-
Repeat leveling process after watering if any depressions appear.
Finish Sides
-
Backfill around outside walls to cover trenches and hardware cloth.
-
Mulch around beds once planted to control weeds and mud.
Material Options for Raised Beds on Sloped Sites
For best results on sloped yards, choose super sturdy materials for constructing your raised bed walls:
-
Pressure Treated Lumber – Rot resistant and long lasting. Avoid chemical leaching by lining beds.
-
Cedar or Redwood – More expensive but naturally rot-proof and durable.
-
Recycled Plastic Lumber – Made from recycled plastic bags and bottles; doesn’t rot or leach.
-
Masonry Blocks – Interlocking blocks withstand the earth; can be decorated.
-
Poured Concrete – Form permanent beds edged in concrete.
-
Stacked Stone – For a decorative look; stones anchor wall boards in place.
Treated lumber is an affordable option. For organic gardens, plastic lumber or untreated cedar avoid chemicals.
Tips for Growing on Steep Hillside Gardens
Once your raised beds are built, here are some additional tips to get the most from your sloped vegetable garden:
-
Amend soil regularly to replenish nutrients that can wash away with rains.
-
Use erosion control techniques like ground cover plants, mulch, and diversion channels.
-
Protect young seedlings with plastic covers to avoid wash out until established.
-
Stake taller plants like tomatoes for extra support in high winds.
-
Pick a variety of crops that do well in drainage, like spinach, kale, onions and carrots.
-
Start a terraced orchard! Fruit trees like lemon, apple and pear grow well on slopes.
With smart planning, quality construction, and the right care, raised garden beds enable you to cultivate bountiful gardens and orchards even on steep, sloping terrain. Follow these guidelines to create stable, successful veggie gardens and flower beds on hillsides. And reap the benefits of raised bed gardening even on the most challenging slopes!
DIY Raised Garden Beds (On a Slope)
FAQ
Can I put a raised bed on a slope?
How to build a garden on a hillside?
Do raised beds need to be level?
How to plant a vegetable garden on a slope?
Can you build a raised bed on a slope?
Thankfully, building a raised bed on a slope is an option, and there are multiple ways to do it! Depending on how steep the grade is where you’d like to place your raised beds, different variations may be necessary. You’ll have to do some digging and leveling no matter what you do, but the rewards will be worth it.
Can raised beds be installed on uneven ground?
One way to build a raised garden bed on sloping, uneven ground is to terrace the ground into level ‘steppes’ or build raised beds for the garden vegetable plots in order to keep the valuable soil and amendments
Are raised garden beds good for sloped ground?
As mentioned earlier, soil erosion can be a major issue when gardening on sloped ground. Raised garden beds will retain soil and prevent it from washing away during heavy rains. Raised garden beds will also retain mulch, which is important for suppressing weeds and retaining soil moisture.
How do you build a raised bed on a hill?
You’ll need to carve out the side of the hill to make a level, stepped location for your raised beds. Leave enough room for both the raised bed and your intended reinforcement wall, plus additional room if you want to access the side of the bed closest to the reinforcement. You’ll likely need to remove quite a bit of soil to make a level surface.
- How Fast Does Boston Ivy Grow? A Complete Growth Guide - June 9, 2026
- Gravel for Garden Beds: A Functional and Beautiful Option - June 9, 2026
- The Best Mulch for Raised Garden Beds – Pros, Cons, and Tips - June 9, 2026