What you use for paths, borders, and ground cover has a big effect on how your garden looks after you’ve designed it. Gravel is an attractive and useful option that can be used in many ways. It also helps your plants grow.
Gravel is one of the smartest additions I make to my garden beds every season. It improves drainage so roots stay healthy, suppresses weeds before they take hold, and gives the whole area a clean, polished look that lasts for years. In my own raised garden beds, switching to gravel has cut my watering time, reduced weeding dramatically, and made the space look intentional and beautiful without constant upkeep.
I’ve tried many ground covers over the years, but gravel for garden beds stands out because it works in both functional and decorative ways. Whether I’m creating pathways, topping off planting areas, or building a rock garden feature, gravel delivers results that mulch alone can’t match. It stays in place, drains well even after heavy rain, and actually gets better with age as it settles. If you want garden beds that look great and require less work, gravel is the answer I keep coming back to.
Why Use Gravel in Garden Beds?
Used wisely, gravel offers advantages both functional and aesthetic:
- Improves drainage – Allows excess moisture to readily drain away from plant roots.
- Suppresses weeds – Loose gravel prevents weeds from establishing in paths and beds
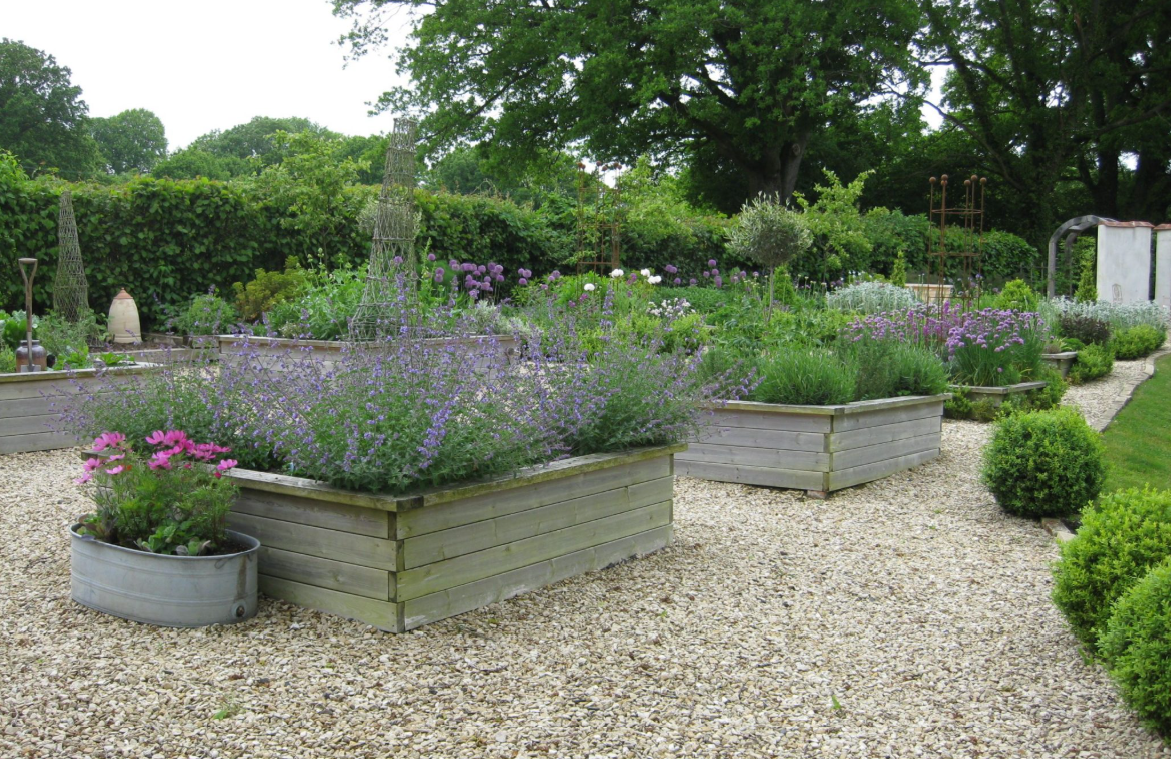
- Defines beds – Provides a clean edge to delineate planting areas.
- Adds texture – Contrasts pleasingly with foliage textures and colors.
- Provides footpaths – Makes walkways through the garden crisp and tidy.
- Protects plants – Stops soil from splashing onto plant leaves during rain.
- Retains moisture – Pea gravel shades soil to reduce evaporation.
- Affordable – Relatively low cost hardscape material.
With the right installation approach, gravel excellently completes the look of ornamental and edible gardens.
Best Types of Gravel for Garden Beds
Not all gravel performs the same way. I choose based on the look I want, how much foot traffic the area gets, and what my plants need. Here are the options I use most often in my own garden beds.
Pea gravel is my top all-around choice for most garden beds and pathways. The small, rounded stones (usually 1/8 to 3/4 inch) feel comfortable underfoot and create a natural, informal look. Pea gravel comes in soft buff, tan, brown, and gray tones that blend with almost any planting scheme. It drains well, stays relatively stable, and works beautifully as both a topper for planting areas and a material for winding paths through the garden. I especially like it in high-traffic zones because it doesn’t shift too much once settled.
River rock gives a bolder, more substantial appearance. These larger stones (1 to 6 inches) create visual weight and work well around specimen plants, water features, or in drainage channels. The natural mix of tans, browns, grays, and whites adds depth and interest. River rock is heavier, so it stays put even on slight slopes, but it’s not ideal for areas where I walk barefoot often because the larger pieces can feel uneven.
Decomposed granite packs down firmly, making it excellent for patios and traditional garden paths. The small particles (1/8 to 1/4 inch) create a smooth, stable surface that feels almost like a natural pavement. It comes in muted pink, gold, and tan hues that look elegant and understated. I use decomposed granite where I want a more formal path that still feels organic.
Lava rock is perfect when I need lightweight drainage and a dramatic dark color. The porous, jagged pieces in dark gray or black add texture and help move water away from roots quickly. Lava rock works especially well in rock gardens, borders, or beds with bold tropical foliage. It’s durable and doesn’t break down, though the dark color can make the bed look hotter in full sun.
Pebbles offer a uniform, polished look in consistent small sizes (often 1/4 to 1/2 inch). Available in white, gray, brown, and mixed tones, they create clean, modern effects when arranged in patterns or broad swaths. Pebbles work well as decorative borders or in container displays where I want a refined finish.
Gravel mulch combines small pea-sized gravel with coarse sand. It makes an excellent top dressing that retains some soil moisture while still suppressing weeds. I apply it 2 to 3 inches deep over planting areas for a finished look that doesn’t compete with the plants.
How I Install Gravel in Garden Beds
Proper installation makes all the difference in how long gravel lasts and how well it performs. Here’s the process I follow for lasting results.
First, I mark the layout with a garden hose or spray paint and excavate a shallow depression about 2 to 4 inches deep. This creates a stable base and keeps the gravel from spreading into adjacent lawn or planting areas.
Next, I line the excavated area with heavy landscape fabric. The fabric prevents gravel from mixing with the soil underneath while still allowing water to drain through. I overlap seams generously and secure the edges.
Then I install edging all around the bed. Metal, plastic, stone, or wood borders work well—I choose whatever matches the overall garden style. The edging keeps everything neat and prevents grass or soil from creeping in over time.
I fill the bed with the chosen gravel, spreading it evenly and raking it smooth. I tamp it down gently with a landscape rake or tamper so it settles firmly without becoming too compacted. Finally, I top off any low spots to create a level surface and leave a small gap between the gravel and any adjacent lawn or borders.
I avoid walking directly on fresh gravel right after installation so it doesn’t shift or compact unevenly. Taking time with the base and edging means the gravel stays looking good for years.
Designing Beautiful Gravel Features in the Garden
Gravel gives me so many creative options. I use pea gravel or decomposed granite for meandering pathways that invite exploration through the garden. I border planting beds with bands of pebbles or lava rock two to three feet wide, using landscape edging to keep everything contained.
Mixing larger accent rocks into beds of smaller gravel creates visual interest and breaks up large areas. For high-traffic spots I choose smoother, rounded gravel that feels good underfoot. I surround focal points like statues or specimen plants with generous gravel beds that make them stand out.
On slopes, gravel mulch helps reduce erosion while still looking attractive. I pair warm gravel tones with hot-colored flowers and foliage for energetic combinations, or use cooler grays and whites with soft pastels for a calmer feel. The contrast between the hard texture of gravel and the softness of plants always looks intentional and polished.
Caring for Gravel Garden Beds Over Time
Gravel gardens need only light maintenance to stay tidy. I pull any weeds or grass that manage to emerge, which is usually minimal once the layer is established. Every so often I rake the surface smooth if gravel becomes uneven from foot traffic or weather.
I add a fresh 1 to 2 inch layer of the same gravel once a year or as needed to refresh the appearance and maintain good coverage. Edging along the borders prevents grass and soil from creeping in. After heavy rain I sometimes need to re-level areas where gravel has shifted or washed.
With this simple routine, my gravel features stay clean and functional for many seasons. The material doesn’t break down like organic mulch, so I’m not constantly replacing it.
Common Mistakes to Avoid with Gravel in Garden Beds
I’ve learned a few lessons the hard way. One mistake was skipping the landscape fabric layer. Without it, gravel gradually mixed with the soil underneath and became difficult to manage. Now I always use good fabric.
Another error was making the gravel layer too thin in high-traffic areas. It quickly scattered and looked patchy. I now apply at least 2 to 3 inches everywhere and more in paths.
I also once used very fine gravel in a vegetable bed and found it hard to work around when planting or harvesting. Larger pea gravel or river rock works better when I need to dig or move plants occasionally.
Finally, I learned to keep gravel several inches away from plant stems and crowns. Piling it directly against stems can trap moisture and lead to rot. A small clear zone around each plant keeps everything healthy.
My Personal Experience Using Gravel in Raised Garden Beds
In my raised garden beds, gravel has become a permanent feature I rely on. I use a combination of pea gravel for pathways between beds and a thinner layer of gravel mulch as a topper in the planting areas themselves. The combination gives me easy access, excellent drainage, and a finished look that makes the whole garden feel more cohesive.
One of my favorite projects was creating a gravel feature around a small water fountain in one corner of the garden. The contrast between the moving water and the still gravel is calming, and the area stays clean with almost no maintenance. My visitors always comment on how polished everything looks.
I’ve also used lava rock in a hot, sunny bed with succulents and Mediterranean herbs. The dark color and excellent drainage keep the plants happy even during heat waves, and the texture complements the bold foliage perfectly.
Quick Tips for Success with Gravel for Garden Beds
- Always use landscape fabric underneath to prevent mixing with soil.
- Choose particle size based on use—smaller for topdressing, larger for drainage layers or bold accents.
- Keep gravel a couple inches away from plant stems to avoid rot.
- Replenish the top layer annually to maintain appearance and function.
- Combine gravel types for both beauty and practicality—pea gravel paths with river rock accents, for example.
- Consider color and how it will look against your plants and hardscaping.
- Plan for good edging from the start—it makes all the difference in longevity.
How To Lay Your Gravel
FAQ
What kind of gravel do you use for a garden bed?
Which gravel is best for a garden?
Should you put gravel in the bottom of a raised garden bed?
What is the best gravel for flower beds?
- How Fast Does Boston Ivy Grow? A Complete Growth Guide - June 9, 2026
- Gravel for Garden Beds: A Functional and Beautiful Option - June 9, 2026
- The Best Mulch for Raised Garden Beds – Pros, Cons, and Tips - June 9, 2026