With their classic white petals and sunny centers, Shasta daisies are a cherished flower for cottage gardens. These beauties bloom all summer long and make cheerful cut flowers. Growing Shasta daisies from seed is an easy and rewarding way to add this garden staple to your yard.
In this comprehensive guide, we’ll walk through everything you need to know to successfully grow Shasta daisies from seed
An Overview of Shasta Daisies
Before we dive into the specifics of growing from seed, let’s do a quick overview of this perennial flower.
- Botanical name: Leucanthemum x superbum
- Bloom time: Early summer to fall
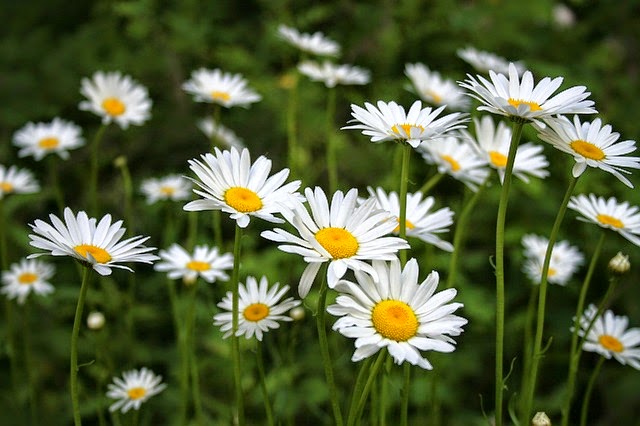
- Flowers: White petals with yellow center, single or double blooms
- Height: 1-4 feet
- Spread: 1-3 feet
- Hardiness: Zones 5-9
Some key facts about Shasta daisies
- Extremely cold hardy perennial
- Tolerates heat and drought once established
- Long bloom period from early summer to fall
- Excellent cut flowers with good vase life
- Attracts pollinators like butterflies and bees
Now let’s look at how to grow these beautiful blooms from seed!
When to Plant Shasta Daisy Seeds
You can start Shasta daisy seeds indoors or sow them directly outside. Here are the optimal timeframes:
Indoors: Start seeds indoors 6-8 weeks before your last expected spring frost date. This gives enough time for the seedlings to develop into sturdy young plants that can be moved outdoors.
Outdoors: Direct sow Shasta daisy seeds in the garden when soil temperatures reach at least 70°F. This is usually a few weeks after the last spring frost.
Fall: You can also plant fresh seeds in fall. Sow 8-10 weeks before first frost so plants have time to establish roots before winter dormancy.
Starting Shasta Daisy Seeds Indoors
Sowing seeds indoors gives you more control over moisture, light, and temperature for better germination rates. Here’s how to do it:
Supplies Needed
- Shasta daisy seeds
- Containers – trays or pots
- Seed starting mix
- Grow lights (optional)
- Plastic dome or wrap
Step-By-Step Process
-
Fill containers with moistened seed starting mix. Tap down gently.
-
Place 1-2 seeds on the surface of the soil about 1 inch apart.
-
Gently press seeds into the soil but do not cover completely. Light helps germination.
-
Mist the soil surface well until moist but not saturated.
-
Optional: Cover trays with plastic domes to retain moisture.
-
Place containers in bright location or under grow lights.
-
Maintain soil temperature of 65-70°F for best results.
-
Once sprouted, remove any domes and water carefully to avoid damping off disease.
-
Thin seedlings to the strongest plant per cell once 2 sets of true leaves appear.
Transplanting Shasta Daisy Seedlings Outdoors
Young Shasta daisy plants can be moved outside once they are several inches tall and past the danger of any frost.
Hardening Off: Over 7-10 days, gradually expose seedlings to longer periods outdoors to “harden off”. Avoid hot sun/wind at first.
Transplanting: Move seedlings outdoors in evening or on cloudy day to avoid transplant shock. Gently loosen roots before replanting at same depth in garden. Water in well and shelter from sun a few days.
Direct Sowing Shasta Daisy Seeds Outdoors
For a casual, natural look, you can scatter Shasta daisy seeds directly in the garden for flowers that self-sow each year.
When: After all chance of frost when soil is at least 70°F. Can also plant in fall.
Where: Full sun to partial shade area with good drainage.
**How:**scatter seed evenly over soil surface. Gently press into soil and mist well to moisten. Keep moist until sprouted. Thin to 6-12 inches apart.
Caring for Shasta Daisies
Once established, Shasta daisies are easy to care for. Here are their needs:
-
Sun: Full sun is ideal, can tolerate partial shade
-
Soil: Average garden soil, enriched with compost or manure
-
Water: Moderate, allow soil to partially dry between watering
-
Fertilizer: Apply balanced fertilizer or compost in spring
-
Pruning: Deadhead spent blooms to encourage new flowers
-
Dividing: Divide congested clumps every 2-3 years in spring or fall
Common Pests and Diseases
Shasta daisies have very few problems but may be affected by:
-
Slugs/snails – Use organic baits if population is high
-
Aphids – Wash off with water or use insecticidal soap
-
Root rot – Avoid overwatering and increase drainage
-
Powdery mildew – Can occur in humidity, improve air circulation
-
Rust – Remove affected leaves, avoid overhead watering
Tips for Growing Gorgeous Shasta Daisies
Follow these tips to get the most out of your Shasta daisies grown from seed:
-
Give young plants protection from intense sun and wind until established
-
Deadhead religiously throughout bloom season to encourage more flowers
-
Stake taller varieties like ‘Alaska’ to prevent flopping in heavy rain
-
Cut flowers for bouquets in early morning while blooms are freshest
-
Divide dense clumps every 2-3 years to rejuvenate and control spread
-
Plant en masse for beautiful drifts of daisies through your garden
-
Mix colors by pairing with bee balm, coneflowers, and ornamental grasses
FAQs About Growing Shasta Daisies from Seed
How long do Shasta daisies take to bloom from seed?
If started indoors, Shasta daisy seeds may bloom about 3-4 months after being sown. If direct sown outdoors, allow at least 2-3 months for blooms the first season.
Do Shasta daisies come back every year?
Yes, Shasta daisies are herbaceous perennials that will return each year if grown in the proper hardiness zone. They are extremely cold hardy.
Should Shasta daisy seeds be covered when planting?
No, Shasta daisy seeds require light to germinate so do not cover them with soil when planting. Simply press gently into the soil surface.
How much sun do Shasta daisies need?
Shasta daisies grow best with full sun. They can tolerate partial shade but will produce less blooms.
Growing Shasta daisies from seed is a simple, rewarding way to add reliable color to your garden. In just a few months, you’ll have gorgeous drifts of white blooms to enjoy all season long. With proper care, these summer-blooming beauties will return each year.
Shasta daisy is a garden staple
People who are new to gardening often start with the Shasta daisy, a 3–4-foot hybrid perennial that is easy to grow and has a simple beauty. Daisy flowers come in white, yellow, and buff shades, and the petals around the traditional yellow eye are very different from one another. Some dwarf varieties (8–12″) can be put at the front of garden beds, while others have strong, attractive clumps of foliage that look great against other flowering perennials in the garden.
Extremely cold hardy, this plant can be grown from seed or from transplanting potted starts. If the weather is moist and normal, the Shasta daisy grows well and strongly, making it easy for the gardener to spread it around the garden and get lots of blooms for vases. The Ox-eye daisy (Chrysanthemum leucanthemum), which is related to the other daisy, can be used to make white carpets in meadows or along driveways. This plant is so strong that it is illegal in some states and must be planted with care.
When & Where to Plant Daisies
Potted Shasta daisies are planted in the fall and early spring. Plant Shasta daisy and Oxeye daisy seeds in early winter or late spring. You can also plant them in the fall. Select a sunny site for your plants or seeds with well-draining soil rich in organic matter. Protection from strong winds is also preferred as some taller varieties can flop over.
Potted plants should be planted with the crown above the soil. Seeds can be scattered at a rate of approximately 1/4 ounce/100 sq. ft. and should be left uncovered, as they need light to germinate. Tamp them down to make good soil/seed contact.
Light: Shasta daisy and ox-eye daisy do best in full sun. They can tolerate part-shade conditions, but flowering will be reduced.
Soil: Average to sandy soil works well for these daisies. Overly dry conditions will result in the plant losing vigor over the season and eventually dying out.
Spacing: 24-30 inches for plants. Shasta daisy seeds should be spread out 6 inches apart if they are not being broadcast. Strong plants should be spaced at least 18 inches apart. Ox-eye daisy seeds are often broadcast on disturbed soil and raked in for a more natural look.
Shasta daisies are rhizomatic and spread underneath the soil, increasing the clump size fairly quickly. Ox-eye daisies are notoriously vigorous, spreading through seed and rhizomes. Ox-eyes are considered invasive in some states and it is important to check this before planting.
Planting: Plant potted plants in fall or early spring and seeds in winter, spring, or fall.
Garden Flowers: How to Seed Start Shasta Daisies Indoors: Perennial in Zones 5-9 – MFG 2014
- The Moderate Growth Rate of the Stunning Edith Bogue Magnolia - April 10, 2026
- Cultivating Vibrant Dahlias in Garden Beds – A Complete Growing Guide - April 10, 2026
- Mediterranean Pink Heath in Summer – Tips for Care and Maximizing Bloom - April 9, 2026