Raised garden beds made from breeze blocks offer many benefits over traditional in-ground gardening. Breeze blocks, also known as concrete blocks, are durable rectangular masonry units with hollow cores that provide drainage. Constructing raised beds with these blocks creates an organized, contained space to grow flowers, herbs, vegetables, and other plants.
Advantages of breeze block raised beds:
- Elevated height reduces back strain
- Improve drainage and prevent waterlogging
- Block out weeds and pests
- Extend growing season as soil warms more quickly
- Create organized, easy-to-access beds
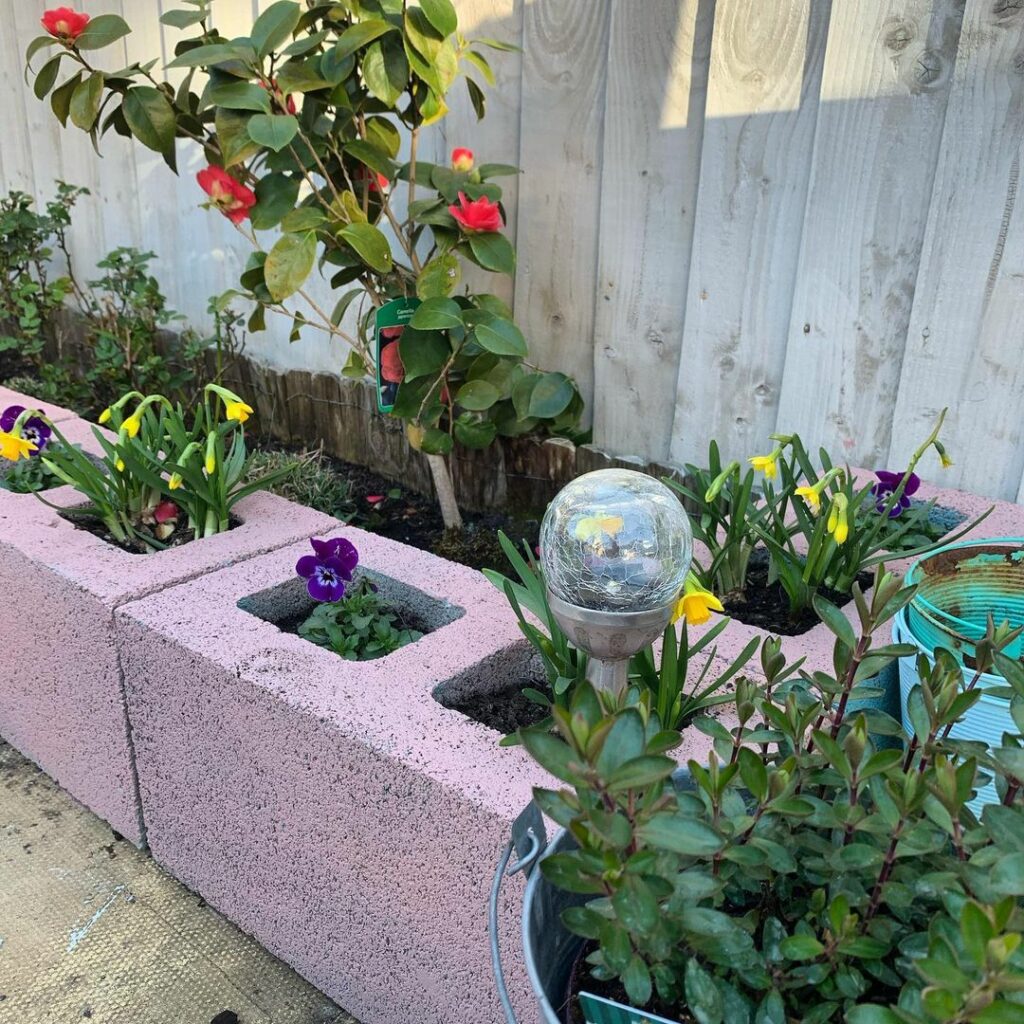
- Can be customized with paint, edges, materials
- Long-lasting and low maintenance structure
This comprehensive guide will cover everything you need to know about building your own breeze block raised bed, including:
- Sourcing materials and tools
- Key design considerations
- Step-by-step instructions for construction
- Planting, care, and maintenance tips
- Inspiring photos of DIY beds
- Answering common questions
Follow along to create durable, stylish raised beds that will serve as an excellent growing space for years to come.
Why Use Breeze Blocks for Raised Beds?
Here are some of the key advantages of using concrete breeze blocks for your DIY raised garden bed project:
- Inexpensive – Breeze blocks are very budget-friendly compared to materials like brick, natural stone, or redwood.
- Durable – Properly constructed, breeze block walls can last for decades with minimal upkeep. They stand up well to weather and garden conditions.
- Design flexibility – Breeze blocks don’t require mortar, so it’s easy to expand or rearrange your design later as desired.
- Good height – Standard 440mm long blocks offer an ideal height of around 300mm for raised beds when laid on their side. This reduces back strain for planting and tending the bed.
- Improve drainage – Elevating the soil improves drainage and prevents overly wet conditions at the roots.
- Weed prevention – Raising your garden above ground makes it easier to prevent weeds from surrounding areas.
- Warms soil faster – The raised position, drainage, and thermal mass of concrete help the soil warm up earlier for an extended growing season.
Shopping List for Materials
To build a basic 4ft x 8ft breeze block raised bed, you’ll need:
- 16-20 breeze blocks (440mm x 215mm x 100mm)
- 1-2 bags sand and cement for mortar
- 1-2 yards quality garden soil blend
- Landscape fabric for weed barrier
- Spade, shovel, trowel for digging
- Spirit level, rubber mallet, line marking spray
- Wheelbarrow for moving soil
When prepping the base, use coarse materials like gravel or MOT Type 1 to improve drainage under the blocks.
And don’t forget the soil! For raised beds, I recommend using:
- A mix of compost and topsoil
- Slow-release organic fertilizer
- Mulch to retain moisture
This will give your plants rich, nourishing soil to thrive in.
The key is choosing porous materials and amendments to allow for drainage while retaining moisture. This prevents the dreaded overwatering issue.
It’s also useful to rent a cement mixer and plate compactor to make the job easier. Pick up a couple extra breeze blocks to allow some flexibility in laying your design.
Design and Choosing the Location
When selecting where to install your new raised bed, consider:
- Sunlight – Most plants need at least 6 hours of direct sun daily. Pick a sunny spot.
- Soil quality – Avoid overly compacted or wet soil if possible. Raised beds help improve poor soil but don’t fully mitigate issues.
- Accessibility – Ensure you can easily reach all areas of the bed for planting, weeding, and harvesting.
- Proximity to water – Having a nearby hose or spigot makes watering easier. Plan this into your layout.
- Flat terrain – Avoid steep slopes which could lead to erosion around the raised bed over time.
Now for the fun part – picking a shape and size! Considerations:
- Shape: Traditional rectangular or square beds are easiest to build. But you can get creative with circles, curves, L-shapes, etc!
- Size: Beds should be 3-5 feet wide max so you can reach the center from the sides. Length is flexible based on space.
- Height: 2 feet is optimal, but make sure blocks are stable if going taller.
Here are some trendy breeze block raised bed shape ideas if you want to spice things up:
- Circular bed with a fountain in the middle
- Long S-shaped bed weaving through the yard
- Hexagonal or octagonal bed for a modern vibe
- Stepped pyramid bed cascading with flowers
- Mix of geometric and curved edged beds
And don’t forget you can paint or stain the blocks once stacked to add serious style points. Get those creative juices flowing!
Play around with different sizes and shapes on paper before finalizing your design. This planning will ensure your bed fits the space and your unique vision.
Take time to pick the optimal garden location before gathering materials and starting work.
Step-by-Step Guide to Building a Breeze Block Raised Bed
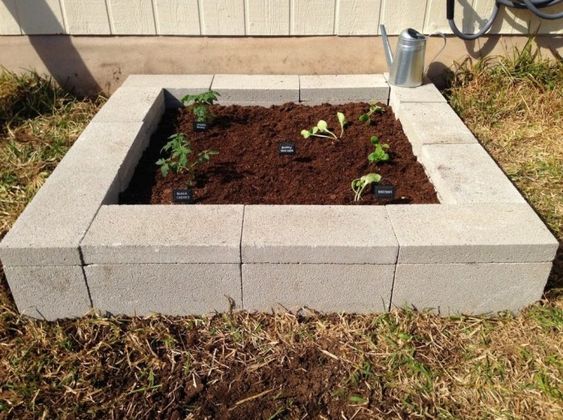
Follow these simple steps to create your own beautiful breeze block raised garden bed:
Prepping the Building Site
First up, we need to clear and level the ground where your new bed will sit.
- Remove any grass, weeds, rocks or debris.
- Use a shovel to flatten and smooth the soil.
- A spirit level is your friend here – use it to ensure your surface is evenly flat.
This gives us a stable, solid foundation for laying the blocks.
Adding Gravel Base Layer
Now we’ll boost drainage under the blocks by adding a gravel base layer:
- Spread a 5-8cm layer of gravel (I recommend pea gravel or MOT Type 1) across the prepped area.
- Compact the gravel layer by walking over it or using a hand tamper. This locks the rocks together.
- Check that the gravel layer is flat and level using your trusty spirit level once more.
Gravel layer? Check. Let’s start stacking!
Laying the First Block Layer
Time to lay the first layer of blocks. A few tips:
- Start in a corner and lay blocks lengthwise first.
- Use a masonry trowel to spread mortar about 2cm deep before placing blocks.
- Tap blocks gently with a rubber mallet to nudge them into the mortar and position correctly.
- Check level and alignment periodically with the spirit level.
- End with corner blocks cut in half for a clean edge.
- Allow overnight for mortar to cure before moving on.
Once your first layer of breeze blocks is in place, take a breath. The foundation is set.
Adding Reinforcement (Optional)
If using hollow breeze blocks, here’s an extra stability tip:
- Hammer rebar pieces into the open cores of the corner blocks and first layer.
- Make sure rebar reaches top of 2nd layer but isn’t visible.
This braces the structure. But it’s optional if using filled blocks.
Lining the Bed
Before layer two, let’s add the liner:
- Line inside walls with landscaping fabric. This improves drainage and blocks weeds.
- Make sure fabric edges aren’t visible.
Stacking the Second Layer
Now repeat the process with your second layer:
- Use 2cm mortar beds to stack blocks in an offset pattern, alternating seams.
- Tap blocks into alignment with the mallet.
- Check level often with the trusty spirit level.
- No need to line inside walls again.
Finishing Touches
Once second layer is complete, we add the finishing touches:
- Mix five parts sand with one part cement.
- Apply first layer of render about 1cm thick. Score diamonds into it with a trowel.
- Let dry overnight.
- Apply a second smoother layer of render. Use a sponge to create a consistent texture while still wet.
- Allow a week to cure before painting. Stronger render, stronger walls!
- Paint outer walls with masonry paint for protection and color.
Then it’s time for the fun part – filling your new bed with rich soil and plants!
Whew, we did it! Wasn’t too painful right? I’m pumped to see your finished breeze block raised bed – be sure to tag me on social media! 🪴
Growing Plants in Breeze Block Beds
Soil Considerations
Good soil is key to growing thriving plants. For raised beds, I recommend:
- A mix of compost, topsoil, and organic fertilizer – this provides nutrients and retains moisture
- Adding mulch on top to prevent weeds and slow water evaporation
- Testing drainage by pouring water into a hole – it should slowly seep down
- Leaving about 5-10cm of space at the top for mulch and watering
Adjust soil composition as needed for the plants you want to grow.
Best Plants for Raised Beds
Here are some of my fave flowers, veggies and herbs for raised beds:
- Leafy greens – Kale, spinach, lettuce, arugula
- Root crops – Carrots, radishes, beets
- Tomatoes, peppers, cucumbers – Delicious veggies that thrive in contained beds!
- Herbs – Mint, thyme, rosemary, parsley, basil, oregano
- Petunias, marigolds, lavender – Beautiful flowers that attract pollinators
- Climbing plants like cucumbers, peas, beans – these can be trellised vertically along the blocks to maximize space!
Play around with different combos – just make sure plants have similar sunlight and water needs.
Ongoing Care
To keep your raised bed and plants happy:
- Water when the first 5cm of soil is dry
- Use organic liquid fertilizer throughout the growing season
- Pull weeds when small to prevent spreading
- Monitor for pests and treat organically ASAP
- Amend soil with compost or mulch each season
With proper care, your plants will thrive in the contained raised bed environment. Let your creativity run wild and try out new plant combos!
Design Inspiration
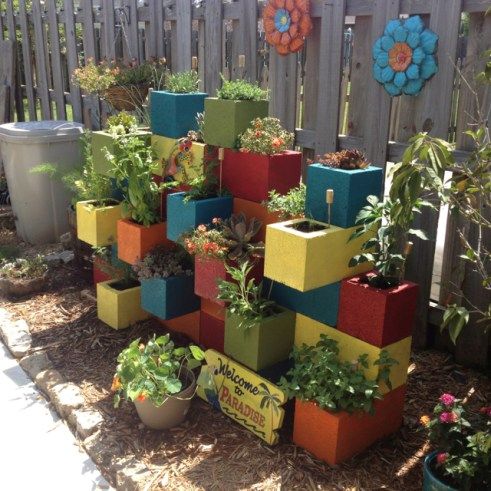
Painted Breeze Block Beds
One of the easiest ways to customize your beds is by painting the blocks. Here are some fabulous ideas:
- Go for a fun, vibrant color like cherry red or lime green to make the bed pop.
- Paint alternating blocks in different colors for a more eclectic, mosaic look.
- Stick with neutral earth tones like tan, brown, or grey for a subtle touch.
- Use blocks as “canvases” to paint beautiful murals, patterns, or designs. Get creative!
A fresh coat of paint does wonders to dress up boring cinder blocks.
Unique Edging Techniques
Edging your raised beds pulls the look together beautifully:
- Use additional blocks, bricks, or stones as a border around the exterior base.
- Consider a metal edge band for an industrial vibe.
- Wooden planks around the perimeter offer a rustic feel.
- Large rounded rocks create a natural-looking edge.
Mixing materials creates cool contrast and textures. Don’t be afraid to experiment!
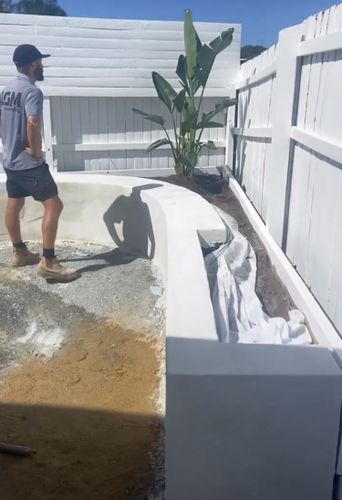
Mixing Materials
Speaking of textures, combining different construction materials for beds is trending. Try:
- Using reclaimed wood for the short ends and blocks for the long sides.
- Alternating wood boards and blocks to divide separate planting areas in one bed.
- Incorporating metal pipes or corrugated tin into parts of the structure.
Blending natural, industrial, and masonry elements creates beautifully eclectic raised beds.
Vertical Gardens
Finally, think vertically! Add trellises along the upper blocks and grow vining plants:
- Bean teepees or pea trellises make great use of vertical space.
- Espalier fruit trees flat against a wall for aesthetic appeal.
- Hang planters along the inner walls to double planting capacity.
Tips for Filling, Planting, and Maintaining a Breeze Block Raised Bed
Here are some useful care tips for your new raised garden:
- Add compost and organic fertilizer to replenish nutrients in soil yearly
- Use 2-3 inches of mulch to reduce watering needs and keep weeds down
- Install drip irrigation or soaker hoses to efficiently water your garden
- Practice crop rotation from season to season to prevent disease and pest issues
- Control bugs and diseases organically using Neem oil, insecticidal soap, etc
- Check edges of bed walls each Spring and repair any shifted blocks
- Top off soil level every 1-2 years as it settles over time
- Start small – Build just one or two compact raised beds your first year. Don’t overdo it too quickly.
- Focus on just a couple crops – Master tomatoes, leafy greens, peppers or herbs before expanding your plant variety.
- Use quality soil – Purchase a premium organic blend don’t amend garden soil. Good soil is critical.
- Follow a planting plan – Map out what you want to grow before buying too many seeds or plants.
- Use transplants – Starting from seed can be challenging for beginners. Purchase some starter plants.
- Water consistently – New gardens need about 1″ of water weekly, adjusting for rainfall. Don’t let soil dry out.
- Control pests – Cover seedlings with row cover fabric. Quickly treat any pest/disease issues.
- Build up soil – Mix in compost and organic fertilizer each season to nourish plants in raised beds.
Start small, focus on good soil, and don’t overplant too many varieties your first year. Gardening is a fun learning experience, so enjoy the process!
Ready to Build Your Breeze Block Raised Beds?
As you can see, constructing DIY raised beds with concrete breeze blocks is straightforward project for the novice DIYer. The basic steps include:
- Leveling and preparing the site
- Laying blocks in your planned design
- Filling with high quality soil blend
- Planting choices suited to raised beds
- Mulching and caring for your new garden
The end result is a practical, durable, and cost-effective raised bed that will provide enjoyment for years to come. The simple cinder block design can be adapted to fit whatever space you have available.
So don’t let a lack of gardening space hold you back! Follow this guide to build your own beautiful breeze block raised beds this weekend. Then start planting your fruits, vegetables, herbs and flowers to enjoy the benefits and rewards of raised bed gardening!
Building raised beds from breeze blocks Video
FAQ
Can you use breeze blocks for raised beds?
Are concrete blocks safe for raised beds?
How many cinder blocks do I need for a 4×8 garden bed?
How many breeze blocks do I need?
This depends on the size of your raised bed. Generally figure:
- 1 block = 440mm x 215mm
- Allow extra for cutting/wastage
- Plan for 2 layers stacked, unless making very short beds
Do the math for your dimensions and add 10-20% extra to be safe!
Can I build on an existing lawn?
You sure can! Just:
- Mow the grass as low as possible where the bed will go
- Lay down landscape fabric to block weeds
- Build on top of the fabric
The blocks will hold the fabric in place underneath.
What size should I make the beds?
Keep beds 3-5 feet wide so you can reach the center from the sides. Length depends on space, but make sure you can access all areas easily. Start small if it’s your first raised bed!
How do I prevent weeds?
Great question! Try:
- Landscape fabric under the soil
- 2-3 inches of mulch on top
- Hand pull weeds when small
Do I need mortar for layering blocks?
Mortar isn’t 100% necessary, but it helps:
- Keep blocks firmly in place
- Prevent soil leakage
- Increase stability
- How Fast Does Boston Ivy Grow? A Complete Growth Guide - June 9, 2026
- Gravel for Garden Beds: A Functional and Beautiful Option - June 9, 2026
- The Best Mulch for Raised Garden Beds – Pros, Cons, and Tips - June 9, 2026