Laying pebbles in your garden is a great way to add visual interest and texture. Pebbles come in a variety of shapes, sizes and colors, allowing you to get creative and design the garden of your dreams. Installing pebbles is also relatively easy, even for beginners. Here is a step-by-step guide on how to lay pebbles in your garden properly.
Why Use Pebbles in Your Garden?
Before jumping straight into the how-to steps, let’s first go over some of the main benefits of using pebbles in your garden:
- Decoration – Pebbles look highly decorative and instantly elevate the look of any garden. They add pops of color, interesting textures, and beautiful contrasts.
- Variety – You can find pebbles in so many different colors, shapes, sizes and textures. This allows you to get really creative with your garden design.
- Low maintenance – Pebbles are easy to maintain. Just occasional rinsing with a hose is enough to keep them looking fresh.
- Good drainage – The gaps between pebbles allow for good drainage, which is useful for plant health.
- Weed prevention – Properly laid pebbles act as an effective weed barrier.
- Affordability – Pebbles are an affordable way to give your garden a makeover.
- Long-lasting – Pebbles will easily last for years in the garden with minimal upkeep.
How to Choose the Right Pebbles
When selecting pebbles, keep the following tips in mind:
- Types – Some popular options include river pebbles, beach pebbles, marble chips, granite stones, lava rock, etc.
- Shape – Pebbles come in various shapes like round, oblong, flat, irregular, etc. Choose based on your preference.
- Size – Most pebbles range from 10mm to 60mm in diameter. Bigger pebbles (60-100mm) are also available.
- Colors – Look for pebbles in colors that will complement your overall garden scheme. Neutral, natural tones usually work well.
- Texture – Smooth, polished pebbles have a more elegant vibe. Rough, irregular ones feel more organic and natural.
- Purpose – Consider factors like foot traffic, drainage needs, pet access, etc. when choosing pebbles.
- Amount – Buy more pebbles than you think is needed to have extra on hand for topping up later.
How to Lay Pebbles in Your Garden
Follow these simple steps for properly laying pebbles in your garden:
Gather Your Materials
You will need:
- Pebbles
- Landscape fabric or weed barrier
- Shovel
- Rake
- Gloves
- Eye protection goggles (optional)
Prepare the Base
- Remove any existing grass, plants or debris from the area. Dig the ground to about 2-3 inches deep using a shovel.
- Grade and level the soil using a rake. Eliminate any bumps or depressions.
- Optional – Place a landscape fabric or weed barrier over the soil. This prevents weeds from poking through the pebbles later.
Add the Pebbles
- Using a wheelbarrow, move your stone of choice to the prepared area and tip the cobbles or pebbles.
- Once the decorative stones have been tipped, use a garden rake or similar gardening tool to evenly spread the stone – they should cover the area completely.
- Use your hands or a small trowel to distribute the pebbles around plants, borders or any decor pieces in the garden.
- Step back and ensure the pebbles look evenly distributed with good coverage. Fill any visibly sparse areas with more pebbles.
Finishing Touches
- Use a hand tamper or piece of wood to gently tamp down the pebbles. This helps with stability.
- Hose down the pebbles to clean off any dust and see the true colors shine through.
- Make any final adjustments to the layout or add decorative accents like garden lights, stones, sculptures, etc.
And that’s it! Your pebbled garden is now ready to enjoy. The rocks will naturally settle more over time with rainfall and foot traffic. Replenish with fresh pebbles as needed.
Creative Ways to Use Pebbles in Your Garden
Beyond just scattering pebbles across beds or paths, there are tons of creative ways to incorporate them into your garden design:
Pebble Mosaics
Get artistic and make stunning pebble mosaics in different geometric patterns, images or text. Use pebbles of contrasting sizes and colors for maximum impact.
Accent Borders
Line garden beds, trees, pathways or other features with a pebble border in a bold color. This draws attention to the area and makes it ‘pop’.
Mix with Other Materials
Combine pebbles with crushed bricks, marbles, sea glass, etc. for extra texture. Or plant low-growing greenery like succulents or moss between pebbles.
Walkways
Cover walkways in evenly laid pebbles for a satisfying crunch underfoot. Go for bigger pebbles and tamp them down well for high-traffic areas.
Water Features
Use pebbles to create dry creek beds, line ponds, fill in around fountains, etc. The water makes the pebbles shimmer beautifully.
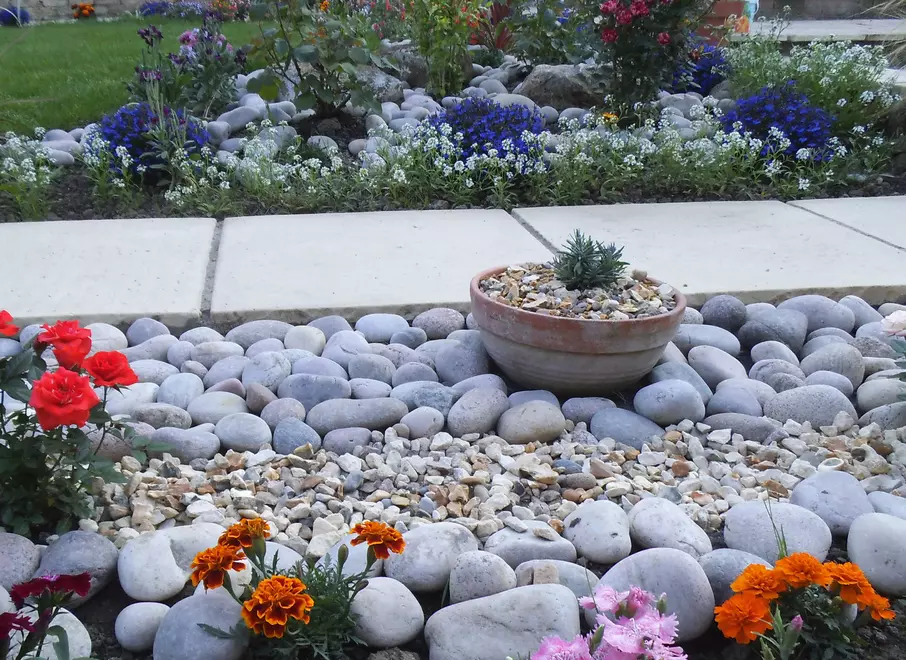
Top Dress Potted Plants
Top dress the soil surface of potted plants with pebbles. This helps retain moisture and prevents mud splashes on walls and floors.
Driveways and Parking Areas
For driveway and parking spaces, use very large pebbles that can withstand vehicle weight when tamped down properly.
Zen Garden
Create a peaceful zen garden with pebbles carefully raked into neat patterns and designs. Mix in some larger rocks, boulders and greenery.
Pet Areas
Use pebbles to create cozy lounging, playing or feeding zones for pets. Ensure the pebbles are too large to be ingested.
Fire Pits
Surround fire pits and outdoor fireplaces with pebbles. Scatter some around the base of chimineas too. The firelight makes the pebbles twinkle magically at night.
FAQs about Laying Pebbles in Gardens
Here are answers to some commonly asked questions about pebbles:
How deep should pebbles be laid?
For most areas, a 2-3 inch depth of pebbles is ideal. Deeper layers like 4-6 inches are better for high foot traffic zones.
Should anything be placed under the pebbles?
Landscape fabric or weed barrier placed beneath the pebbles helps reduce weed growth and contains the pebbles. It’s optional but recommended.
How much space should be left around plants?
Leave a gap of 3-5 inches around plant stems. This prevents the pebbles from burying the plant crown.
Can you cement pebbles in place?
Yes, you can cement pebbles using mortar or gravel binder. This helps stabilize them and is useful in high foot traffic areas.
How long do pebbles last in a garden?
With minimal maintenance, pebbles easily last 5-10 years or longer outdoors. Their longevity depends on the climate and how heavily they are used.
Should pebbles be tamped down?
It’s a good idea to gently tamp pebbles as it helps ‘lock’ them in place initially. Just don’t over-compact them as some settling is natural.
How often do pebbles need to be topped up?
Most pebble areas need fresh stones added once every 1-3 years. High-traffic zones may need yearly top-ups.
Can you mow over pebbles?
It’s best to avoid mowing directly over pebble areas as it can scatter the stones around and damage lawn mower blades.
Are pebbles bad for pets?
Pebbles are safe for pets as long as they are too large to be swallowed. Avoid very small pebbles if you have dogs or cats. Monitor babies and toddlers around pebbles too.
Get Creative with Pebbles in Your Garden!
Pebbles are a simple yet extremely versatile landscaping material. Whether you opt for a minimalist pebble path or craft intricate mosaic art, the possibilities are endless. Hopefully these tips gave you a good overview of how to properly lay pebbles in your garden.
Just remember to prep the base well, choose an appropriate pebble type and size for the location, spread the pebbles evenly, and leave space around plants. This will ensure your pebbled garden stays put and nurtures your plants too. Get creative, mix colors and textures, add fun accents, and enjoy your stylish new garden!
- How Fast Does Boston Ivy Grow? A Complete Growth Guide - June 9, 2026
- Gravel for Garden Beds: A Functional and Beautiful Option - June 9, 2026
- The Best Mulch for Raised Garden Beds – Pros, Cons, and Tips - June 9, 2026