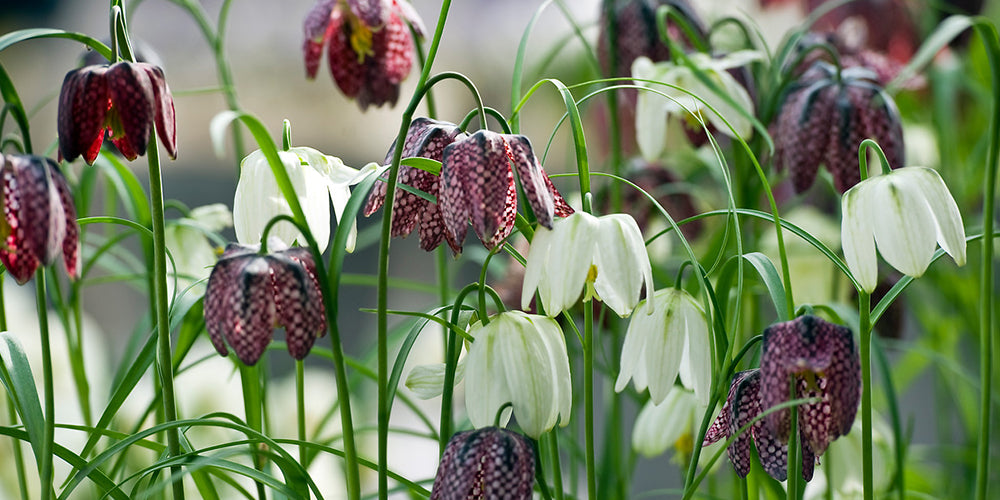
With their unique shapes and colors, Fritillaria bulbs offer an exciting way to add unusual flair to your spring garden. If you want to grow these cool, quirky blooms next season planting Fritillaria bulbs properly in the fall is key.
Here is a complete guide to successfully planting and growing Fritillaria bulbs for a gorgeous spring display:
Choosing a Planting Site
Fritillaria grow best in a location with
- Well-draining soil – Avoid soggy areas
- Full sun to partial shade – Depending on variety
- Zones 4-9 – Check tags for specific variety hardiness
Prepare the planting bed by mixing in compost or other organic material if needed to improve drainage.
Container planting is not recommended as Fritillaria prefer to be left undisturbed for years.
When to Plant Fritillaria Bulbs
For spring blooms, Fritillaria bulbs must be planted in the fall, typically:
- Late summer in warmer climates
- Early to mid fall in cooler areas
This gives the bulbs time to establish roots before winter dormancy.
How Deep and Far Apart to Plant
Proper planting depth and spacing is important for the health and performance of your Fritillaria bulbs:
- Crown Imperials – Plant 5-6 inches deep, 10-12 inches apart
- Checkered Lilies – Plant 3-4 inches deep, 4 inches apart
- Other types – Plant 3-4 inches deep, 4-6 inches apart
Digging the Hole
Use a trowel to dig holes to the recommended depth based on the type of Fritillaria you are planting. The width of the hole should be about 2 times the width of the bulb.
Placing the Bulb
Gently place the bulb in the hole with the pointed end facing up. The indentation on top of the bulb indicates the previous year’s stem, so this tip should point upward.
If your bulb has no indentation, plant flat-side down.
Backfilling the Hole
Fill in the hole with the soil and gently firm it around the bulb. Take care not to pack the soil too densely.
Watering
Water thoroughly after planting to settle the soil.
Caring for Your Fritillaria Bulbs
Follow these tips for growing healthy, vibrant Fritillaria:
- Water during active growth, about 1″ of water per week
- Allow foliage to fully ripen after blooming
- Remove foliage only once it turns yellow and dies back
- Let bulbs rest 2-3 months after foliage dies back
- Avoid frequent division or disturbance
Providing excellent drainage is critical – Fritillaria will rot in soggy soil.
What to Expect After Planting
-
Fall – Roots begin developing underground after planting
-
Winter – Foliage and flower buds form during the cold dormancy period
-
Spring – Foliage emerges, followed by the unique blooms
-
Summer – Foliage ripens and dies back as the bulb enters dormancy
Tips for Growing Success
Follow these tips to get the most out of your Fritillaria bulbs:
-
Amend heavy soil with organic matter like compost or bark fines
-
Plant Crown Imperials toward the back – some dislike the scent
-
Wear gloves when handling bulbs – they can irritate skin
-
Don’t worry if bulb arrives with a hole on top – it’s normal
-
Allow leaves to fully ripen to nourish bulbs after blooming
-
Avoid frequent disturbance for best results over time
-
Provide excellent drainage and avoid soggy soil
-
Deadhead spent blooms but keep foliage in place
With the right planting and care, your Fritillaria bulbs will reward you with their wonderfully exotic blooms next spring. Just be sure to plant them in the fall at the proper depth and spacing. Fritillaria are easy and fun to grow when given well-drained soil and ample sunlight.
How to Plant FRITILLARIA BULBS Correctly for a GUARANTEED Spring Display & Annual Re-Growth
FAQ
Which way to plant Fritillaria bulbs?
Where is the best place to plant Fritillaria?
Do Fritillaria like sun or shade?
How late can you plant Fritillaria bulbs?
How do you plant Fritillaria imperialis?
Check the growing requirements of your chosen Fritillaria species carefully. Bulbs should be planted in September and October. Plant the large bulbs of Fritillaria imperialis deeply to ensure flowering – around 30cm below the surface. Follow some bulb planting tips from Monty Don. Allow the foliage to die down completely after flowering.
How do you grow Fritillaria?
Plant fritillaries at least 4 times the height of the bulb. The soil should be deeply prepared so that the bulbs sit in well-drained soil. Plant Fritillaria in full sun or part shade. Grow Fritillaria in humus-rich, well-drained soil. Plant bulbs as soon as available in fall usually late summer or early fall so they don’t dry out.
When should you plant Fritillaria bulbs?
These plants are great for containers or outdoor plantings but will not thrive in soggy soil or standing water. Fritillaria bulbs should be planted sometime between late summer and early fall, giving the bulbs time to start rooting before the soil cools. Roots will develop in the fall, with foliage and flowers forming in the spring.
Can you plant Fritillaria in a rain garden?
Plant fritillary singly or in groups of three to five. Follow these steps to make a rain garden in your landscape. Plant fritillaria bulbs in the fall for spring bloom. The bulbs have a tendency to dry out quickly so when you purchase them, plant the bulbs as soon as possible.

Follow me on YouTube
- A Complete Guide to Caring for Yuki Cherry Blossom Shrub - January 23, 2025
- Identifying Red Hot Poker Seeds: What to Look For When Harvesting Torch Lily Pods - January 23, 2025
- A Complete Guide to Harvesting Evening Primrose Seeds - January 23, 2025