Raised garden beds make growing fruits, vegetables, and flowers easy and accessible. With their contained structure and elevated height, they allow you to garden without having to bend over or kneel on the ground. But while raised beds make the actual planting and tending very simple, there are some important steps for preparing them beforehand.
Proper preparation of a new raised bed will help you get off to the best start. Follow this guide to learn how to prepare your raised garden bed for healthy, productive plants.
Choose the Right Location
The first step is picking the optimal spot to set up your raised bed Here are some factors to consider
-
Sunlight – Most plants need at least 6 hours of direct sun daily Choose a sunny spot, free from shade cast by trees, shrubs or structures
-
Soil – Good drainage is key. Avoid low areas where water collects. Test soil quality and amend if needed.
-
Access: Choose a spot that is close to water and free of obstacles so that it is easy to care for and harvest the plants.
-
Exposure – Protect plants from heavy winds if possible. But do allow ample airflow circulation.
-
Layout – Consider the shape and orientation and how beds will fit together in the overall garden design.
Take the time to carefully select your raised bed location as it can greatly impact success. This will be harder to change later on.
Level and Prepare the Ground
Once you’ve picked the perfect raised bed spot, prep the ground:
-
Remove any grass, weeds or debris.
-
Use a rake to smooth and level the soil.
-
Place your framed raised bed on the leveled ground.
-
Check that the frame has solid, even contact with the ground on all sides.
-
If not level, dig out high spots or build up low areas with soil until the frame sits flat.
Take time to get the base precisely level. This prevents future soil erosion under the bed edges.
Add Bottom Layer(s)
Before filling with soil, add protective bottom layers:
-
Weed barrier – Landscape fabric blocks weeds from below.
-
Moisture barrier – Plastic sheeting retains moisture and suppresses weeds.
-
Cardboard – Corrugated cardboard smothers existing grass or weeds.
-
Wood chips – A few inches of chips also deter weeds.
-
Gravel – Coarse gravel boosts drainage.
Use one or a combination of these barriers as needed to block weeds and enhance the raised bed.
Include Internal Drainage
Excess moisture is the enemy of healthy raised bed soils. To improve drainage:
-
Place a 2-3 inch layer of wood chips, gravel or crushed stones in the base of the empty frame.
-
Intermix straw, twigs or woody stems throughout the soil mix.
-
Include vertical drainage pipes if your bed is taller than 18 inches.
-
Ensure the bed frame has gaps or holes in the bottom for water to exit.
Good drainage yields happier roots and fewer problems like rot or mold.
Fill In High-Quality Soil
Now comes the fun part – adding soil! Resist the urge to simply use native garden soil. Raised beds need:
-
Nutrient-rich – Abundant compost provides nourishment.
-
Well-draining – Ideally a sandy loam texture versus heavy clay.
-
Light and fluffy – Resists compacting and allows oxygen circulation.
-
Soilless mixes – Blight-free and lightweight options like peat or coconut coir.
Either create your own ideal soil blend or purchase a premium organic potting mix for raised beds.
Aim for roughly:
- 1/3 high-quality potting soil or compost
- 1/3 peat moss or coconut coir
- 1/3 vermiculite or perlite
This lightweight, nutrient-packed combo is raised bed gardening gold.
Mix in Compost
Compost adds vital organic matter to feed plants and beneficial life in the soil. Blend in 2-4 inches of finished compost. Garden compost and worm castings are excellent choices.
If adding granular or pelleted fertilizer, go sparingly. Too much can burn plants. But a balanced, slow-release organic formula mixed in lightly is beneficial.
Don’t Bury the Bed Frame
When filling your raised bed, don’t heap soil higher than the frame itself. Excess soil weighs down the structure causing boards to bow or break over time. Leave a 1-2 inch space between the soil level and top of the frame.
Water Thoroughly
Once the bed is filled and leveled, water deeply. This helps compact, evenly settle and consolidate the soil. Let it drain fully.
Repeat watering and drainage several times to stabilize ingredients. The bed may sink slightly. Simply top off with more soil as needed.
Add Mulch as Finishing Touch
Spread 2-3 inches of organic mulch like wood chips, straw, leaves or grass clippings atop the finished soil.
Mulching retains moisture, keeps soil cool and suppresses weeds. Replenish it regularly as it decomposes.
Leaving the soil bare risks hardening, eroding, compressing and rapid water evaporation. Protect it with mulch!
Fertilize Smartly
While compost provides nutrition, you may need supplemental feeding depending on plants chosen. Here are tips:
-
Test soil pH and amend as needed. Most veggies prefer slightly acidic soil.
-
Work gentle organic fertilizer into the entire bed pre-planting.
-
Use light liquid feeds per individual plant instructions during growing.
-
Avoid synthetic chemicals that can accumulate and damage soil health over time.
Adjust fertilization based on the needs of what you are growing. Less is often more when it comes to soil amendments.
Allow Time to Settle Before Planting
Don’t rush to plant seeds or starts immediately after building and filling your bed. Give it a few weeks or longer to allow the soil to settle and ingredients to begin melding together.
Early planting into fresh soil can hamper success. Be patient! This also gives time for any latent weed seeds to germinate so you can remove them before sowing crops.
Follow Crop Rotation Schemes
When planning your raised bed garden layout, organize crops in sections rotated annually. This reduces disease and pest issues inherent when growing the same plants repeatedly in one spot.
Divide the bed into quadrants, thirds or halves and rotate plant families accordingly each season. Or simply shift sections down or across the bed each year.
Maximize Yield with Intensive Planting
The loose, enriched soil in raised beds enables you to plant more densely versus traditional row gardening. Employ these intensive planting techniques:
-
Use succession planting to squeeze more crops into a season.
-
Interplant compatible quick and slow growing varieties.
-
Space plants closer with proper nutrients and sunlight.
-
Trellis or cage vines and tall crops to save space.
-
Exploit vertical growing with shelving or tiered beds.
With thoughtful intensive planting, a raised bed can yield up to four times more produce than a conventional garden plot.
Include Support Structures
Install trellises along the inside or across the top of the raised bed frame. These provide vertical support for vining crops like pole beans, tomatoes, peas and cucumbers.
Also incorporate cages for tomatoes and mesh frames for heavy producers like squash. Having these supports in place early on saves hassle later.
Use Season Extenders
One advantage of raised beds is they are perfect for using protective devices to lengthen your growing season. Integrate:
-
Cold frames, hot caps or row covers to allow earlier spring and later fall harvests.
-
Shade cloth structures to shield plants through intense summer heat.
-
Mini hoop houses or greenhouse covers to customize growing conditions all year.
-
Heated propagation mats for gently warming roots and soil.
With a mix of season extending tools, you can stretch out harvests over many extra months.
Protect from Pests
Unfortunately pests like slugs, snails and insects are drawn to the rich raised bed environment. Deter them with:
-
Copper strip barriers to block crawling insects.
-
Floating row covers to keep flying pests off plants.
-
Diatomaceous earth sprinkled around plants as nontoxic pest control.
-
Beer in shallow containers sunk to soil level make handy slug traps.
Take action at the first signs of damage to keep pests from destroying crops.
Follow Proper Maintenance
Ongoing raised bed care is essential too. Be sure to:
-
Pull weeds promptly before they spread.
-
Replenish mulch as needed.
-
Water and feed plants per their requirements.
-
Prune and trellis vines and branches as they grow.
-
Harvest produce at peak ripeness.
-
Remove and compost spent plants after bearing.
-
Amend and enrich soil yearly with organic matter.
With close observation and quick response to needs, your raised bed will thrive season after season.
Avoid Common Raised Bed Pitfalls
Steer clear of these common raised bed gardening mistakes:
-
Neglecting to level beds, causing erosion issues.
-
Forgetting to include adequate drainage layers and aeration.
-
Using poor quality or imbalanced soil lacking nutrients.
-
Planting incompatible crops together leading to stunted growth.
-
Cramming too many plants together without proper spacing.
-
Allowing vines, fruits and branches to grow wild and overtake the bed.
-
Failing to use crop covers for weather and pest protection.
-
Letting weeds take over choking out desirable plants.
With sound preparation and care, you can avoid these pitfalls and enjoy a prolific raised bed for years to come!
Ready to Grow Your Bountiful Raised Bed Garden?
Follow this guide when prepping your new raised garden bed, and you will set yourself up for success from the start.
Raised bed gardening already makes planting accessible for beginners and experts alike. Taking time upfront to ready your bed makes enjoying the process and harvesting bountiful yields that much more foolproof.
Soon you will have your own urban or backyard oasis overflowing with fresh fruits, vegetables and flowers grown just steps out your door in your productive raised bed garden. Get that soil prepped and let the planting begin!
5 Steps to Prepare Raised Beds For Spring Planting! // Garden Answer
FAQ
What do I put on the bottom of a raised garden bed?
How do you prep the ground for a raised garden bed?
How do you prepare a raised bed for the first time?
What do you layer a raised garden bed with?
How do you Seed a raised bed?
Broadcast Seeding: Broadcast or block seeding is all about maximizing planting efficiency and is especially helpful for covering larger garden spaces. Simply scrape the top inch of garden soil off to the side of your raised bed, sprinkle your seeds in the planting area, and then gently toss the soil back over them.
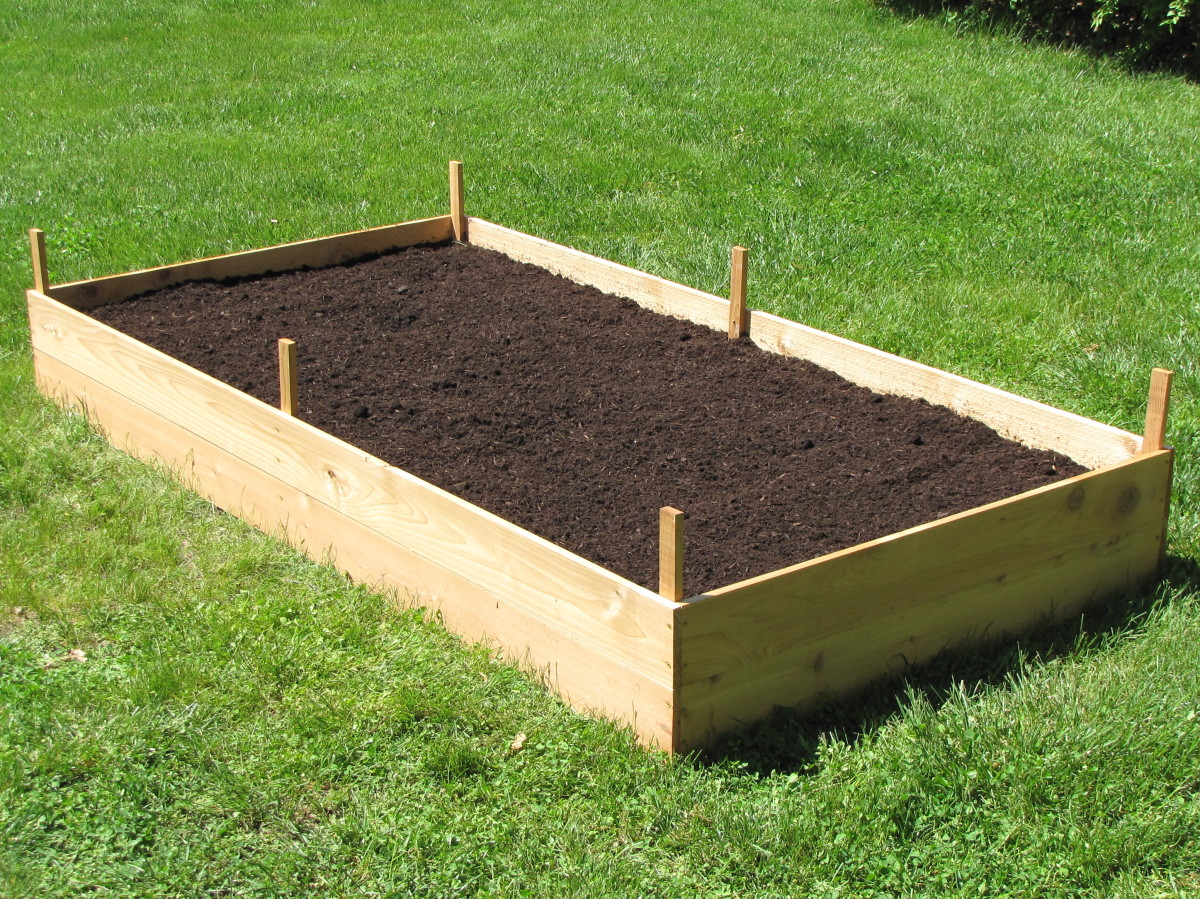
How do you build a raised bed?
There are several ways to put together a raised bed. Here is one of the simplest methods. To build one garden bed that measures eight feet long, four feet wide, and six inches deep, here is what you need. Cut one 2x6x8 in half, making two four-foot sections. If you don’t have a saw at home, then ask the lumber company to cut it for you.
Should you put a raised bed in your garden?
Raised beds give you an immediate advantage over an in-ground garden because when you fill your raised bed, you can fill it with a blend of soil that’s superior to the native soil in your yard. Familiarize yourself with some common soil and fertilizer terminology and make any necessary amendments to the soil texture, pH, or drainage.
What makes a good raised garden bed?
Use good soil. Good soil is a very important ingredient for a beautiful raised garden bed. Compare to wooden and other brick raised beds. They’re more durable, long-lasting, corrosion-resistant, and environment-friendly. When you fill your raised bed, you can fill it with a blend of soil, which will be better than native soil in your yard.
- How to Grow Gorgeous Climbing Roses on a Wooden Fence - March 24, 2026
- Avoid These Plants When Companion Planting with Oregano - March 24, 2026
- 15 Great Trees to Plant Near Your House - March 24, 2026