Hey folks, if you’re itching to grow more veggies, herbs, or flowers but hate shelling out for those store-bought pots that take up space and cost a arm and a leg, then learning how to make growing bags is gonna be your new favorite backyard hack. I started tinkering with these a couple seasons back when I had more plants than pots and didn’t wanna run to the store every darn time. Turns out, making your own grow bags ain’t complicated at all – and they work way better than plastic containers for most stuff. They breathe real good, help roots stay happy by air-pruning ’em, and you can haul ’em around the yard to chase the sun. We whipped up a bunch last spring and my tomatoes went totally wild in ’em!
In this guide, I’ll break down everything super simple, from what materials to grab (mostly stuff you might already have) to sewing steps that even a beginner can nail. I’ll share different ways to make ’em too, so you pick what fits your sewing machine vibe. By the end, you’ll have custom growing bags ready for your garden that save money, fold up tiny for storage, and boost your harvest like crazy. Let’s get into it right away – no fluff, just the good stuff to get you planting sooner.
Why Use Grow Bags?
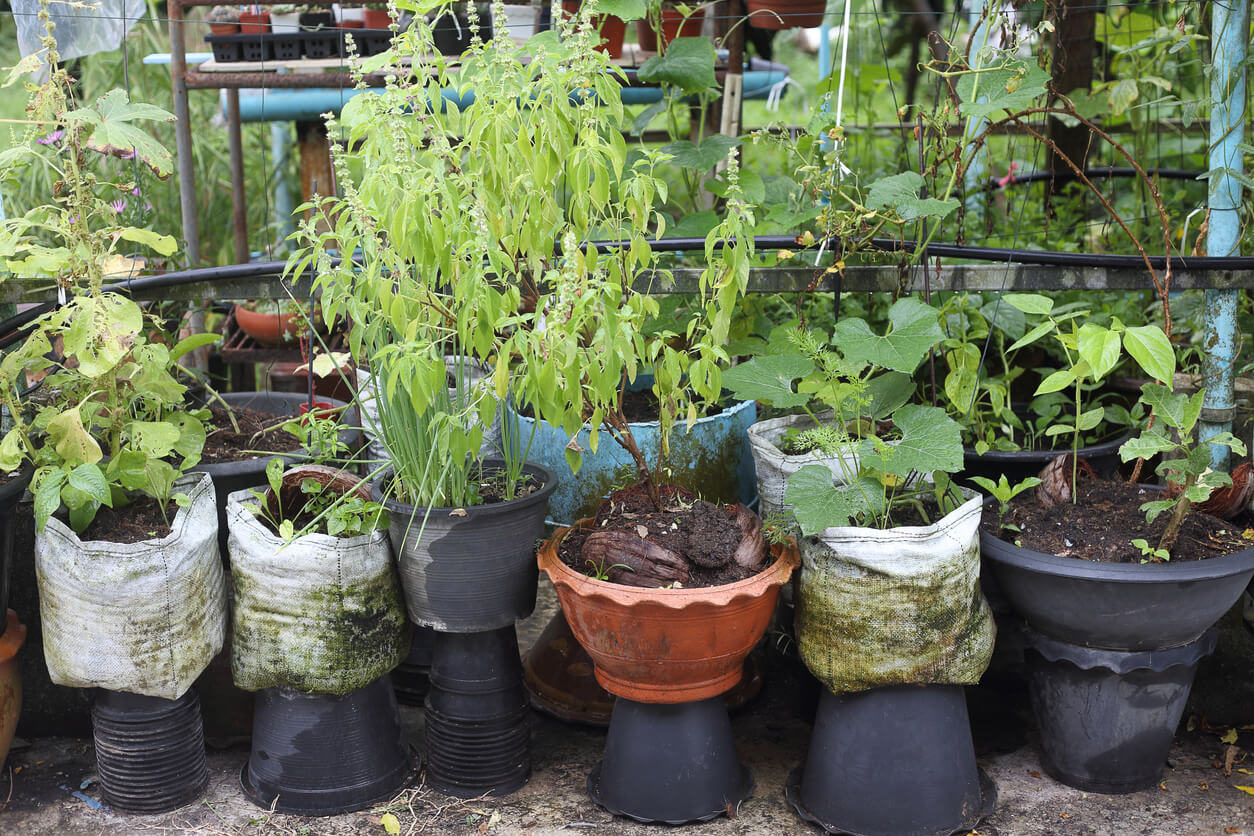
I tell ya, once you switch to grow bags, you won’t wanna go back. These things are portable as heck, so if your balcony gets shade in the afternoon, just scoot the bag over. No digging up roots or wrestling heavy pots. The fabric lets air hit the soil, which stops overwatering issues and keeps things draining perfect. Roots don’t circle around like in solid pots – they hit the edge, get “pruned” by the air, and grow more feeder roots inside. That means stronger plants and bigger yields, especially for tomatoes, peppers, and berries.
We love how they save space too. Got a small patio? Stack or line ’em up. End of season? Empty ’em, rinse, fold flat, and tuck away in a corner. Reusable for years if you pick tough fabric. And cost-wise? Way cheaper than buying new ones every year. I made mine for pennies using leftover bits, and they held up through rain, sun, and even moving day.
Here’s a quick list of benefits we noticed:
- Portable and lightweight – Move plants easy to catch sun or protect from frost.
- Better drainage and aeration – Less root rot, happier soil.
- Air pruning magic – Stops root-bound problems, plants grow fuller.
- Custom sizes – Make mini ones for herbs or huge for fruiting veggies.
- Foldable storage – Takes zero room off-season.
- Eco-friendlier option – Use natural or recycled fabrics when possible.
- Quick to make – One afternoon and you got a whole set.
If your garden’s limited like mine was, these bags open up tons of possibilities. I even hung a couple on the fence for strawberries – genius!
Picking the Right Materials (Keep It Simple and Cheap)
You don’t need fancy gear to make growing bags. I keep it basic: mainly landscape fabric (that weed barrier stuff from the hardware store), good thread, and your sewing machine. Landscape fabric is my go-to ’cause its breathable, tough, and lets water drain without turning soggy. It’s woven polypropylene usually, blocks weeds but still airy. If you got thinner stuff, double it up for extra strength – I learned that the hard way after one season.
Other options? Cotton works in a pinch for one-season bags, but it breaks down faster. Felt is great too if you can find affordable rolls – super soft on roots. Avoid anything too plasticky; you want that breathy feel.
Basic materials for a standard batch (makes about 4-6 bags depending on size):
- Landscape fabric or weed barrier (at least 4-5 yards for starters – cheap at hardware spots).
- Polyester thread (UV-treated if possible, so sun don’t wreck the seams).
- Scissors or rotary cutter for clean cuts.
- Ruler or measuring tape.
- Pins or clips to hold fabric.
- Sewing machine (straight stitch is all you need).
- Optional: Polypropylene webbing (1-2 inches wide) for handles – makes moving bags a breeze.
- Extra: Cardboard or foam scraps for bottom support if you want ’em sturdier.
Pro tip from my trials: Double-layer the fabric if yours feels flimsy. It adds durability without much extra work. And always use polyester thread – regular stuff can rot outside.
Different Sizes and What to Plant In ‘Em (Quick Table Guide)
One of the best parts about how to make growing bags is customizing the size. I make ’em square or round-ish depending on the method. Here’s a handy table I use to plan – adjust based on your space and plants:
| Bag Size | Approx. Dimensions | Best For Plants | Fabric Needed (per bag) |
|---|---|---|---|
| Mini | 6″ wide x 8″ tall | Seedlings, herbs like basil or thyme | 1/4 yard |
| Small | 8″ wide x 10″ tall | Lettuce, strawberries, small flowers | 1/2 yard |
| Medium | 12″ wide x 12″ tall | Peppers, beans, compact tomatoes | 1 yard |
| Large | 14″ wide x 16″ tall | Eggplant, cucumbers, bigger berries | 1.5 yards |
| Extra Large | 20″ wide x 20″ tall | Potatoes, large tomatoes, fruit bushes | 2+ yards |
For a 12″ bag, you’ll cut pieces around 18-24″ depending on method. I always add an inch or two for seams. Taller bags need longer handles if you add ’em. We use medium ones most – perfect balance for our patio setup.
Method 1: The Gusset Style (My Favorite for Sturdy Bags)
This is the one I reach for first – it gives a nice flat bottom that stands up good when filled. I used it for my 16″ bags last year and they didn’t tip over easy.
Start by cutting two big rectangles. For a roughly 16″ finished bag, cut two pieces 32″ by 48″ from your landscape fabric. If the fabric’s thin, this doubles it up automatic-like.
- Fold each rectangle in half so it measures 32″ by 24″. Topstitch along the fold to keep layers secure. (I sometimes baste the other edges too for extra hold.)
- Cut 8″ squares out of the two bottom corners on each folded piece. Save those scraps – handy for patches later!
- Lay the two pieces together, right sides facing if your fabric has a side, and pin all edges except the top.
- Sew around the three sides with a 1/2″ seam allowance. Leave the folded top open.
- Now for the magic gusset: Pull apart the layers at one bottom corner, line up the side seam with the bottom seam, pin, and sew across with 1/2″ allowance. Do the other corner too.
- Turn right side out, and boom – you got a boxy bag with a flat base!
If you want even more shape, add little tucks at the corners after turning. I do that sometimes for a polished look.
To scale this: Pick your finished square size (say 12″). Cut width = size x 2. Height = (size x 1.5) x 2. Corner cutouts = size / 2. Super easy math once you try it once
Method 2: The Quick Tube Fold (Fastest for Beginners)
If you’re short on time or just starting, this tube way is a breeze. I made my first ones like this with cotton scraps and they held up fine for a season.
Grab your fabric – for a large bag, about 36″ by 42″ works.
- Fold right sides together and sew the long edge with 1/2″ seam to make a tube.
- Fold the top of the tube down to meet the bottom raw edges. Now the right side faces out.
- Pin the bottom raw edges (all four layers) and sew across with 1/2″ seam.
- Refold so the side seam sits in the center.
- Flip up the bottom flap, pin the layers, mark the center of the bottom seam, bring corners to meet it, and sew across those fold lines.
- Turn right side out. Leave the extra flaps inside for bonus structure – no need to trim unless you want.
This method is forgiving. If your fabric’s a tad off size, no biggie. I use it for quick small batches when the kids wanna help pin.
Method 3: Four-Piece Style (Great for Handles and Custom Shapes)
Some folks swear by cutting four separate pieces – gives you more control for rounder bags or adding extras.
For a 12″ bag, cut four 18″ x 18″ squares (add seam allowance).
- Pin two pieces right sides together and sew one side. Repeat for the other pair.
- Now sew the bottom seam, lining up the side seams.
- Rotate and mark bottom corners halfway between seams, then sew new seams there to shape the base.
- Turn right side out.
- Fold top edge over twice (about 1″ total) and stitch for a clean hem.
This one’s perfect if you wanna add handles. Cut two 20″ lengths of webbing, pin ’em opposite each other inside the top, and topstitch secure. Handles make carrying filled bags way less messy – trust me!
Adding Handles, Finishing Touches, and Pro Tips
Handles are optional but I always add ’em now. Position so they balance the weight. Sew ’em good with a box stitch for strength.
For finishing: Hem the top nice and wide so it don’t fray. If your climate’s hot, make bags with three or four layers to cut evaporation. I sometimes line the bottom with a cardboard circle wrapped in plastic for extra stability – keeps ’em from sagging when wet.
Common mistakes I made early on? Forgetting double layers on thin fabric (they ripped when moving). Or using weak thread that degraded in sun. Always test a small seam outside first.
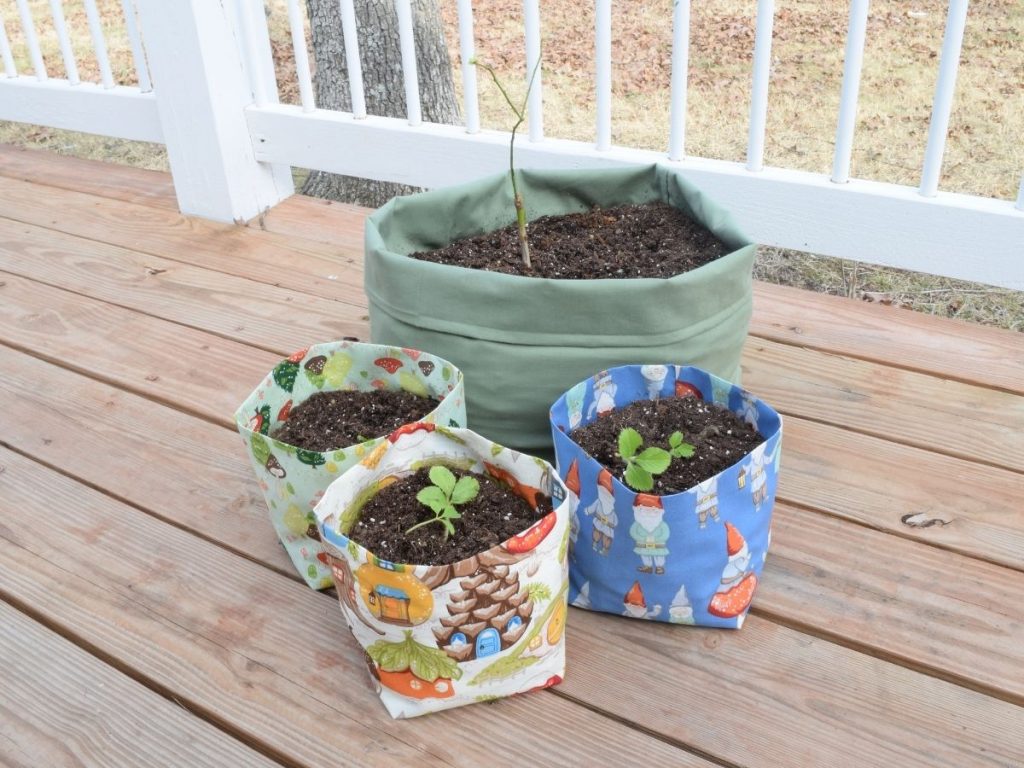
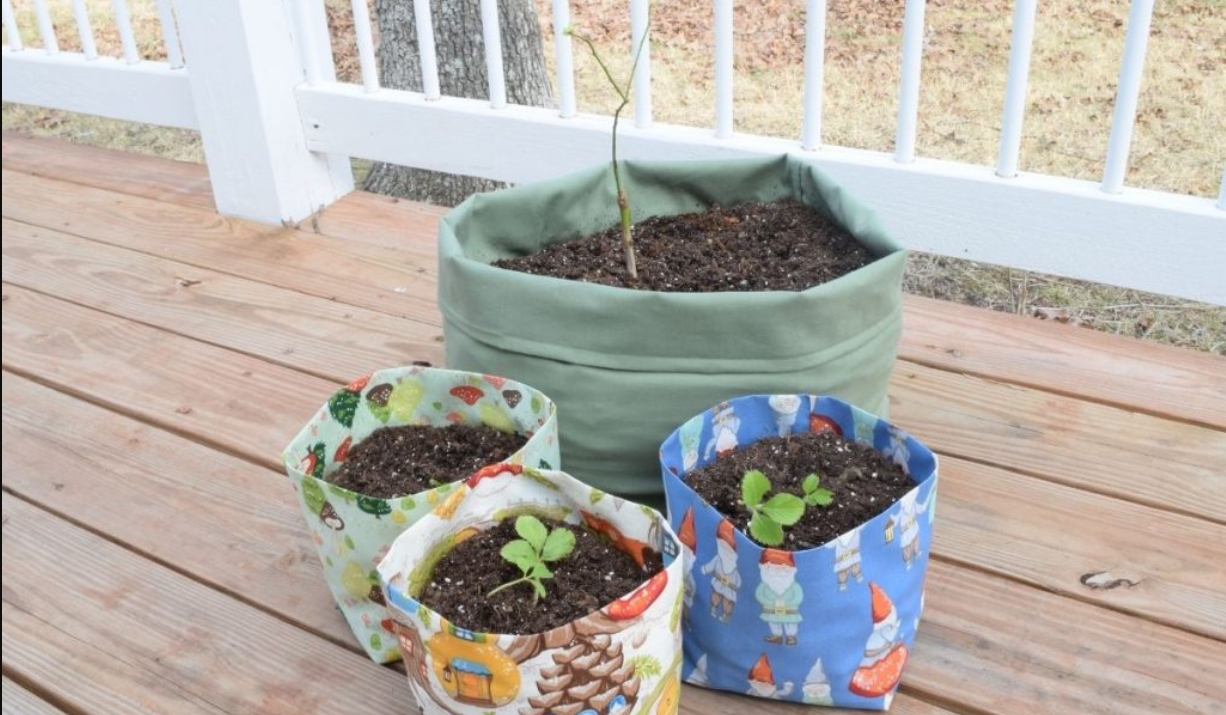
Filling ’em up: Put in quality potting mix about 2/3 full, moisten lightly, add plants. Sit on a saucer if drainage worries you, but most times they dry just right. For deep watering, bury a perforated bottle in the center – genius trick!
How We Use Growing Bags in Real Life (And Care Tips)
Last year we grew peppers in the blackish landscape ones – they loved the extra warmth! Onions and leeks did great too. For berries, the larger sizes let roots spread without binding. In small spaces like ours in Bac Ninh area, these bags let us maximize every sunny spot.
Care is easy: Water when top inch dries, fertilize regular since they drain fast. At season end, dump soil (compost it!), rinse bags, and store folded. They last multiple years if you treat ’em right.
Variations I tried: Short bags for hanging on rails, multi-layer for dry spots, even decorative outer fabric if you wanna pretty ’em up (but keep the inner breathable).
Troubleshooting: If bottom gets too wet, elevate on bricks. Seams pulling? Reinforce with extra stitching. Plants looking sad? Check for overpacking soil – leave room to breathe.
More Ideas to Get Creative With Your Grow Bags
Why stop at basics? Make mini versions for starting seeds indoors then move outside. Or tall skinny ones for vertical gardens. We even did a set for herbs right by the kitchen door – fresh picking all summer!
Think about your zone too. In hotter spots, lighter colors reflect sun better. Add fertilizer spikes near roots for steady feed. And for overwintering? Move bags to sheltered spot, cover if needed.
I could go on forever about how these changed our gardening – from more produce to less hassle. Kids love helping fill ’em, and it feels good knowing we made ’em ourselves.
Wrapping It Up: Get Sewing and Growing!
There you have it – how to make growing bags that’s straightforward, budget-friendly, and seriously effective. Whether you pick the gusset, tube, or four-piece method, you’ll end up with tough, custom planters that make your garden thrive. I keep making more every year ’cause they’re just that handy.
Grab some fabric this weekend, fire up the machine, and watch your plants explode with growth. If you try it, drop me a comment on how yours turn out – I love hearing success stories! Happy gardening, y’all. Your green thumb’s about to get even greener.
(And remember, experiment a bit – that’s half the fun. We started small and now got bags everywhere.)
This whole process from idea to harvest has been such a joy for us. The breathability keeps soil healthy, the portability means no more excuses about space, and the DIY part gives that proud feeling every time I look at ’em. If space is tight or you’re renting like we did before, these bags are lifesavers. They don’t tie you down to one spot forever.
One more thing on durability: I tested different fabrics over seasons. Landscape holds up best long-term, but even the temporary cotton ones paid off when I needed quick planters. Always double-check your seams before filling – better safe than a muddy mess!
Expanding your garden with these is addictive. Start with three or four, then scale up. Pair ’em with good soil mixes heavy on compost for best results. Your veggies will thank you with bigger harvests and fewer pests. I swear by ’em now for everything from leafy greens to root crops.
So what are you waiting for? Head to your sewing corner and get started on how to make growing bags today. You’ll wonder why you didn’t do it sooner. Garden on!
Variations and Tips
- Make short grow bags (6-8″ tall) and hang them on fences or railings.
- Use scrap cardboard or foam at the bottom for extra stability if needed.
- Add an extra layer of landscape fabric on the bottom to help retain moisture.
- Insert fertilizer spikes designed for containers near plant root balls for optimal nutrients.
- For hot & sunny climates, make bags 3-4 layers thick to reduce evaporation.
- Grow bags with handles allow you to move plants into shade or indoors if desired.
- Line interior with plastic for decorative designs or to hold moisture better.
Grow bags are a great way to maximize your garden space! Making your own from landscape fabric is simple and highly customizable. Follow the 6 steps, adjust the size to fit your needs, add handles if desired, and you’ll have excellent affordable containers to grow abundant flowers, herbs, and vegetables anywhere.
How To Make Your Own Grow Bags
FAQ
What material is best for grow bags?
Can I make my own grow bag?
How to prepare grow bags for plants?
How do you make a grow bag?
Small and medium grow bags can also be hung on fences, gates, or the side of raised beds for decoration or to maximize growing space. At the end of the season, grow bags can be emptied and folded up, using minimal storage space. To make grow bags, landscape fabric is sown together to form a round container. Adding handles is optional.
Do DIY grow bags really work?
When you use DIY grow bags this will never happen. As grow bags are made from breathable fabric the roots will reach drier soil towards the edge of the grow bag. The roots will get the message and stop growing in that direction and instead focus energy on growing new feeder roots inside the grow bag.
What size should I make a grow bag?
To make a grow bag, you can choose any size you want, depending on what you will be growing in it. A square foot is a good size. To make a square foot grow bag, you will need 4 feet (1.22 m) plus an inch for the seam. Experts suggest using polyester thread for sewing.
Can you grow vegetables in grow bags?
You can basically grow any plant in grow bags. But grow bags are better suited for some plants and vegetables than others. You can grow all types of herbs and leafy vegetables, as well as tomatoes, eggplants, chillies, lemongrass, and cucumbers in grow bags.
How do you store grow bags?
Simply carry your grow bags into a more sheltered location. If you are short of space, cover them with fabric, wrap the grow bag in bubble wrap and raise them from the ground and let them overwinter outside. And when you are done with your grow bags for the season you simply rinse them off, fold them and store them for future use.
How do you fold a grow bag?
Fold as much or as little fabric as you want but it is easier if you use more fabric. Secure the pins all around and then sew along the top of the fabric to join the pieces together. And you are done! All you need to do now is to turn the grow bag “inside out” to get all the seams on the inside of the bag.

Follow me on YouTube
- How Long Do Rose Bushes Live? A Guide to Rose Bush Longevity - April 14, 2026
- How to Plant Wisteria from Seed – A Complete Guide - April 14, 2026
- How Long Does Viburnum Bloom? A Guide to This Spring Flowering Shrub - April 10, 2026